When you invite your team to join Simply CRM, you can start assigning them different roles and privileges to recreate the structural organization of your company within your Simply instance.
This brief guide will help you create new user roles and define their privileges.
How to create user roles
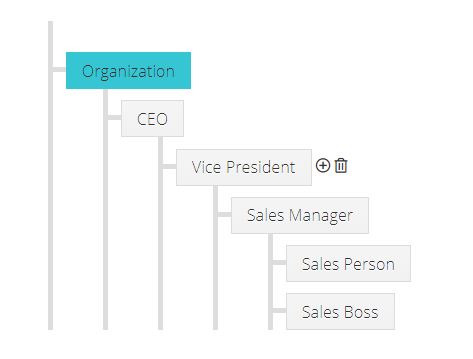
By default, Simply CRM provides you with certain predefined roles, such as CEO or Sales Manager. You can assign these roles to different users to restrict their access to certain features or records in Simply CRM.
To create a role, go to Settings and select Roles under User Management. Click on the plus icon next to an existing role.
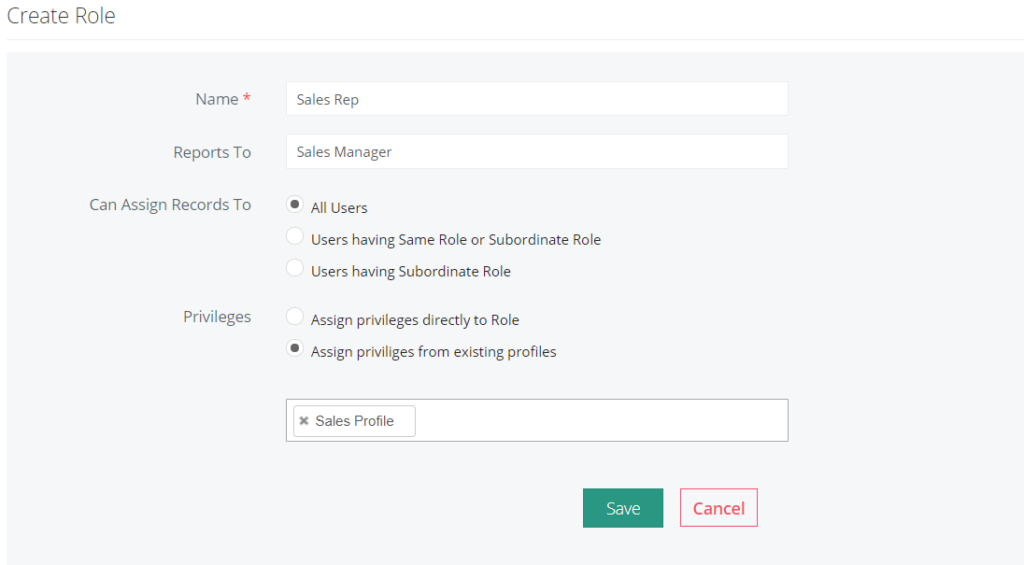
In the new window, you’ll be prompted to enter the role information, such as its name, who it reports to and who the role can assign records to.
How to assign role privileges
When you’re creating a new role, you can also define its privileges using the radio buttons next to the Privileges section, as seen in the image above. You can choose between two predefined options for role privileges:
- Assign privileges directly to Role
- Assign privileges from existing profiles.
Assign privileges to Role
If you choose the Assign privileges to Role option, you’ll need to manually define each privilege that the role will have. You can configure the individual role privileges in the tables shown below – simply check or uncheck the box next to the privilege name.
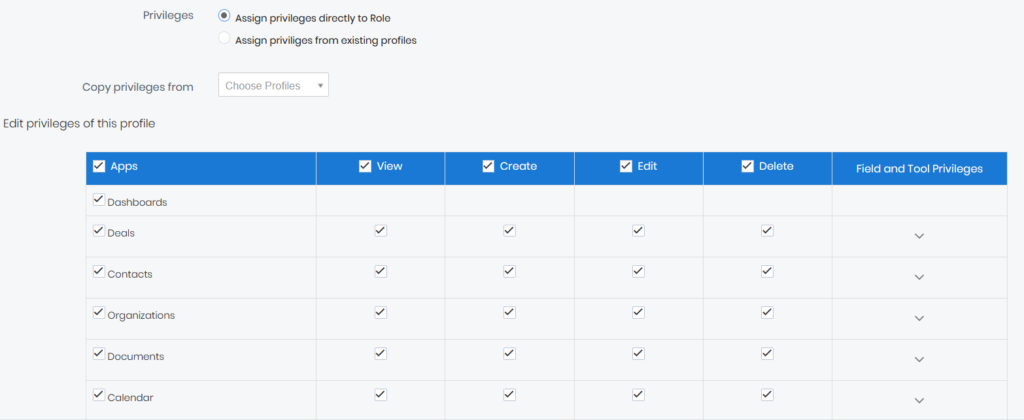
To expand and view all the privileges associated with each application listed in the table, press the arrow in the last table column.
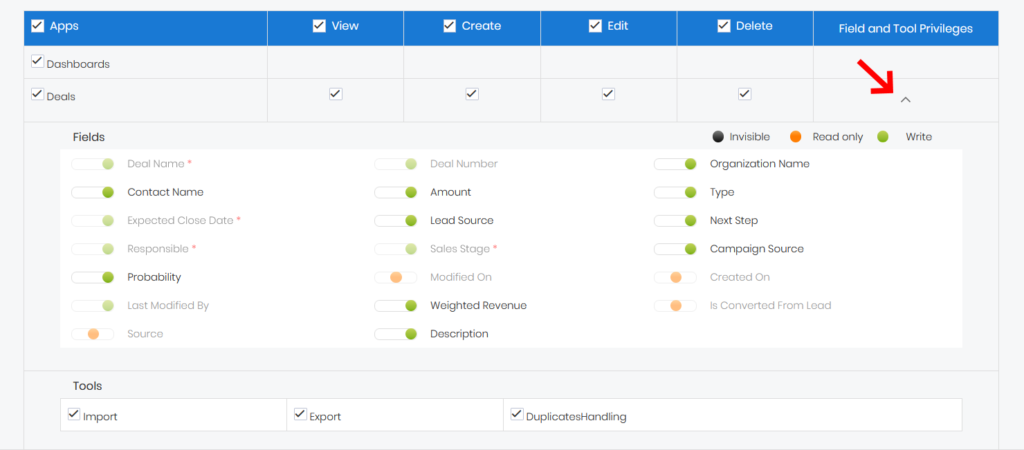
In the expanded view, you can use the sliders next to specific field privileges to adjust what the user role will be allowed to view or edit.
If you set the slider to Invisible next to a field privilege, the entire field will be hidden from the user. He will not be able to view it.
By moving the slider to Read Only, you allow the user to view the field, but not edit its information. If you use Write, the user will be able to both view and edit the field.
When you configure the privileges, press the Save button at the bottom of the screen.
Assign privileges to existing profiles
If you choose the option Assign privileges to existing profiles, you’ll just need to choose the profile from which the role will inherit all the privileges.
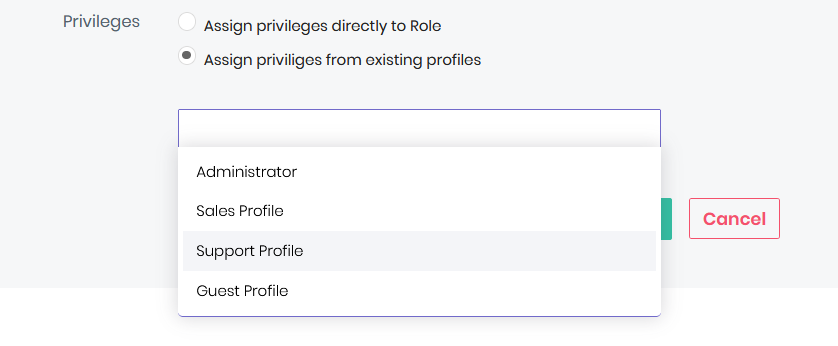
Click on the Choose Profiles drop-down field and select the user profile from which the privileges will be inherited. Then, press Save.
How to assign user roles
To assign a role to a user, go to Settings and select Users under the User Management tab in the main menu. Find the user that you want to edit and press on their name to open the detailed view.
Then, locate the Role field and select the desired role from the drop-down menu.
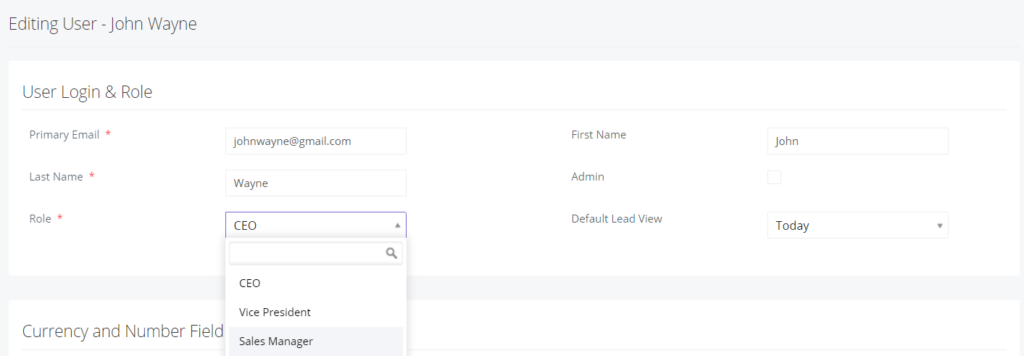
Press Save to confirm the changes.
Important: Multiple users and profiles can be associated with the same role. In case you associate multiple users to the same role, they will not be able to see each others’ records.


