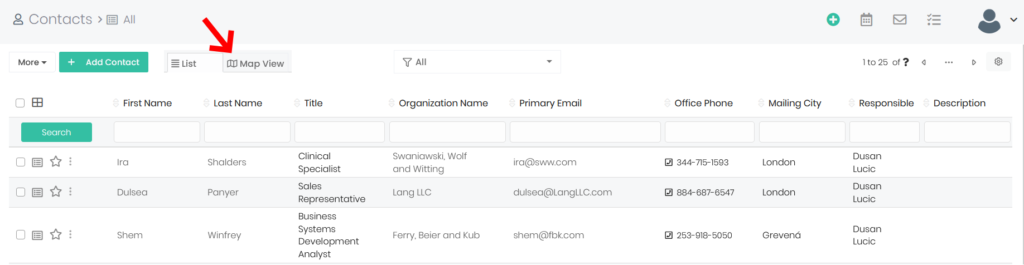
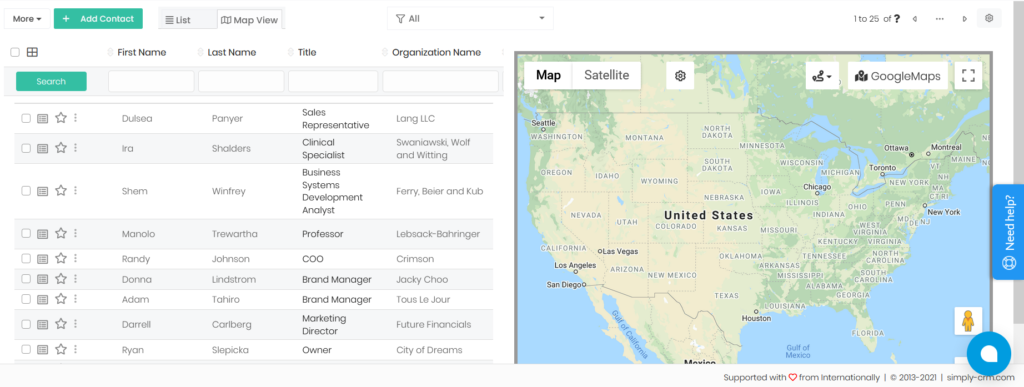
Map View is a module that allows you to visualize the locations of your contacts, leads and organizations in Simply CRM. Maps appear as an additional tab next to the list view of records within the selected module.
To enable the maps, you’ll need to activate the following apps from the Simply App Store: Map View and Address Autofill.
Important: You need to activate both Map View and Address Autofill. Failure to activate both will result in a non-functional map view.
For instructions on how to activate apps from the Simply App Store, please check our guide titled How to activate apps in Simply CRM.
How to configure the Map View app
When you activate the Map View app, open the Settings page and navigate to Map View under Other Settings.
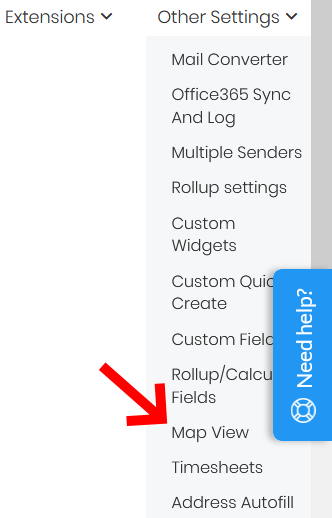
Here, you’ll be able to configure the Map View settings.
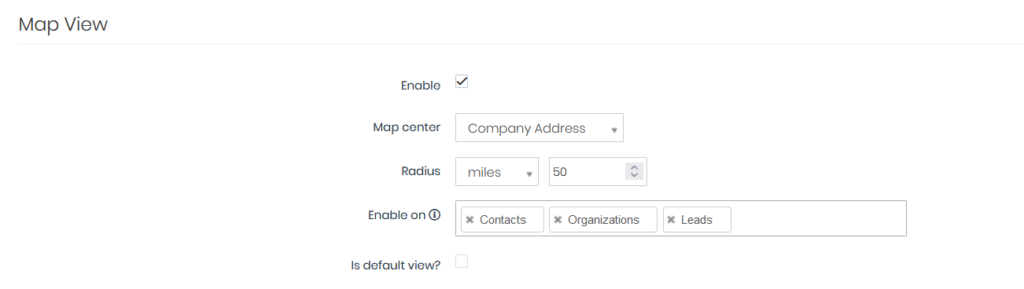
The following table explains all the available options in the Map View module.
| Option | Description |
| Enable | Specifies whether the map view will be enabled or disable within your instance of Simply CRM |
| Map Center | Sets the center of the map, which will be denoted with a location pin |
| Radius | Determines the radius within which the locations will be pinned on the map |
| Enable On | Allows you to select the modules in which the map view will be available within your Simply CRM instance |
| Is Default View | Allows you to choose whether the map view will be opened by default when you access the modules selected in the previous option |
In addition to this, Simply CRM lets you configure certain module-specific settings, such as the address that will be shown or the pin color, for the map view.

Address Shown lets you choose which address field will be used to populate the map view. Pin Color allows you to choose what color will be used for the location pins.
Once you configure the Map View settings, press the Save button at the bottom of the page. The map view tab will immediately become available in the selected modules, as shown below.
If your map view does not contain a central location, please make sure you added your company’s address when you were setting up your Simply CRM instance.
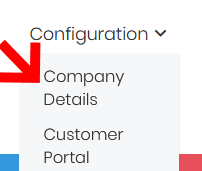
To check your company’s address, open Settings from the profile drop-down menu in the top right corner.
Then, navigate to Company Details under Configuration.
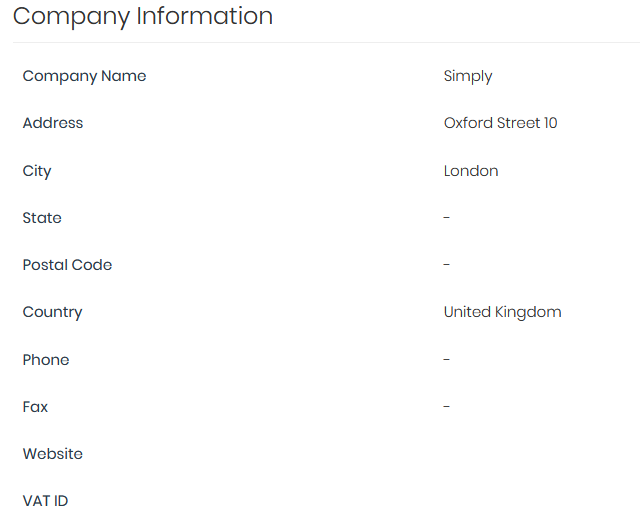
Scroll down to the Company Information box and fill out your company’s address. Please make sure to enter your company’s street, city and country.
Once you’ve added your address, you can select what records will be shown on the map by simply checking the box next to their name on the Map View tab.
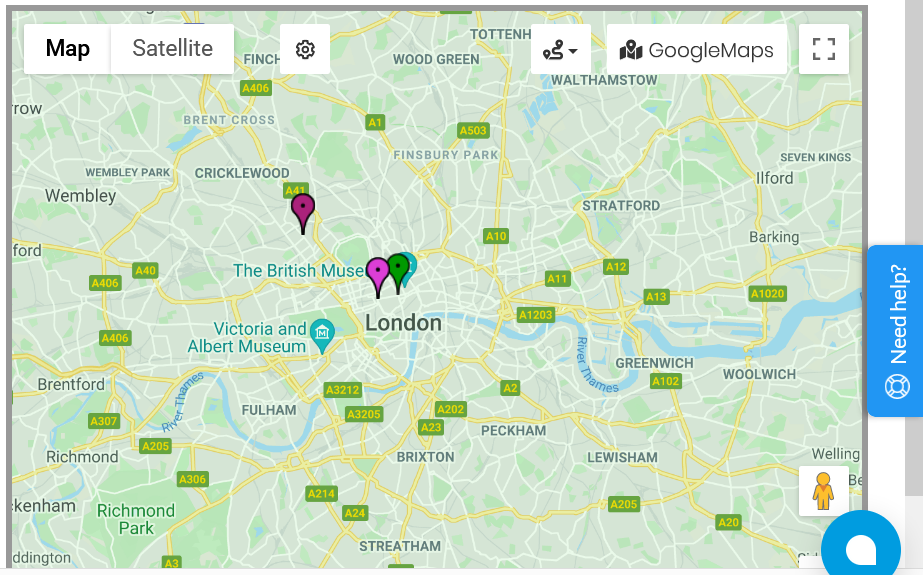
New location pins corresponding to the address of your records will automatically show up on your map.
In case you do not see the new locations on the map, click the Settings icon on the map to configure the map view.
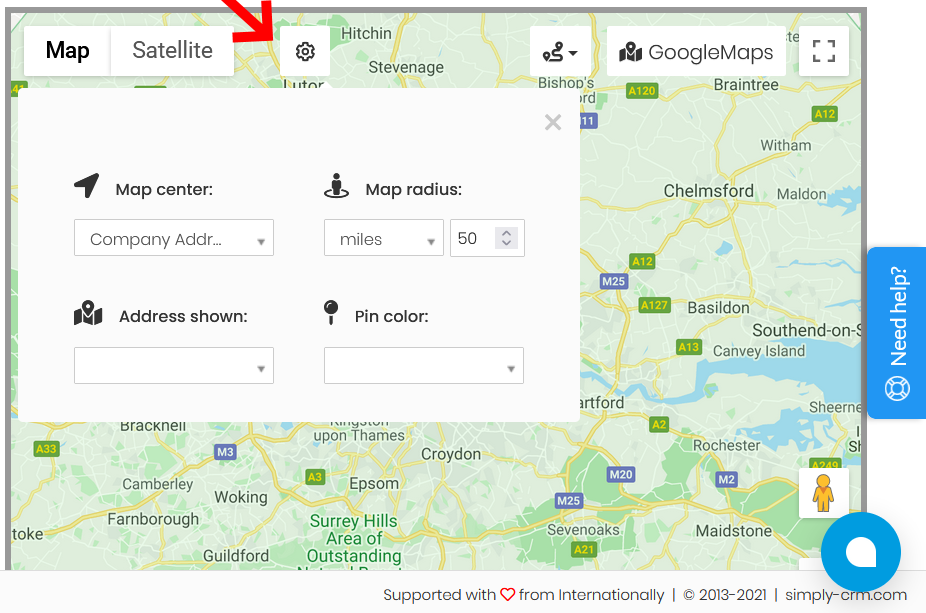
In the resulting pop-up window, fill out the Address Shown and Pin Color fields with your preferred settings, similar to what you did in the Map View module settings earlier.
Then simply exit the pop-up and select the records of the locations you’d like to see on the map.
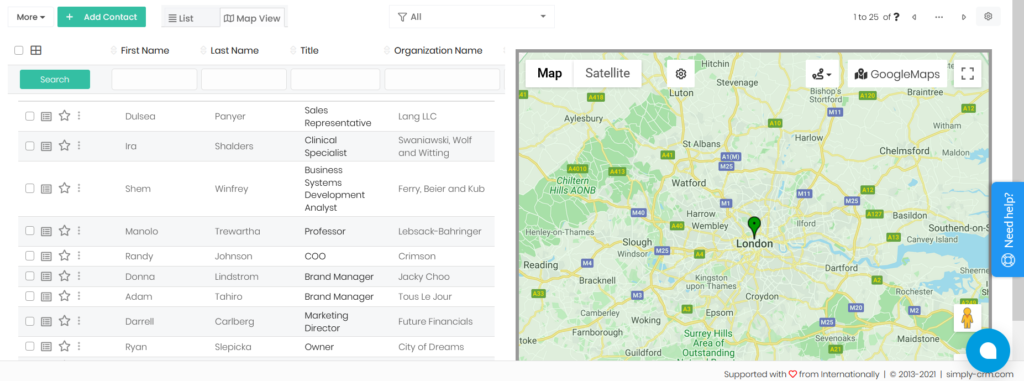
In addition, you’ll have the standard Google Maps settings on your map view.
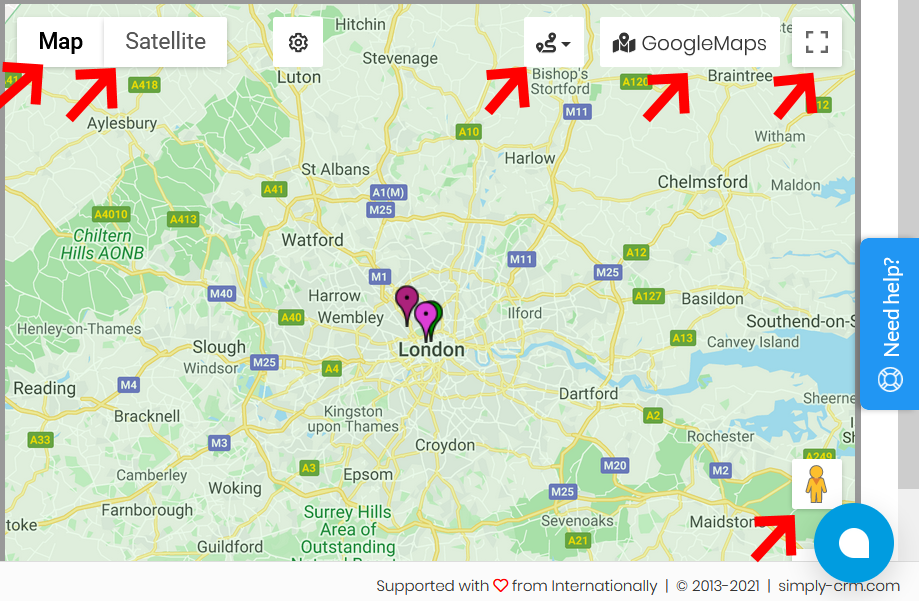
In the top left corner of the map, you can switch between map and satellite view. On the right, you’ll have the options to find the closest route between locations, open the Google Maps page with the selected locations or view the map in full screen.
By clicking on the icon in the bottom right corner, you’ll be able to navigate to the street view of the selected location.
If you need further help with Map View, please contact our support team through live chat or email us at support@simply-crm.com.


