The HelpDesk Email Widget in Simply CRM allows you to manage your communication with each contact stored in the Tickets module. It also provides you with a clear overview of your communication history and helps you create the best possible customer experience for each individual contact.
You can do this straight from the Tickets record of your choice. Continue reading to find out how.
How to configure the HelpDesk Email Widget
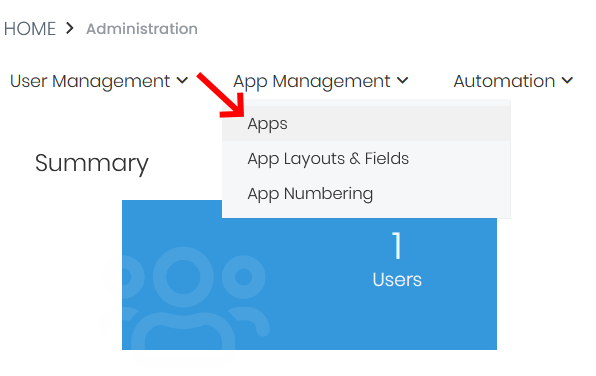
When you log into your Simply CRM instance, you’ll first need to activate HelpDesk from the App Store. To achieve that, open Settings from your profile drop-down in the top right corner.
Then, click the App Management tab in the main menu and select Apps.
In the App Store, locate the HelpDesk widget and press the Activate button from the app card. Once you activate the app, it will become available in your instance.
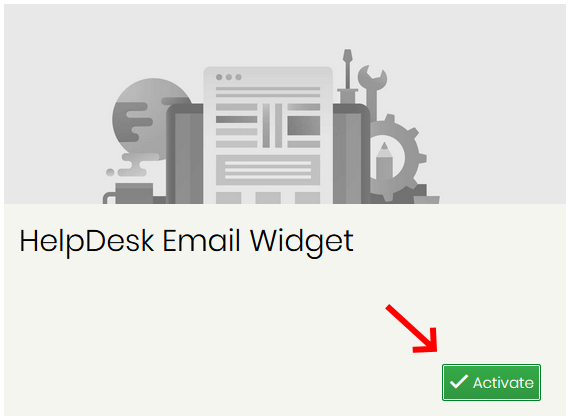
When you press Activate, please refresh the page to make sure that the new app is active. From then on, you can access HelpDesk by selecting HelpDesk Settings from the Other Settings tab in the main menu.
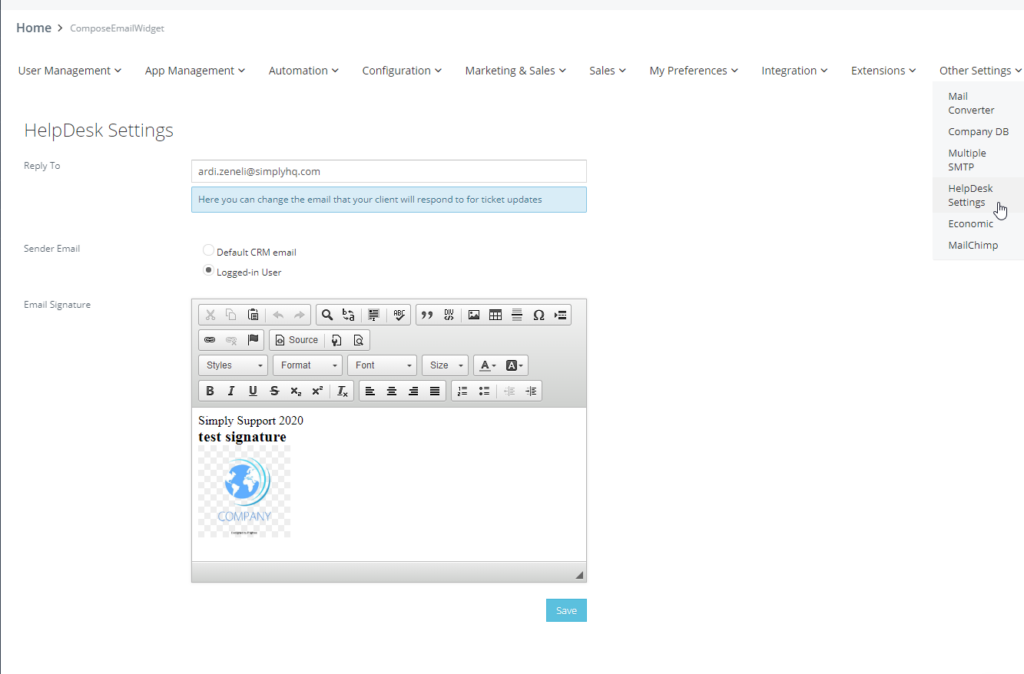
Under HelpDesk Settings, you’ll be presented with the settings shown in the image above. Here, you will need to configure the Reply To, Sender Email and Email Signature settings.
The Reply To field specifies what email will be automatically added as the recipient for the contact’s replies. Enter your preferred email address here.
Sender Email determines what email will be used to send messages to the client. You can set the Sender Email to be the default CRM email or the logged-in user email. The default CRM email is configured on the outgoing server which is used by the entire system. In other words, this is the generic company email address, like info@simply-crm.com. The logged-in user email refers to the email address of the currently active user in MultiSMTP.
Email signature allows you to set up your own signature that will be added at the end of each email that you send. The signature typically includes your name, your position and your company logo.
Important: Once you set up your Reply To address, you’ll need to add the same email to the Mail Converter module.
To do this, you’ll need to open the Other Settings drop-down menu and choose Mail Converter. Enter the following information in the To field:
regex:(?<=ardi.zeneli\+id)[0-9]+(?=@
Replace ardi.zeneli with your own email account details.
In the Action field, select UPDATE HelpDesk Response. Press Save to confirm the changes.
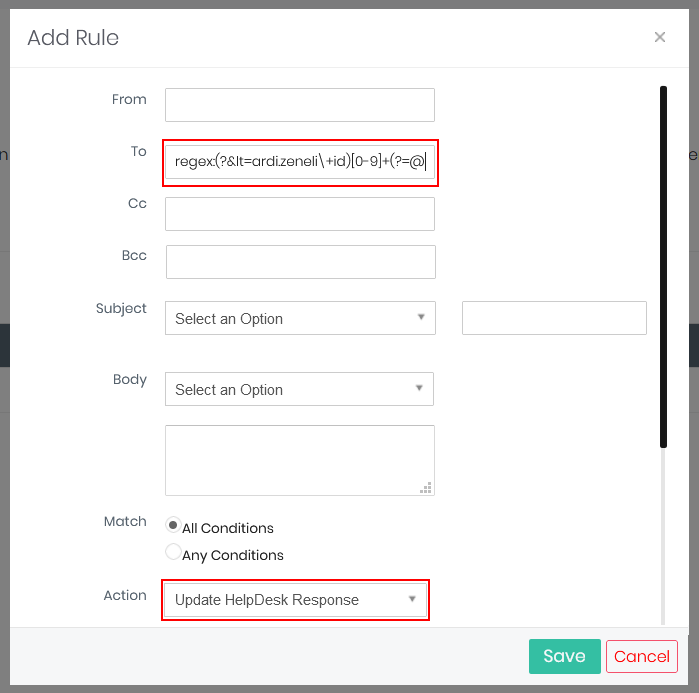
Important: In the To field, you should not change anything aside from the email details.
How to edit the HelpDesk settings in Configuration Editor
You can also configure the default HelpDesk setting using the Configuration Editor option from the Configuration menu option that you can access by opening Settings in Simply CRM.
In the Configuration Editor, update the Helpdesk Support Email-Id field with the email address that you want to use by default. Under Helpdesk Support Name, you can enter the user name that will be displayed for your outgoing emails.
As seen in the image below, the Configuration Editor allows you to edit a variety of other settings as well. You can set up the maximum upload size, Google Client ID, Google Client Secret etc.
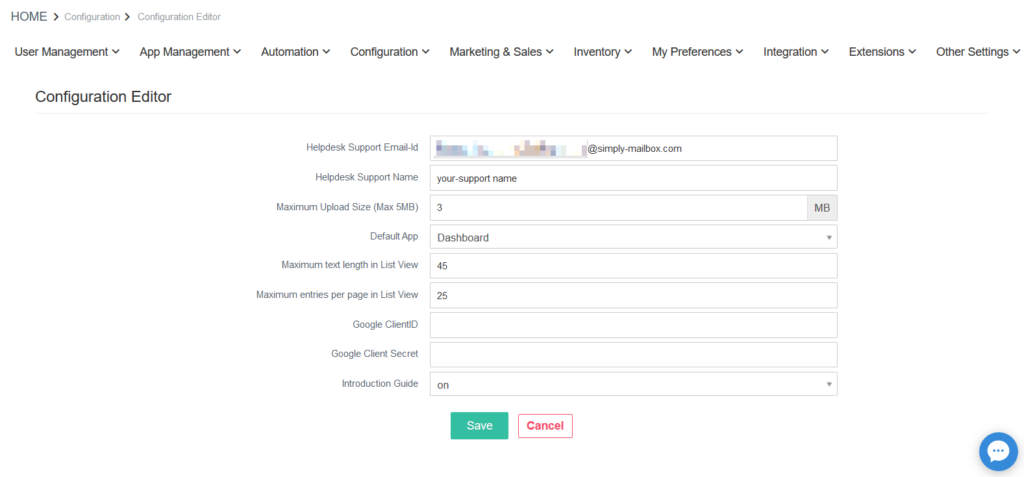
Once you configure the settings according to your needs, don’t forget to press Save to confirm your changes.
How to use HelpDesk
When you set up your HelpDesk settings, you can use it within every ticket record in your Simply CRM instance.
To find the HelpDesk widget, navigate to the Tickets module and open the detailed view of a specific ticket record. Under the Summary tab, you can see the widget on the right side.
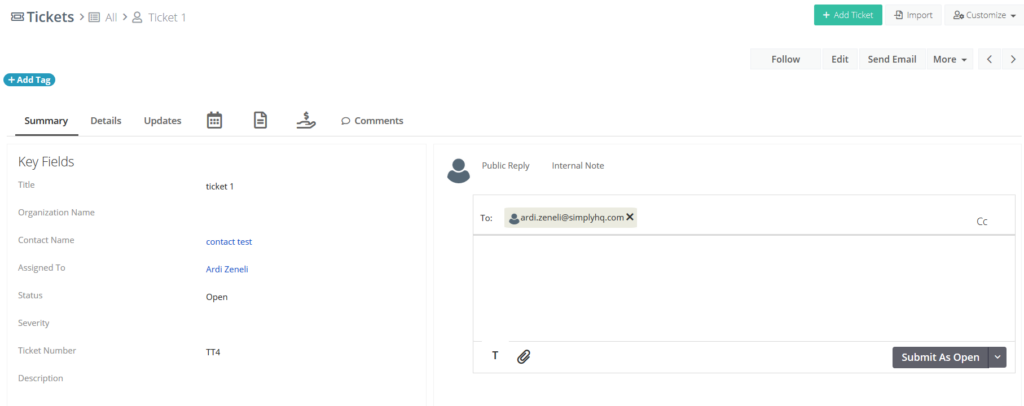
Simply type in your message in the text box and press Submit As Open to send your message. If you don’t want to submit your message as open, you can click on the drop-down and select Submit As Pending or Submit As Solved. Depending on the option you choose, you’ll set the ticket to open, pending or solved.
In case you want to write out a detailed message, you can press on the T icon in the bottom left corner to open the formatting options. The clipboard next to the T icon allows you to attach documents to your message.
Keep in mind that the To field is automatically filled in with the information you provided in the HelpDesk settings. If you want to change the recipient, you can edit the address manually. Simply press on the email address and type in your preferred contact’s email.
Finally, HelpDesk also allows you to record notes in the system. If you want to create a note, open the Internal Note tab in the widget and write out your text. Press Post to publish the note.


