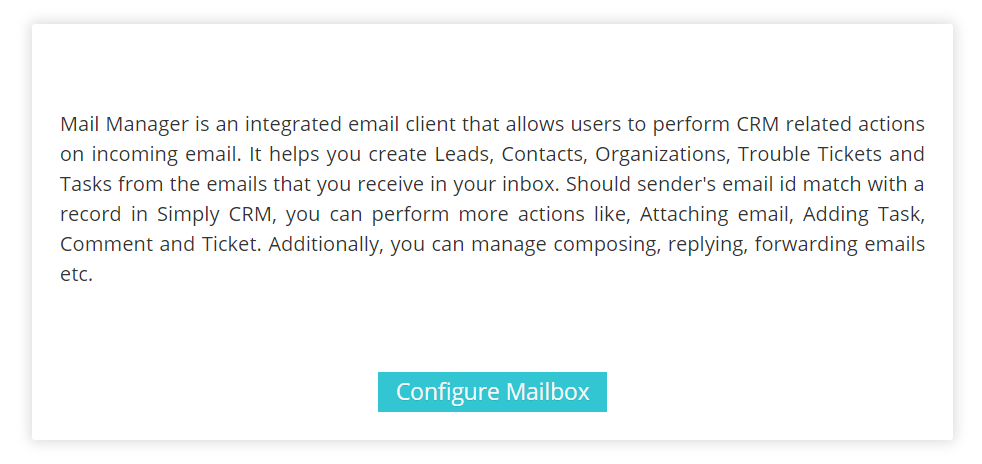
Simply CRM has an integrated email client called Mail Manager that allows you to perform various actions – create Leads, Contacts, Organizations, etc. from the emails that you receive.
Once you match the sender’s email ID with a Simply CRM record, you can perform additional actions, such as add tasks, comments etc.
How to use the Simply CRM Mail Manager
Step 1: Configure your incoming mail
You can configure your email provider to send emails directly to your Simply CRM instance. If you’re using Gmail, Yahoo or Fastmail, the mail server name will be filled automatically. However, if you’re using another email provider, you will need to enter the server name or IP address on your own.
To configure your incoming mail server, press on the mail icon in the top right corner. Click on Configure Mailbox and select your email provider in the pop-up window.
If you use Gmail, Yahoo or Fastmail, the mail server name will automatically be populated. You will only need to enter your user name and password.
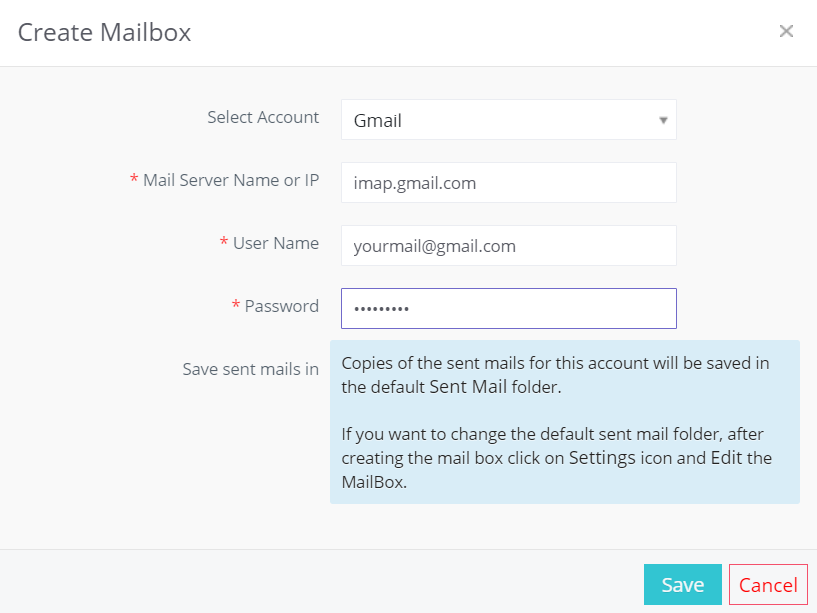
Click Save to confirm the settings.
Important: If you get the Authentication error while configuring your Gmail account, please refer to this guide to resolve the issue.
In case you’re using an email provider other than Gmail, Yahoo and Fastmail, select the option Other for the Select Account field.
Then, you will need to enter all information manually – this includes the mail server name or IP, the user name, the password, the supported protocol, the SSL options as well as the Certificate Validations field.
Once you enter all the necessary information, press Save to confirm the new settings.
Important: Simply CRM only supports IMAP at the moment.
Step 2: How to integrate your Gmail account
If you’re using a Gmail account, you’ll need to configure your email settings before you can start using your email from the Mail Manager.
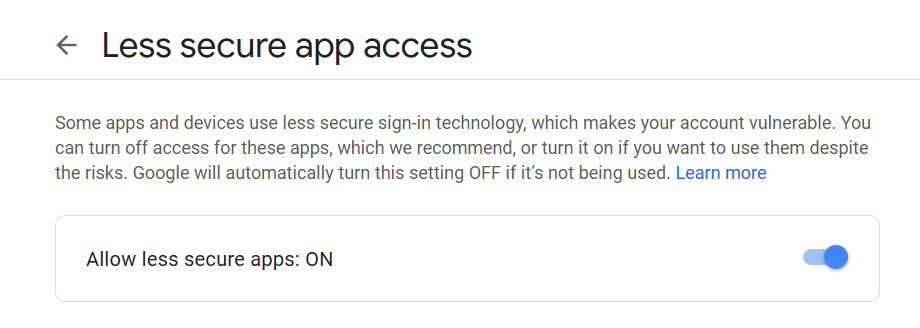
First, you’ll need to allow your Gmail account to override your account’s security settings. You can do that by logging into your Gmail account and opening the Less Secure App Access settings. Simply toggle the button and make sure that the configuration is set to Allow less secure apps: ON.
After that, you’ll need to enable IMAP for Gmail.
IMAP is an Internet protocol that allows email clients to communicate with email services. In other words, it allows the Mail Manager to integrate your email account into the Simply CRM system.
To activate IMAP, you’ll first need to log into your Gmail account and press on the gear icon in the top right corner. In the drop-down, select Settings.
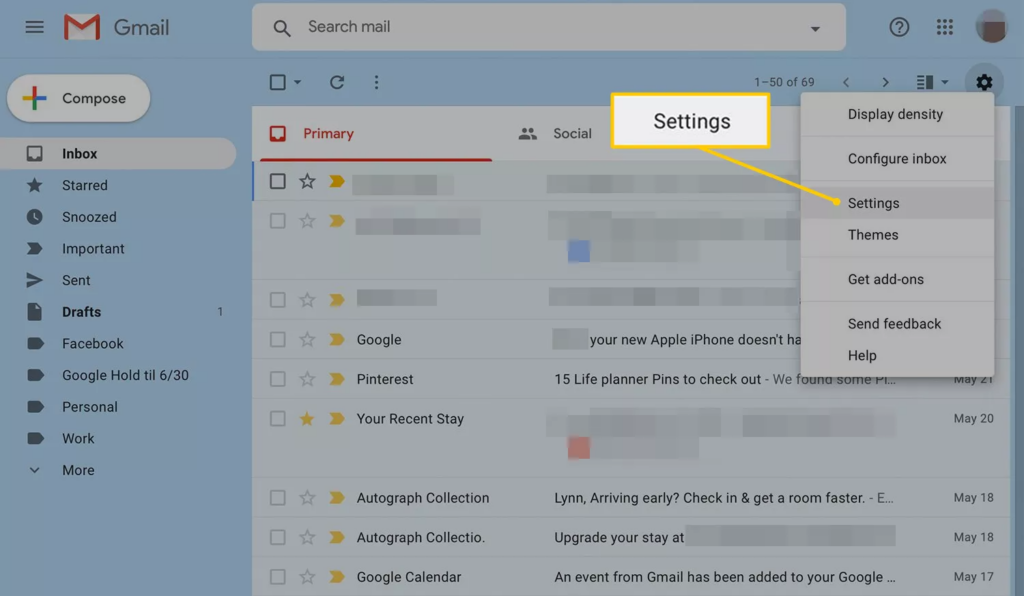
In the new window, open the Forwarding and POP/IMAP tab.
Scroll down to the IMAP access section and select Enable IMAP.
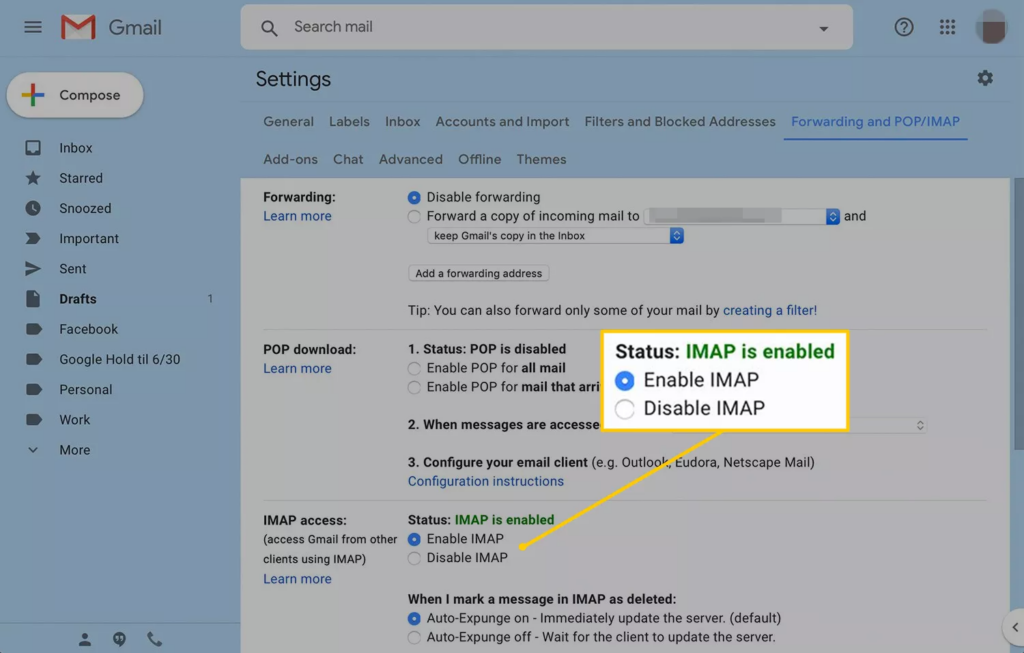
Press Save changes to update your settings.
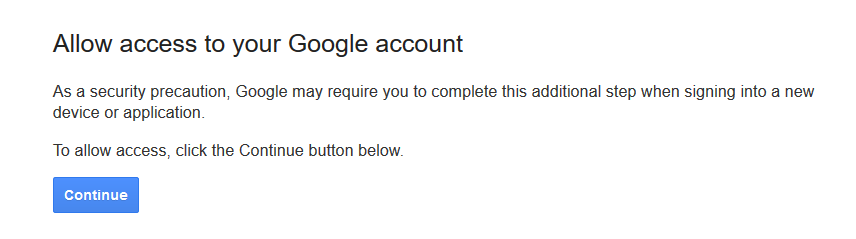
If you still cannot connect your account to the Mail Manager, try updating your Display Unlock Captcha settings in Gmail. Simply press the Continue button to change your settings and grant access to the Mail Manager.
Once you configure your email settings and set up your account in Mail Manager, you’ll be able to use Simply CRM for all your email communication.
Continue reading to find out more about all the useful options that you can use in the Mail Manager.
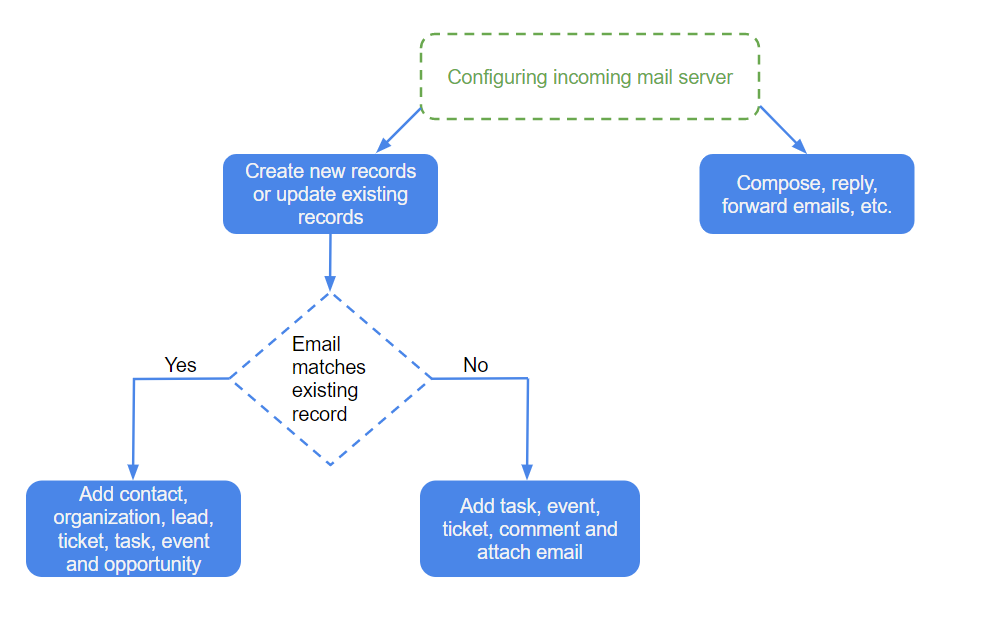
Step 3: Create new records from your emails
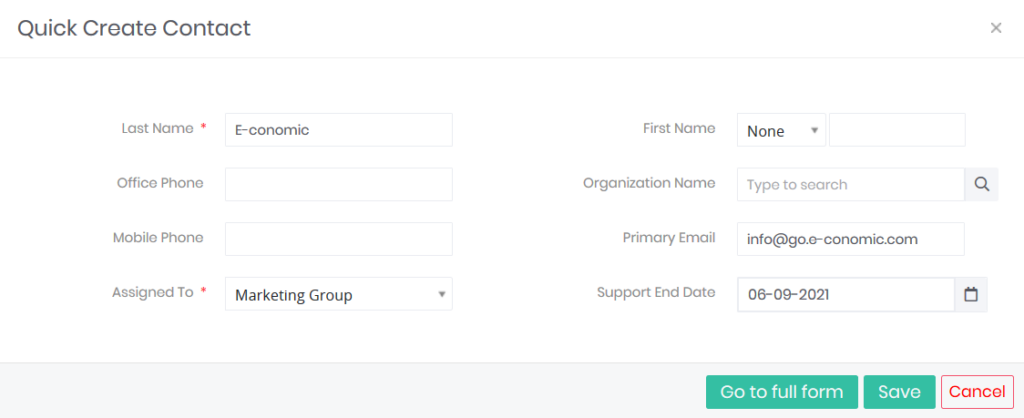
If you receive an email that does not match the email field of an existing record, you can create leads, contacts, organizations, cases, tasks, events or deals within the email.
To do that, follow the instructions below.
Open your email. Based on the email ID, the lookup will be made in the Related Records part on the right side of the page.
In case the email doesn’t match any records, click on the Action drop-down menu and select the type of record you want to add.
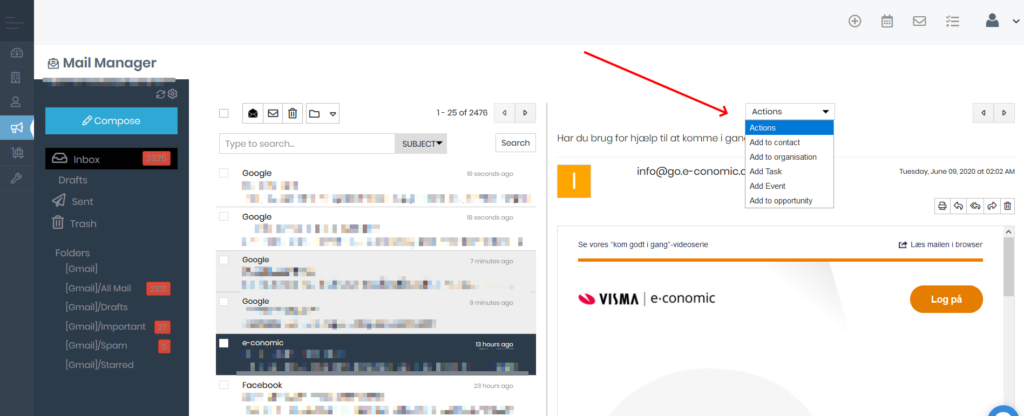
If necessary, you can edit the values in the resulting pop-up. When you’re done, press Save.
In case the email matches an existing record, you will have a few more options at your disposal. You’ll be able to associate a task, event, case or comment with it. You’ll also be able to attach an email to it.

Step 5: Perform additional operations
Aside from performing actions on incoming emails, you can execute certain additional operations from the Simply CRM Mail Manager.
For example, you can send new emails, reply and forward emails, create drafts, group emails in different folders, etc. You will also have various custom filters available in your email account.
In other words, you’ll be able to use Mail Manager as your email app.

How to send emails
Mail Manager allows you to send out emails directly from Simply CRM.
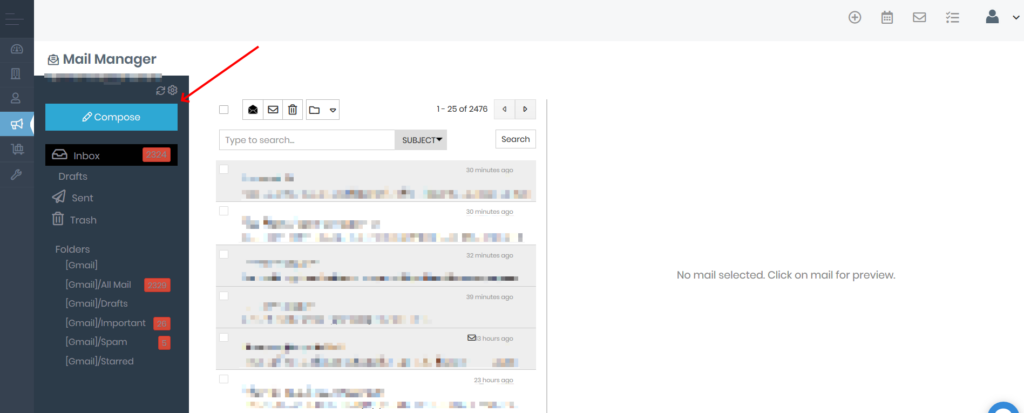
To send an email, open the Mail Manager by pressing on the Mail icon in the top right corner. Then, click on the Compose button.
In the resulting pop-up, you will be able to enter the recipient email and search for email IDs across records in Simply CRM.
You can also attach files or browse Simply for documents to send.
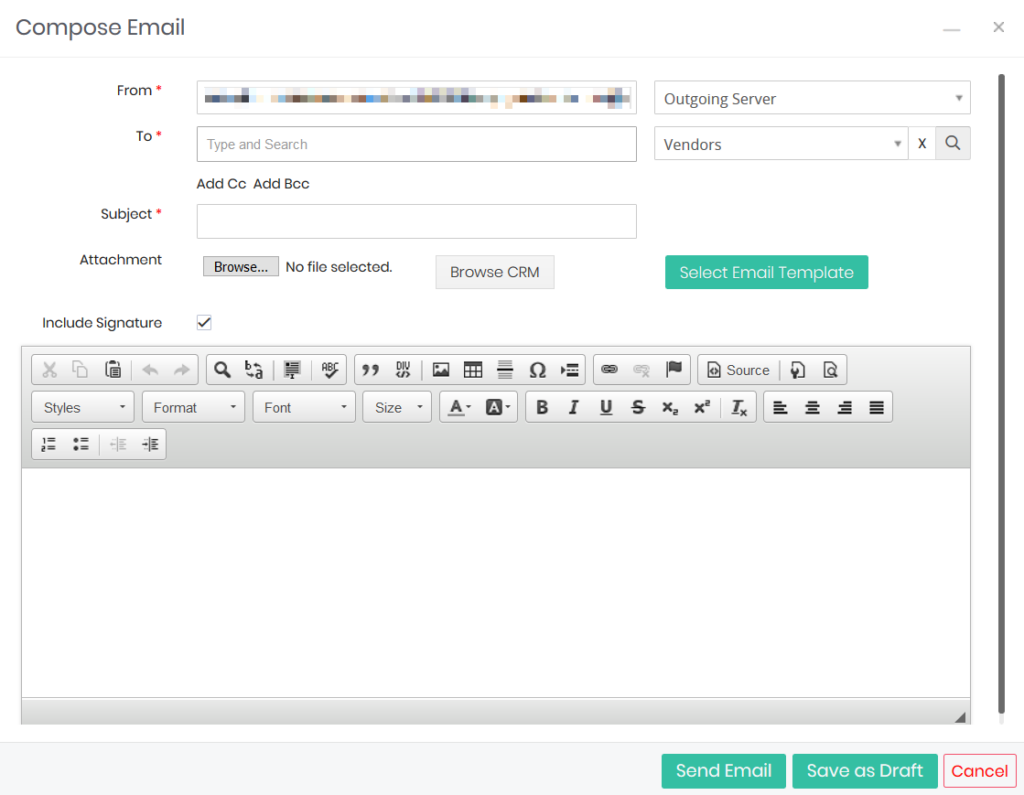
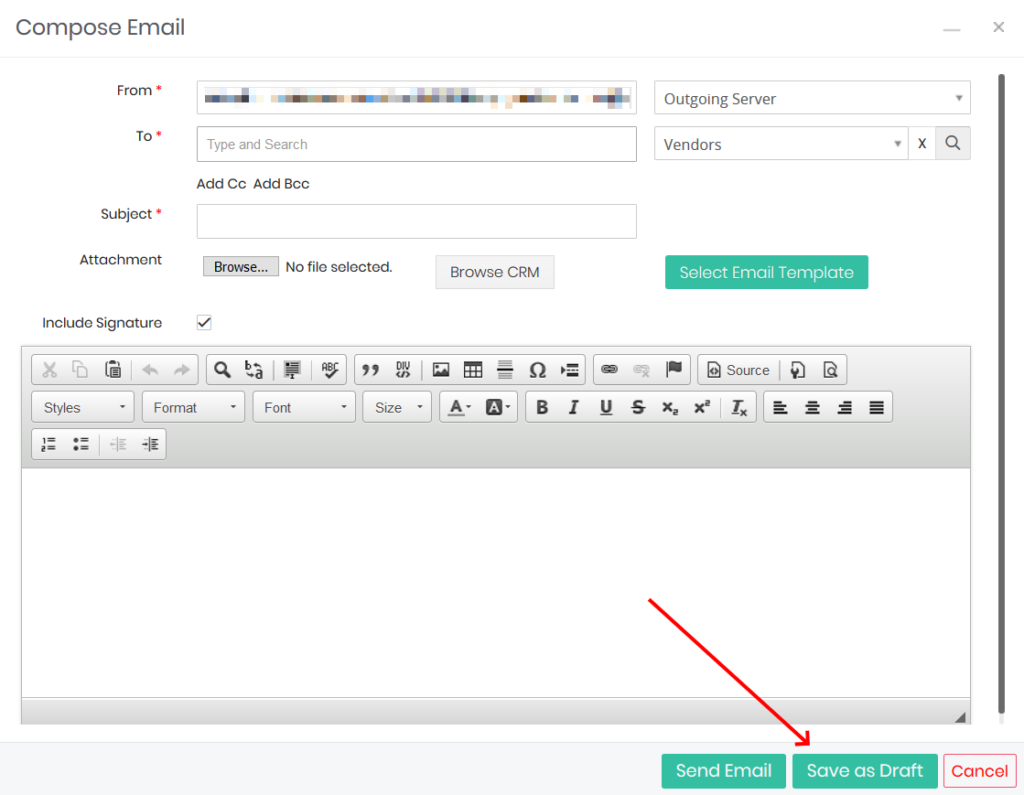
If you want to send your email later, you can save it as a draft by pressing the Save as Draft button.
You can use the Select Email Template button to use a previously saved template for your current email message.
After you finish composing the email, press Send Email. A pop-up window will appear, telling you whether your email was sent successfully.

Important: Don’t forget to configure the outgoing server before you start sending emails.
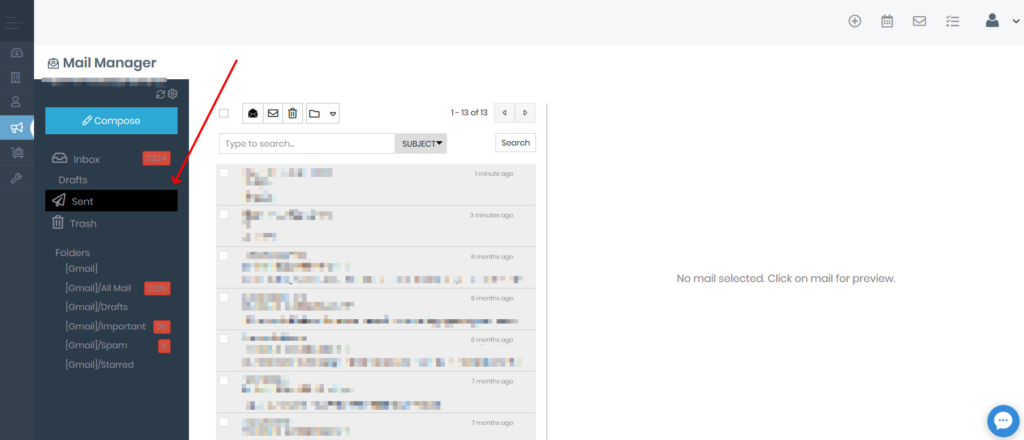
How to view sent emails
You can view all emails that you sent in the appropriate mail folder, e.g. [Gmail/Sent Mails] for Gmail accounts.
To only view the emails sent from the CRM, you will need to create a new email report. You can do that by opening can open the Reports > Email Reports folder.
To find the Email Reports folder, open Reports under Tools on the left menu.
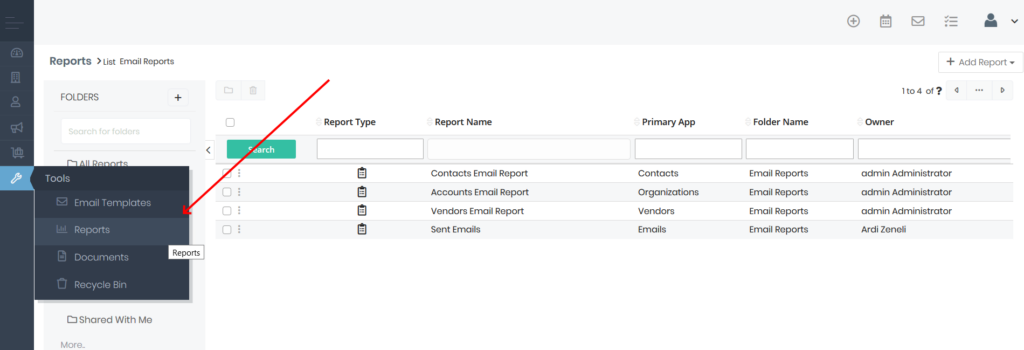
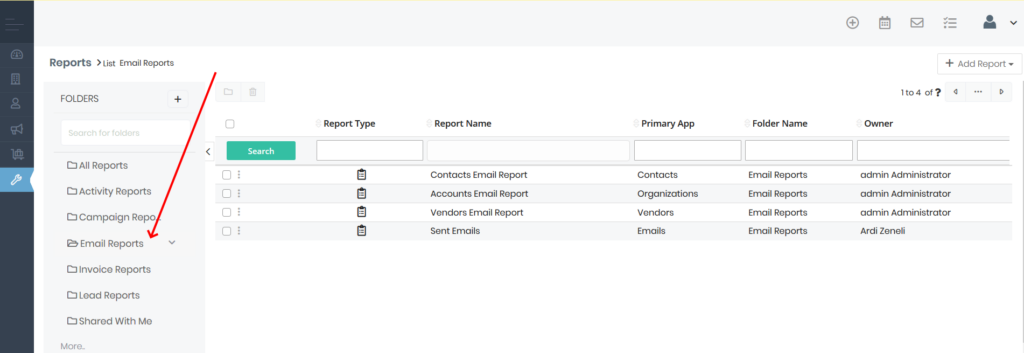
In the Reports module, click on the Email Reports in the left sidebar.
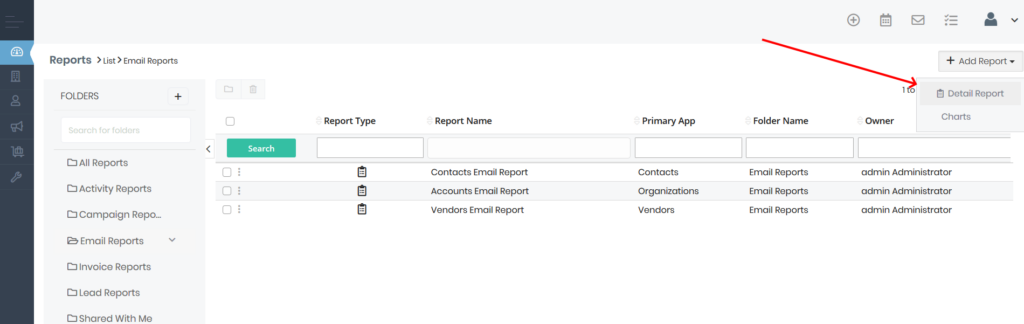
In the new window press on the Add Reports button in the top right corner and select Detailed Report.
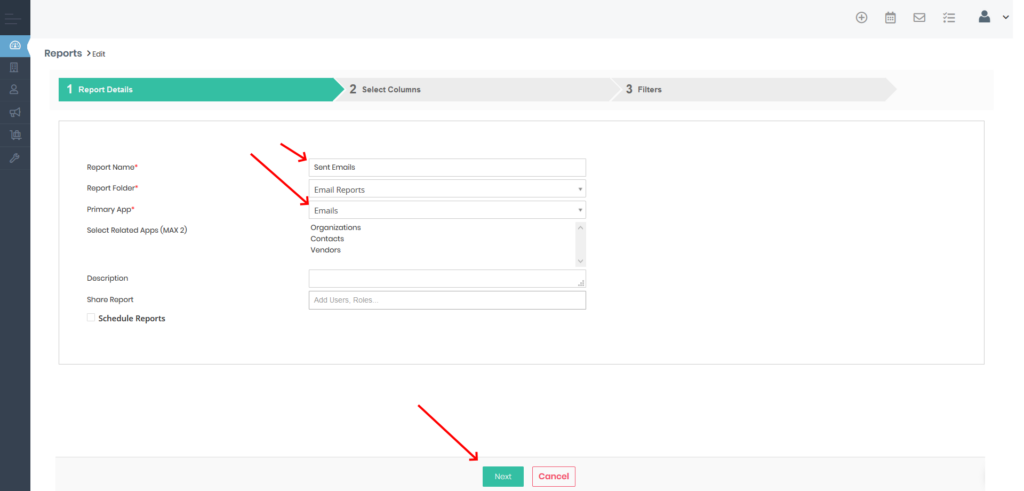
In the new window, enter the Report Name and select Emails under Primary App. Then, press Next.
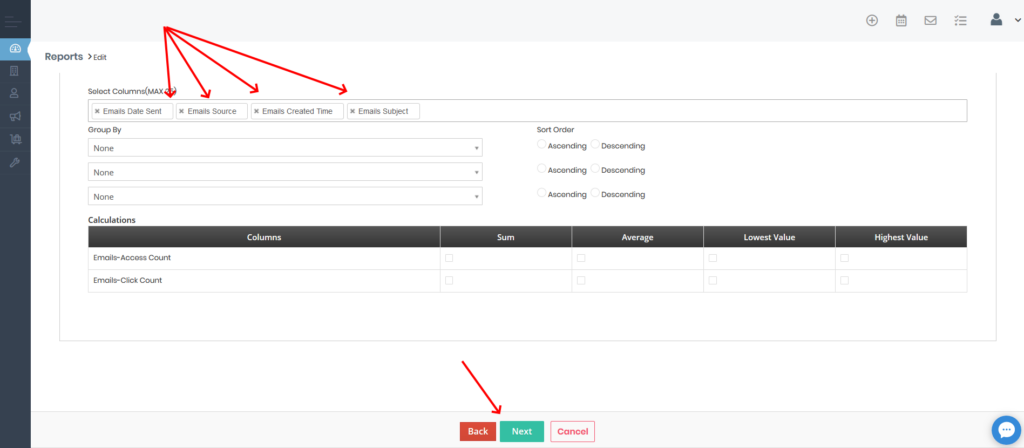
Under Select Columns, choose the following options: Emails Date Sent, Emails Source, Emails Created Time and Emails Subject. Then, press Next.
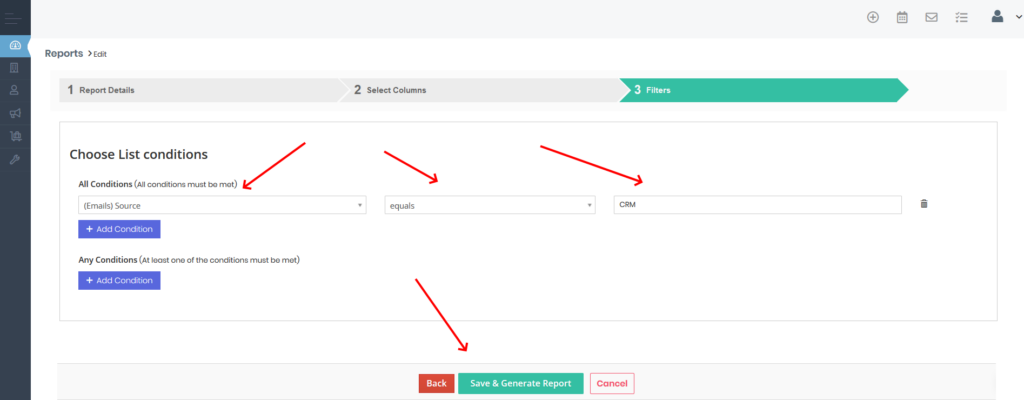
In the next window, set up a filter that will only display emails sent from Simply CRM. To achieve that, set the following filter under All Conditions: (Emails) Source equals CRM. Then, press Save & Generate Report.
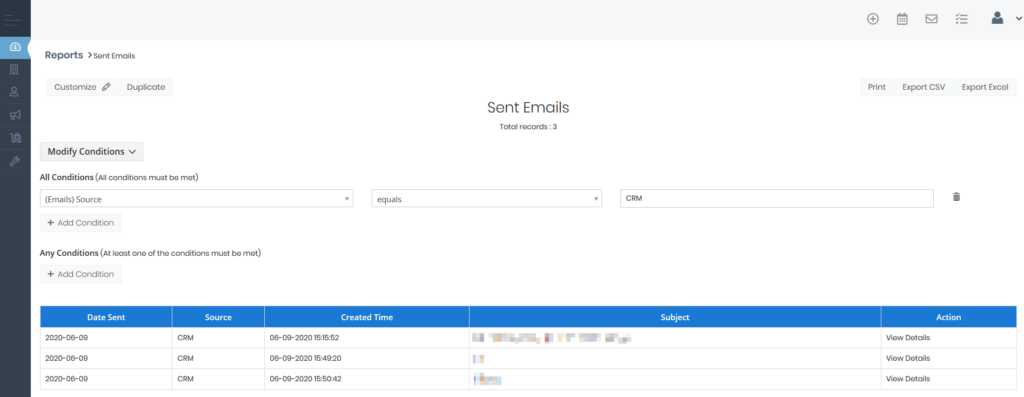
This report will now contain only the emails you sent from the Simply CRM Mail Manager.
Important: The emails in the Sent folder are not necessarily sent from the Simply CRM Mail Manager. This folder contains emails sent from all channels. Follow our instructions to configure a mailbox that only contains emails sent from the Mail Manager.


