The Facebook to Leads app allows you to connect your Facebook business page to Simply CRM. By integrating your page, you can use our apps to automatically generate leads, contacts and organizations based on the information your customers provide on Facebook.
Here, we will explain how you can install and use Facebook to Leads to create a more efficient business. You can handle all customer interactions directly from your Simply CRM dashboard!
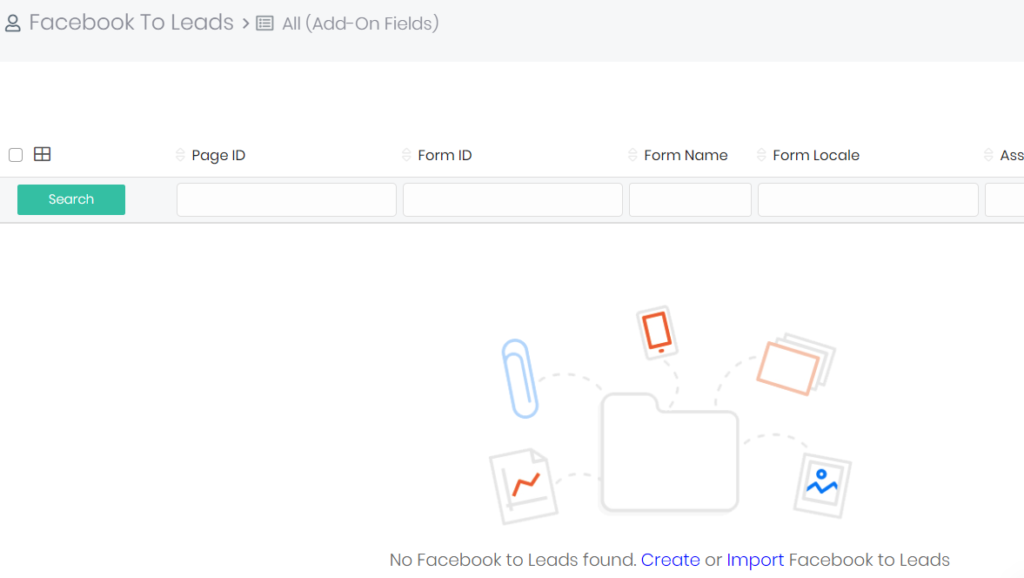
How to install Facebook to Leads
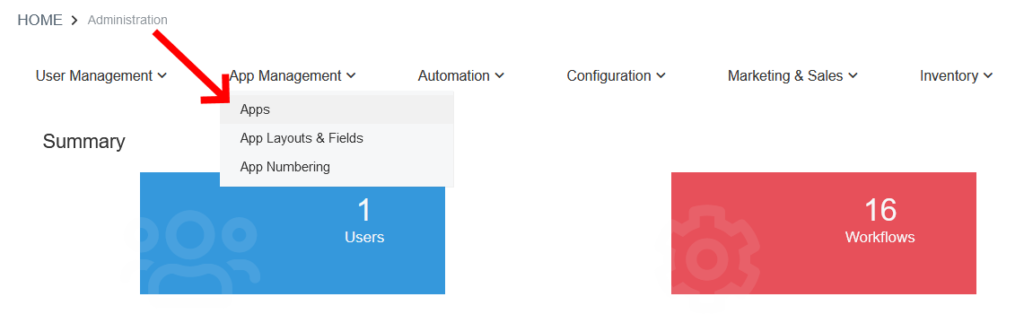
In order to use Facebook to Leads, you’ll first need to activate the app in your instance of Simply CRM. To activate this app, go to Settings.
Hover over the App Management tab and click on Apps.
Search through the available apps to locate Facebook to Leads.
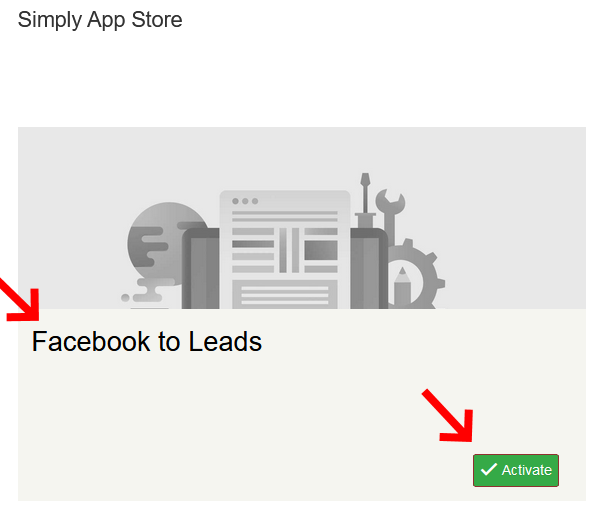
Press the green Activate button to install the app.
The app should be immediately installed and you should receive the following notification on your screen.

Important: If you do not receive this notification or you have trouble finding the Facebook to Leads app under Apps, please contact our support team through live chat.
After you install Facebook to Leads, please make sure to configure your Facebook developer account. If you’re unsure how to do that, you can simply head over to Facebook for Developers and log in with your Facebook account.
Your Facebook profile will automatically be upgraded to a Facebook developer account.
How to connect Simply with Facebook
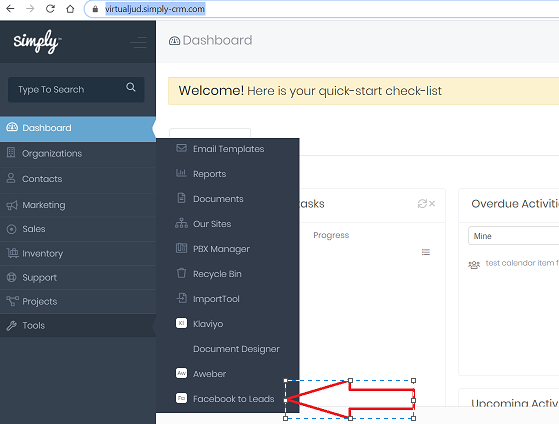
You can access Facebook to Leads in Simply CRM by hovering over the Tools option on the left menu. From the expanded options, select Facebook to Leads.

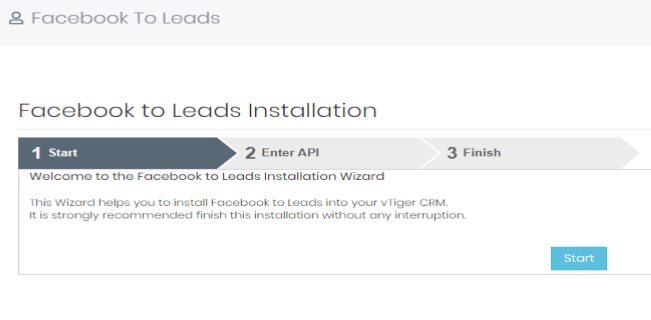
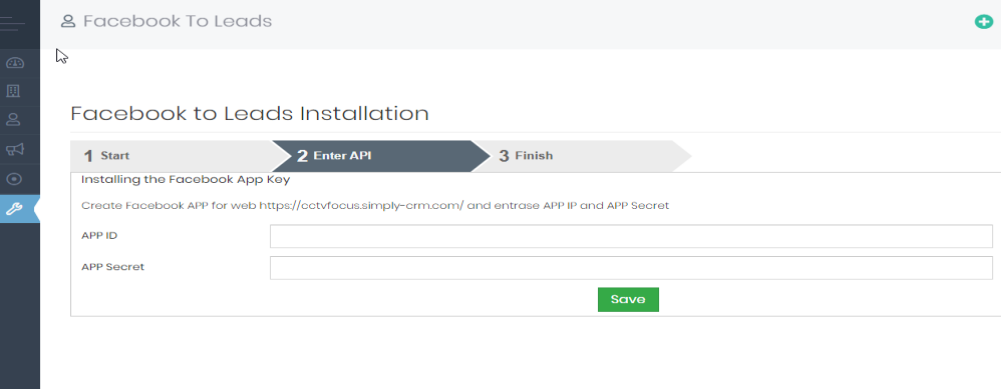
In the Facebook to Leads app, press the Start button to initiate the integration process.
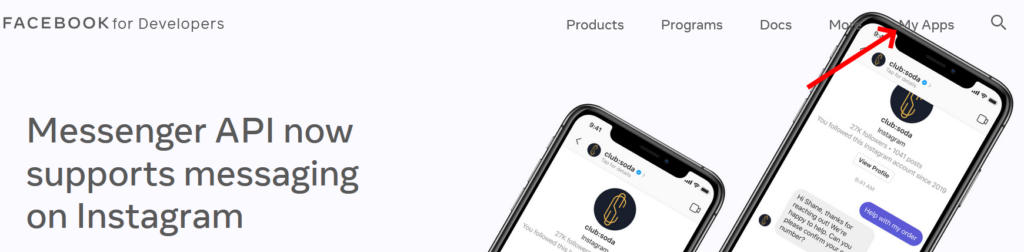
Now, you’ll be required to enter your App ID and App Secret. To acquire this data, you’ll need to go back to Facebook for Developers.
Click on My Apps in the top right corner.
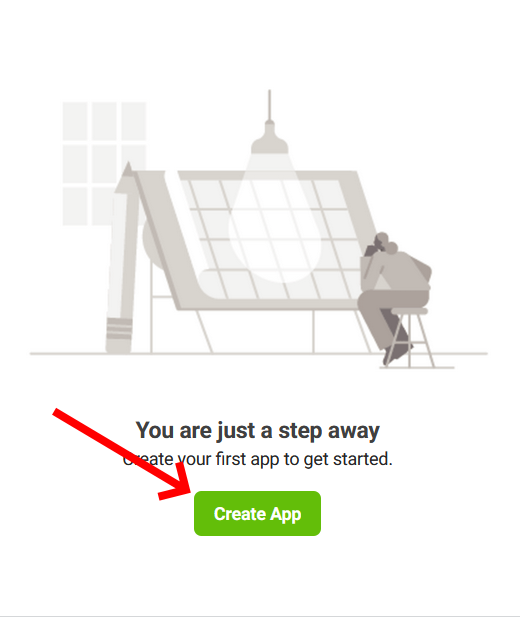
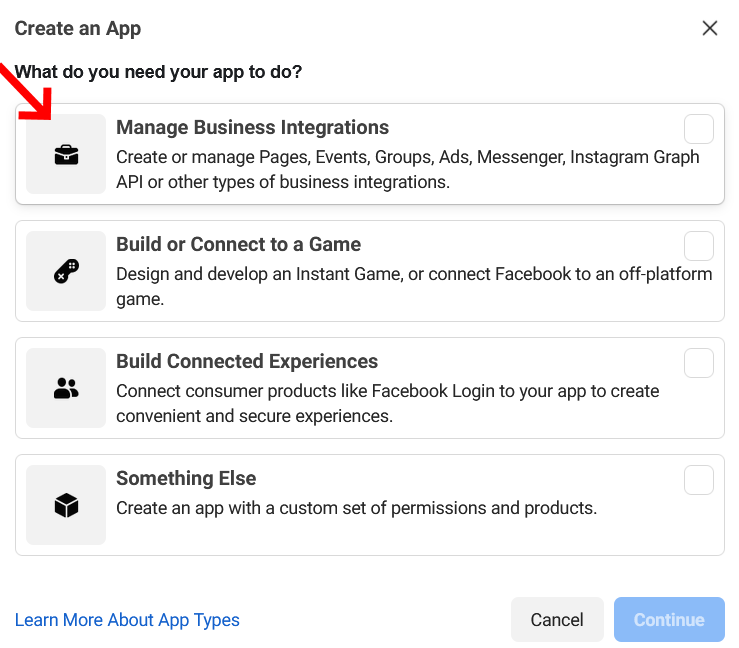
In the new window, press the Create App button.
In the resulting pop-up, select Manage Business Integrations and press Continue.
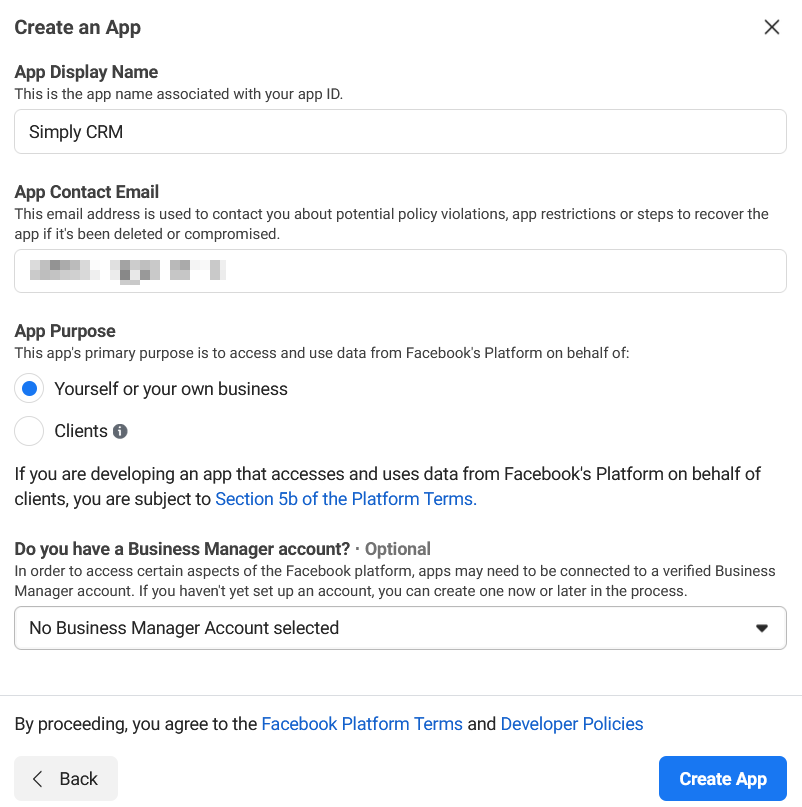
Fill out the necessary fields with your details.
Set the App Name to Simply CRM, enter your contact email address and select Yourself or your own business under App Purpose.
If you have a Business Manager account, feel free to connect it with your app to get access to optional features.
After you enter all the details, press the Create App button in the bottom right corner.
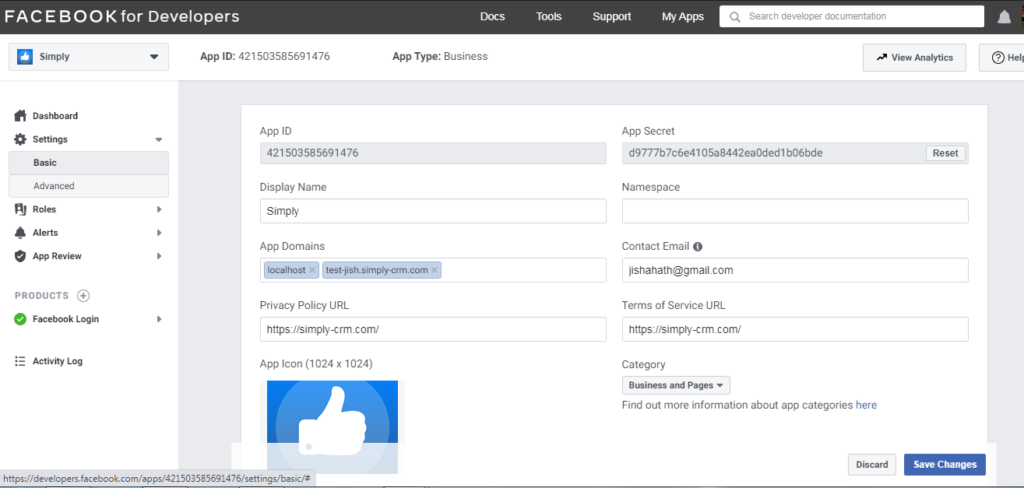
Once you create the app, you’ll need to configure its settings.
Go to Settings > Basic to acquire your App Secret and App ID, which you’ll need to integrate Facebook Leads into Simply CRM.
Under App Domains, add localhost and the URL of your Simply CRM instance. Enter the Simply CRM website under the Privacy Policy and Terms of Service URL fields.
Once you configure the app, your screen should look like this:
Copy your App ID and App Secret from the page. You’ll need to enter them in your Facebook to Leads app when you initiate its installation in Simply CRM.
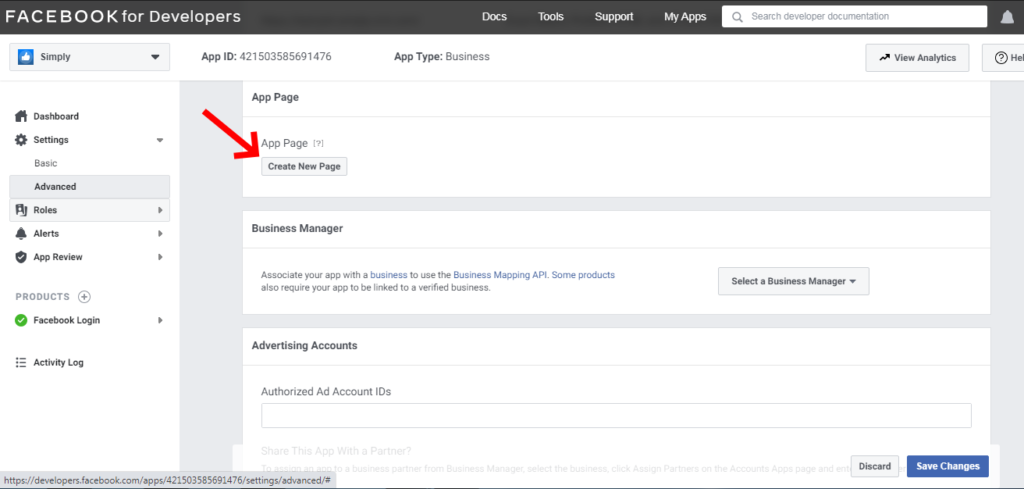
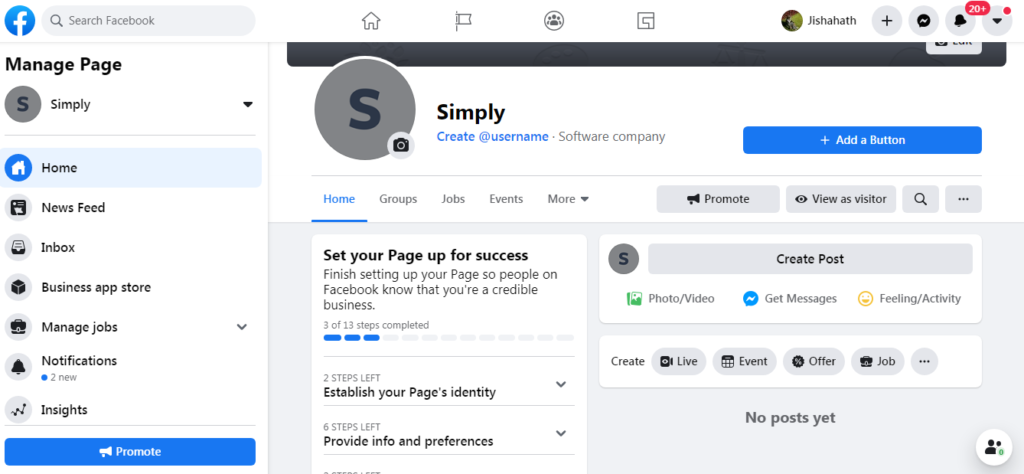
After you save your App ID and App Secret, you’ll need to create a Facebook page for your business.
Important: This step is mandatory, even if you already have a Facebook page for your business. The Facebook Developers studio does not allow you to use existing pages at this point, which means you need to create a new page. However, you don’t need to worry, as you’ll be able to switch to your existing page after you finish creating a dummy page.
To create a new page, press the Create New Page button shown below.
Follow the steps outlined in the Facebook page registration process to create a page similar to the dummy page we created below.
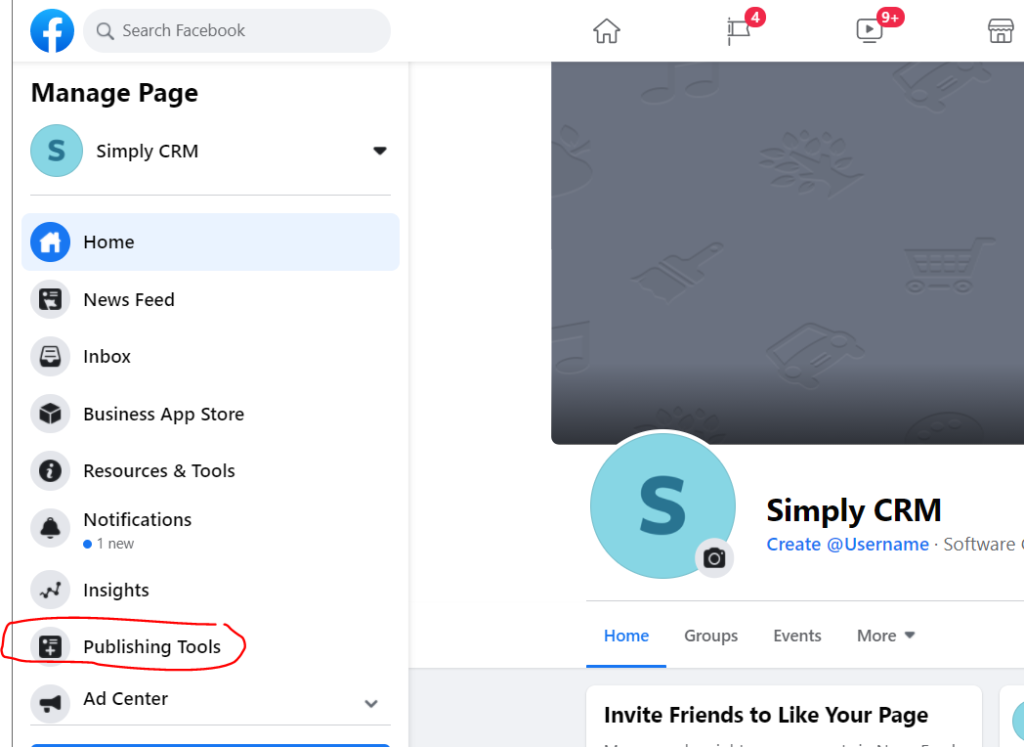
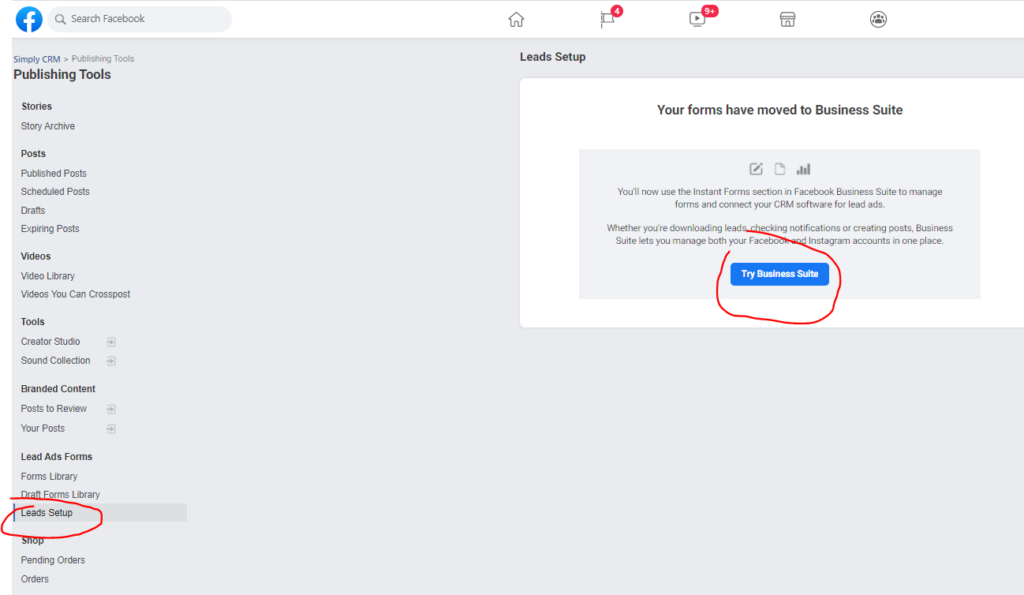
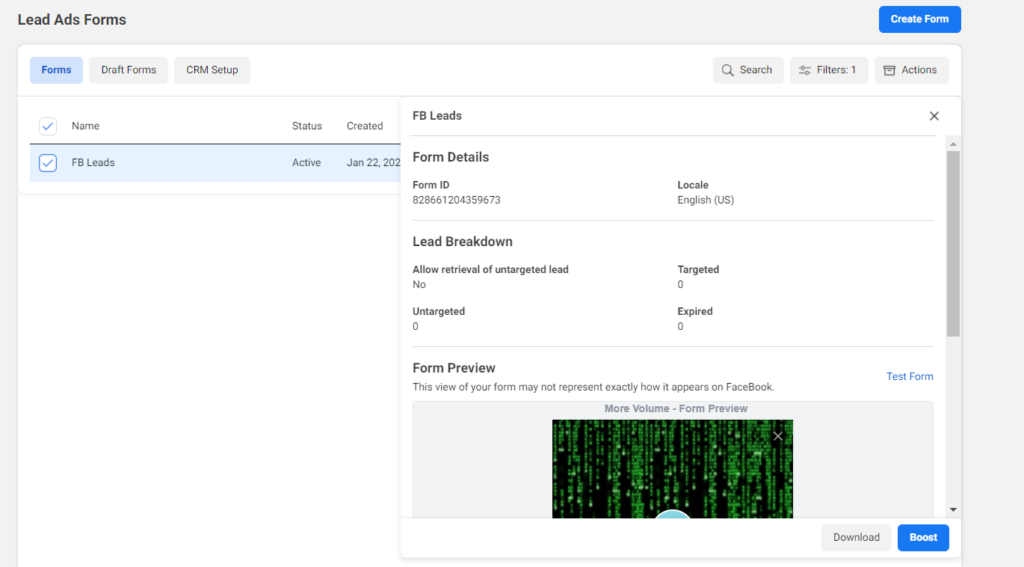
Use the Manage Page menu to create a lead form for the newly created Facebook page. You’ll find this option under Publishing Tools > Leads Setup > Try Business Suite > Forms > Create Form.
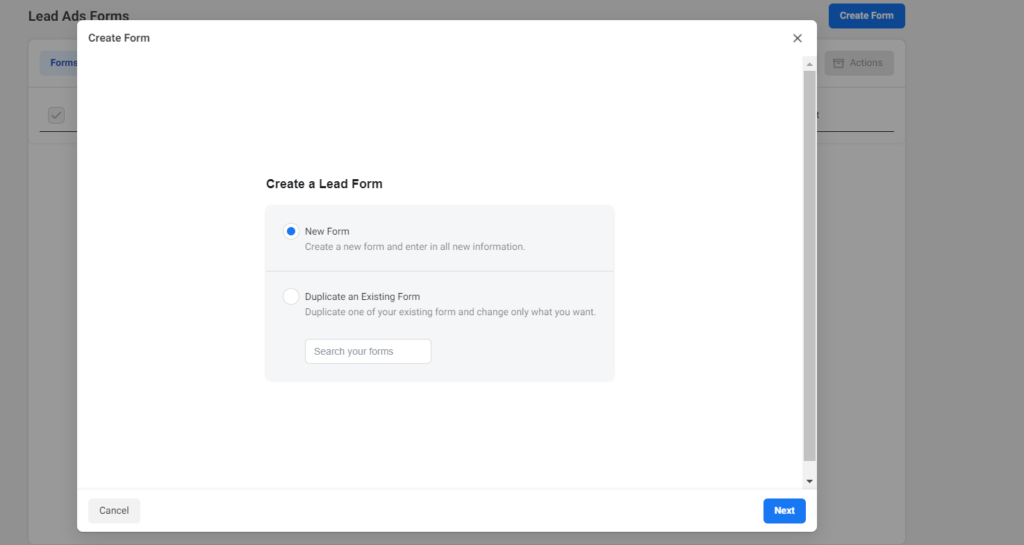
Once the form is create, you’ll need to get the Form ID from the Forms Library under Publishing Tools.
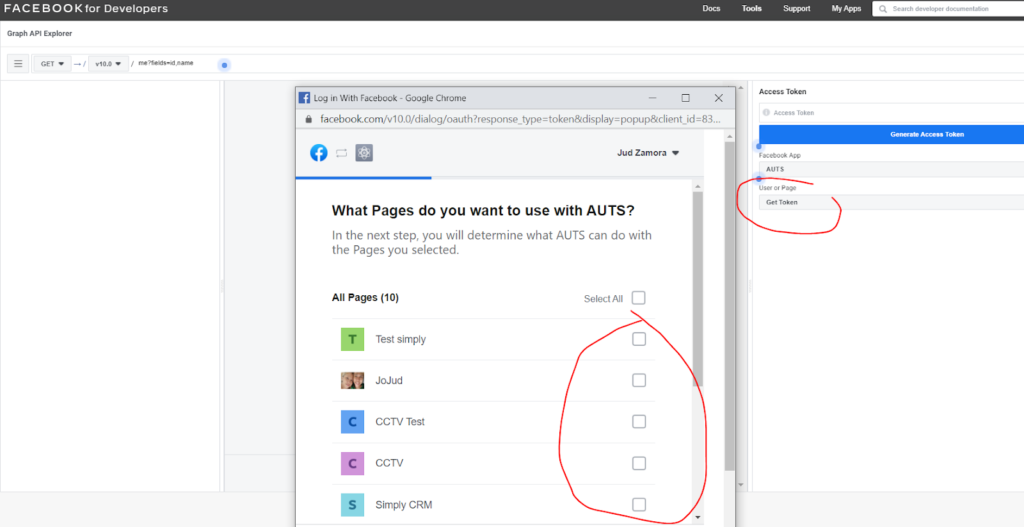
Once you have the Form ID, go back to https://developers.facebook.com/tools/explorer/.
Choose the Facebook App Name and Facebook Page on the left side to generate an access token.
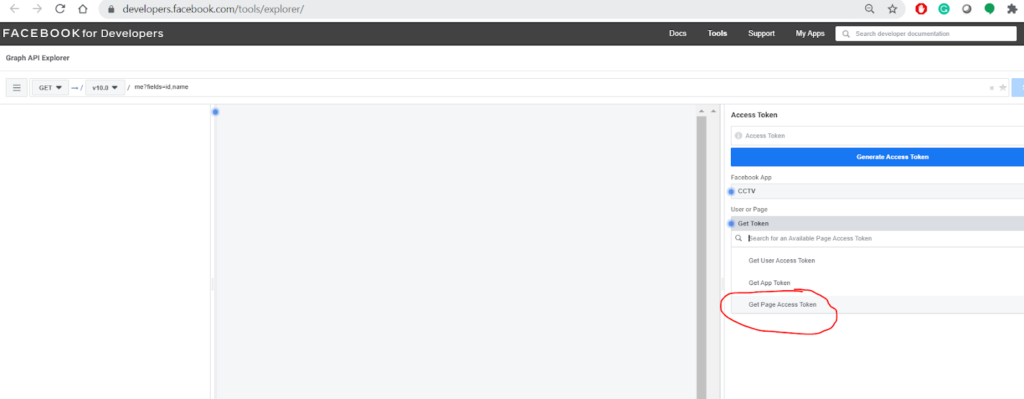
Make sure to select the new page you created earlier. If you want to use a pre-existing Facebook page for the integration, you’ll receive a prompt to connect your Facebook account once you press Get Page Access Token.
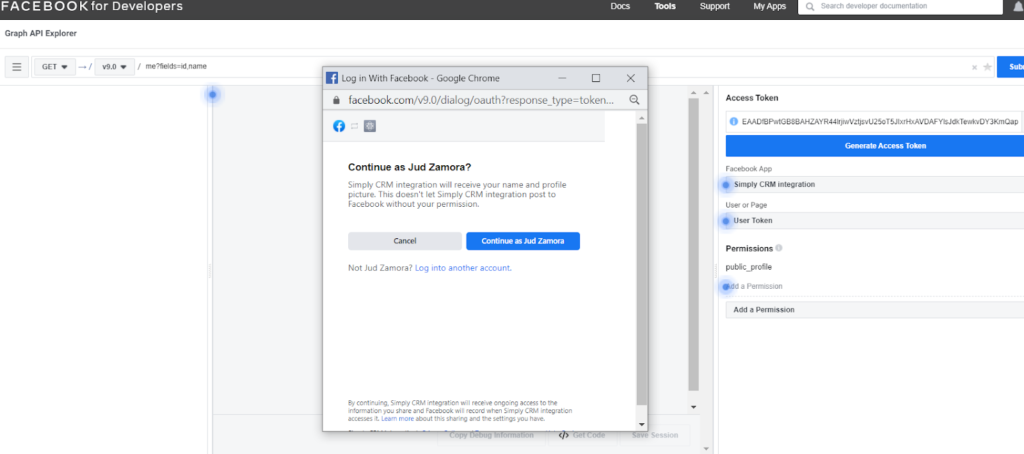
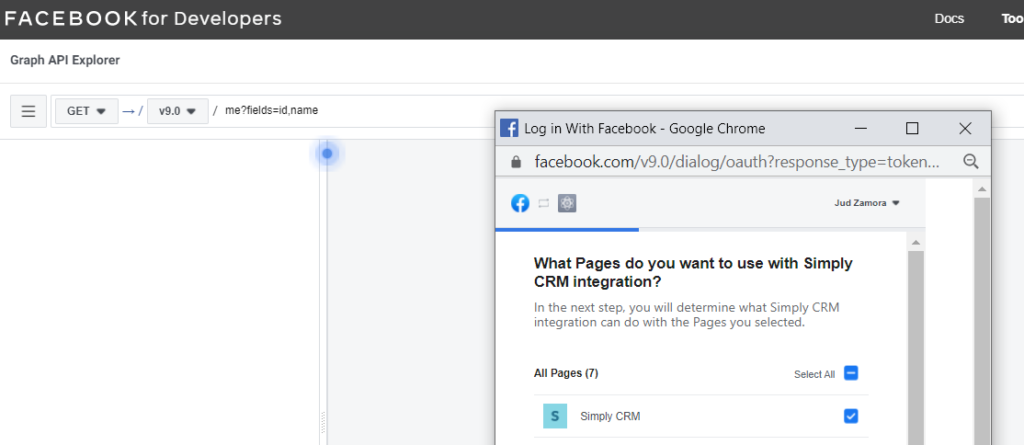
From there on, you’ll be able to select which existing Facebook page you want to link to the Facebook for Developers account.
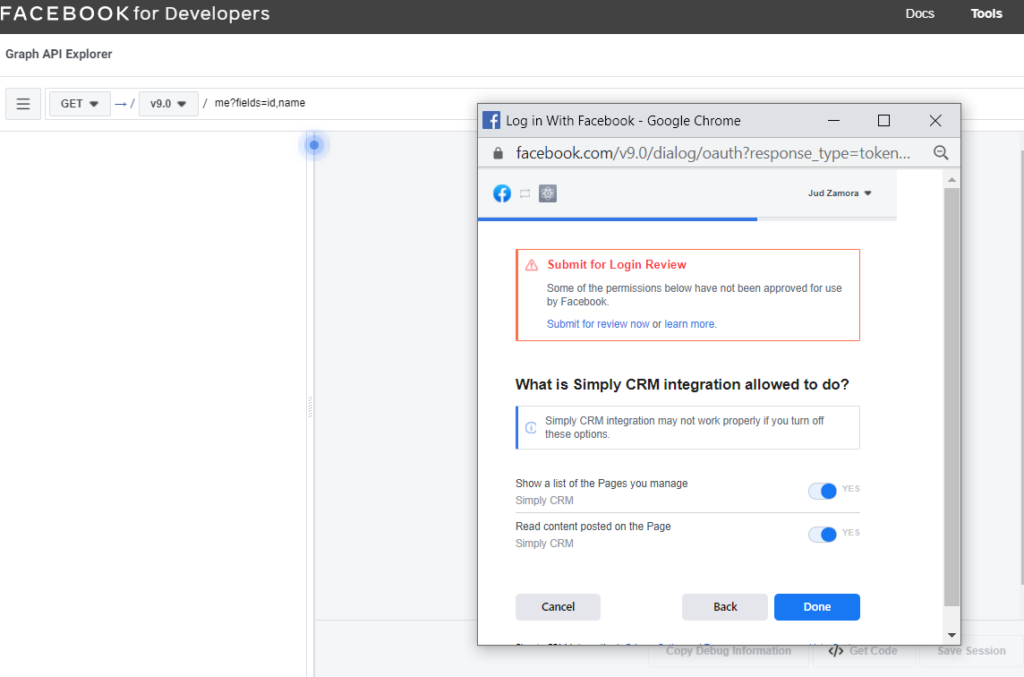
Before you integrate the page, you’ll need to set the app permissions as shown in the next image.
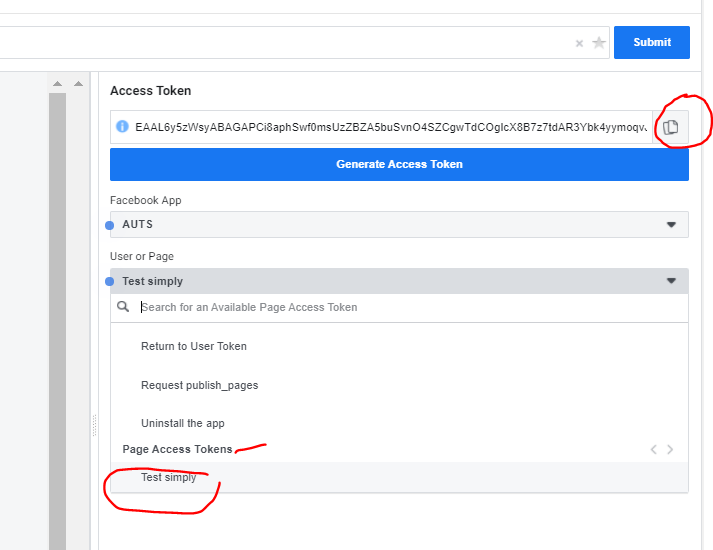
Then choose the page you want to use and copy the Access Token that the app generates for the selected page.
Once your Facebook page is linked, you’ll notice that it goes back to User Token instead of Page Access. Please re-apply Get Page Access Token, and select the Facebook page you want to integrate. Then just click the copy button. No need to click on the Generate Access Token button.
When you save the access token, you’ll need to extend the access token session. You can do that by visiting
https://developers.facebook.com/ > More > Tools> Access Token Debugger.
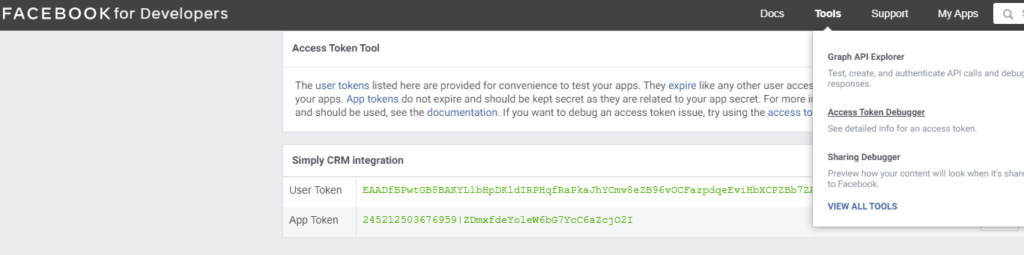
Paste your access token under Access Token, as shown below, and click Debug.
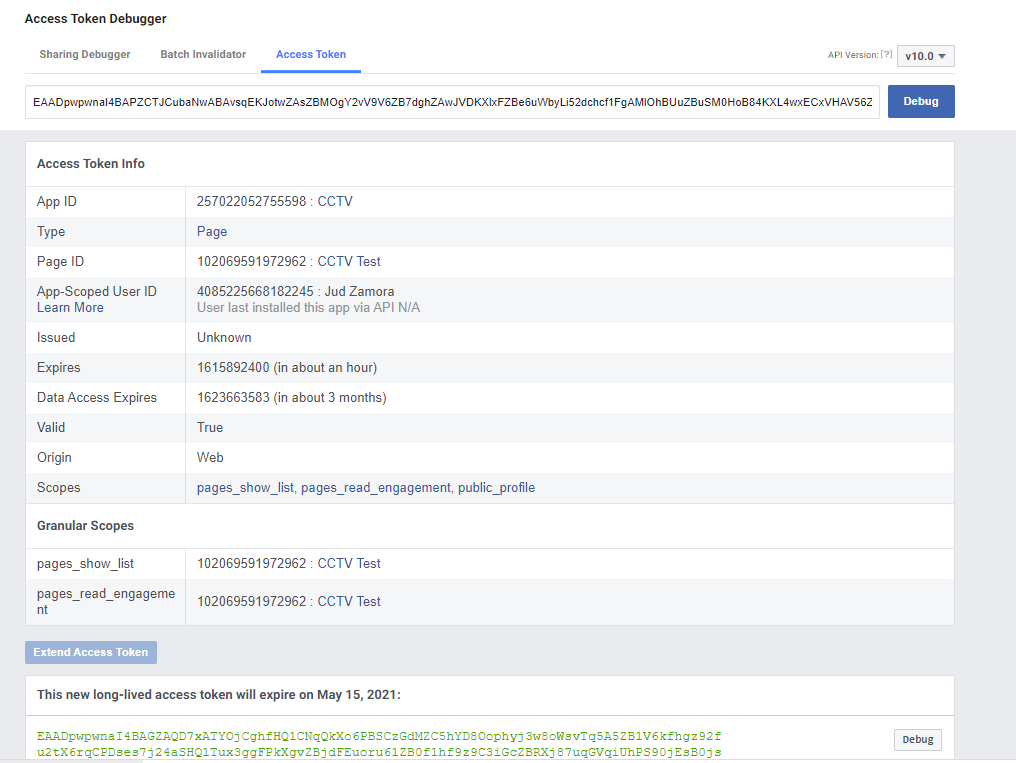
All the details will be auto-generated here. Save your Page ID and App ID somewhere because you’ll need to use them to set up the integration in Simply CRM. Then, press Extend Access Token.
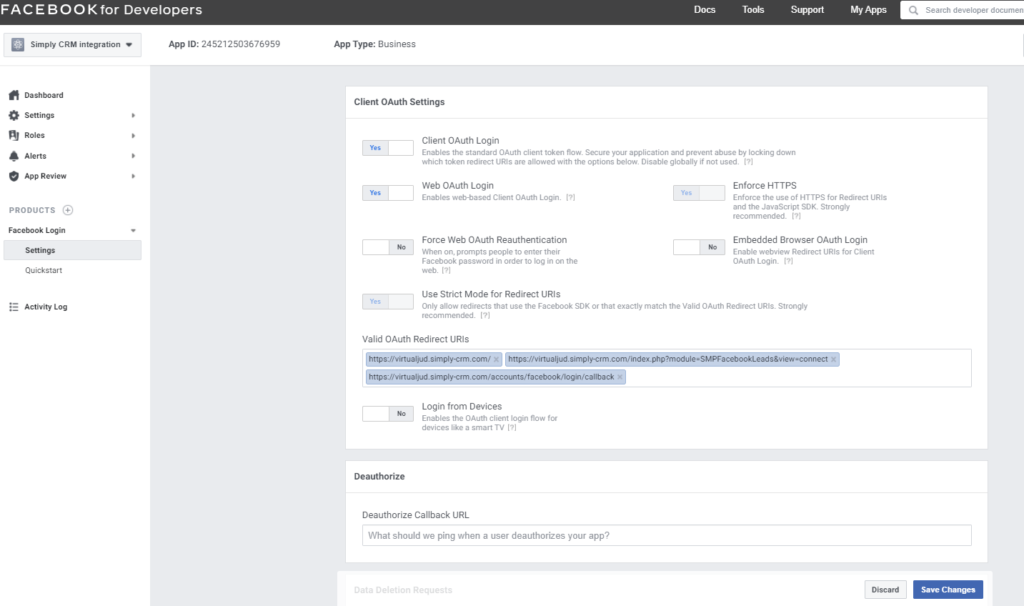
Click Products + to add the Facebook login form.
For the integration to work correctly, you’ll also need to whitelist your Redirect URI on Facebook. To achieve that, simply paste your URIs under
Facebook for Developers > Facebook Login> Settings > Valid OAuth Redirect URIs.
What follows are sample URLs. Please use your own Simply CRM instance URLs with the following paths:
https://virtualjud.simply-crm.com/index.php?module=SMPFacebookLeads&view=Connect
https://virtualjud.simply-crm.com/index.php
https://virtualjud.simply-crm.com/accounts/facebook/login/callback/
Press Save Changes to confirm the configuration.
Now that you’ve set up Facebook for Developers, you can move back to your instance of Simply CRM and open the Facebook to Leads app that we installed earlier.
When you open the app, press Start to initiate the configuration process.
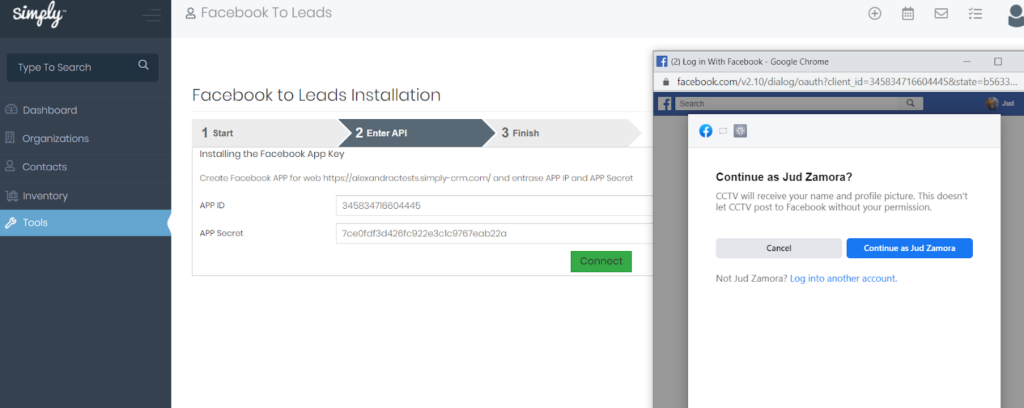
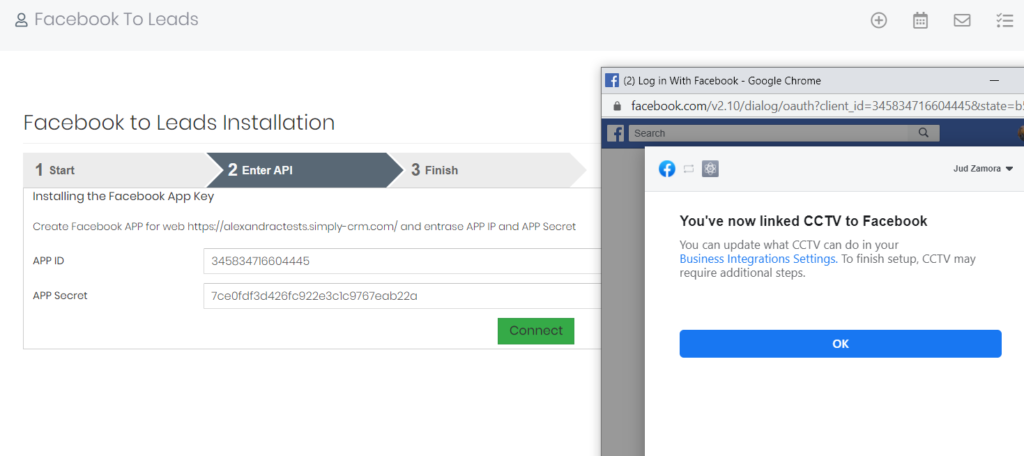
Then, connect your page with Simply CRM by entering your App ID and App Secret.
You’ll be promoted to choose the Facebook page you wish to select.
Click Next and provide the permissions as needed. Then, scroll to the bottom and click Finish.
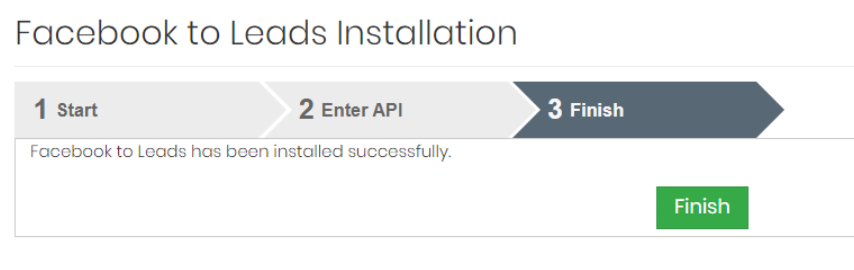
Once you finish the configuration, you’ll get access to the Facebook to Leads homepage, as shown below.
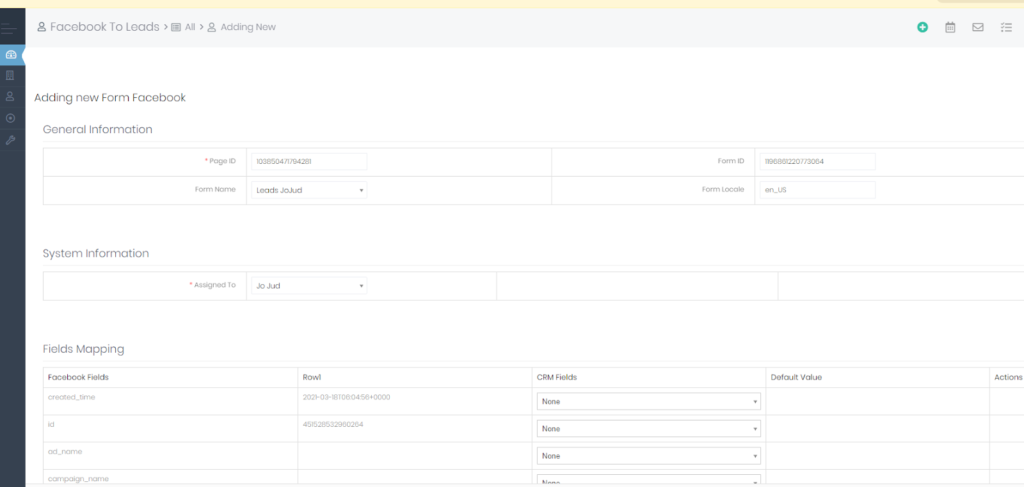
Click Create and enter the page ID of your preferred Facebook page. Then select the lead form from which the leads will be imported.
Once you’ve chosen your page and lead form, you’ve successfully set up Facebook to Leads in your Simply CRM instance.
In the end, you can test your configuration by visiting:
https://developers.facebook.com/tools/lead-ads-testing/. Simply choose the page you set up and the form you created. Then, click Create Lead.
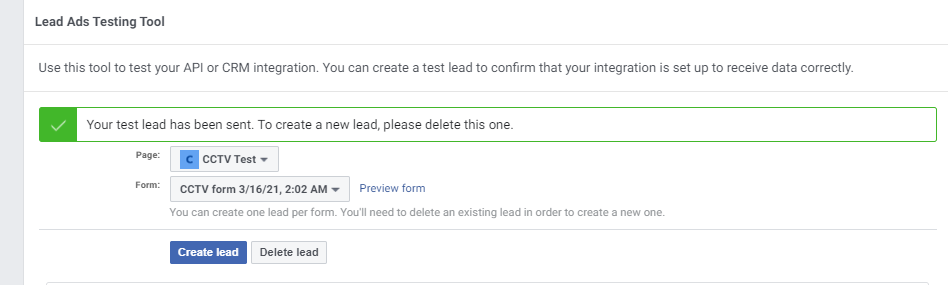
If a new lead appears in your Simply CRM, you’ve successfully integrated Facebook for Leads. In case you have any problems, please revisit the instructions or reach out to our support team.


