Simply CRM allows you to personalize your record view by adding or editing fields inside modules.
How to personalize your record view
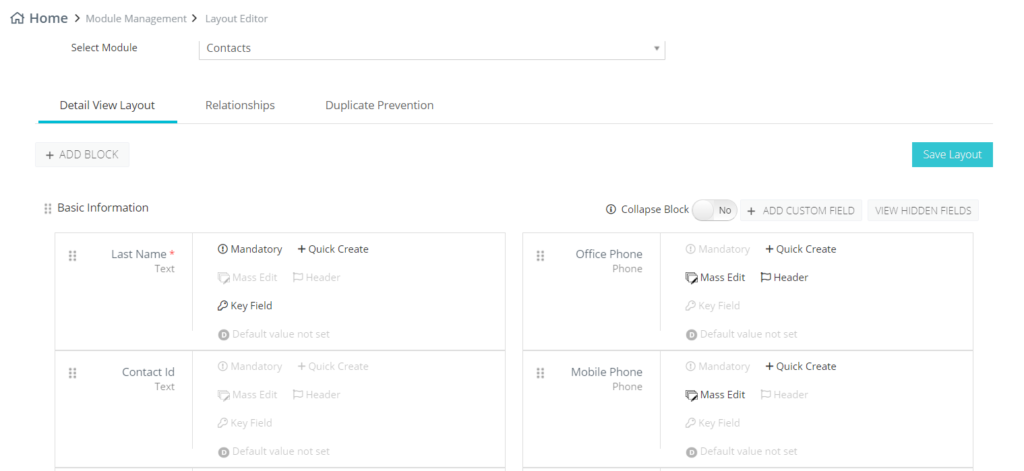
In Simply CRM, each module has a defined number of fields and blocks that are used to store information. The Module Layouts & Fields option allows you to create custom fields, edit existing field properties, or move the fields across various blocks.
There are two ways to open the Module Layouts & Fields option.
You can open it by expanding the User drop-down menu in the top right corner and selecting Settings. Then, go to Module Management and choose the Module Layouts & Fields feature.
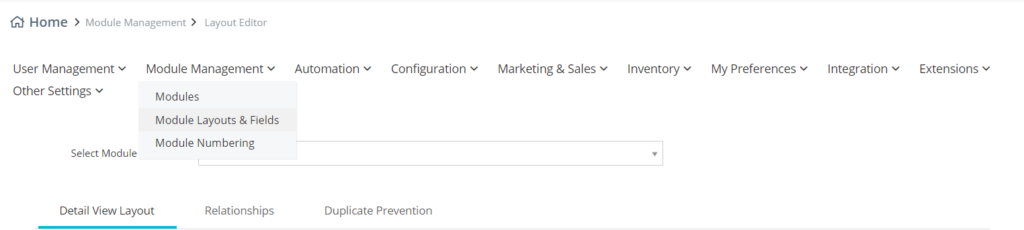
Alternatively, you can open this feature by going through an existing module. In that case, you will need to open a module, e.g. Deals, and select the Customize option in the top right corner.
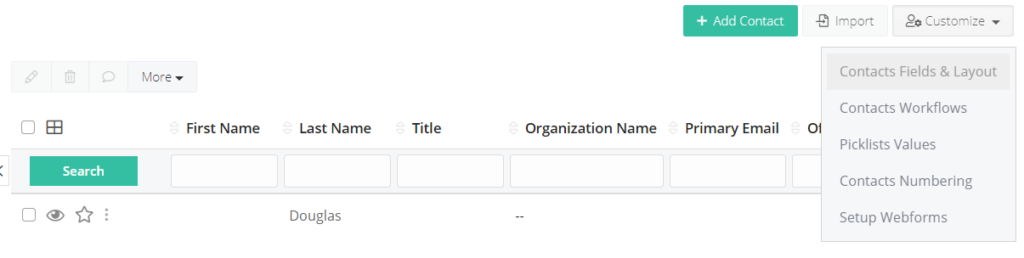
There, you will go to Deals Layouts & Fields.
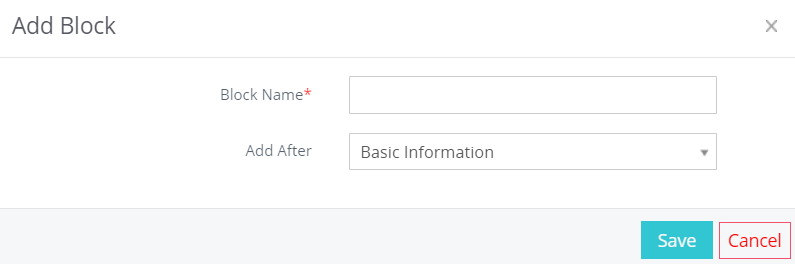
Create a custom block
Each module in Simply comes with a few default blocks, but you can always add more blocks to your modules. Follow the instruction below to create a custom block.
Press the Add Block button. Set the block name and configure the Add After option by selecting a block from the drop-down menu. Click Save.
Add a custom field
You can further expand your modules by adding custom fields to complement the default ones.
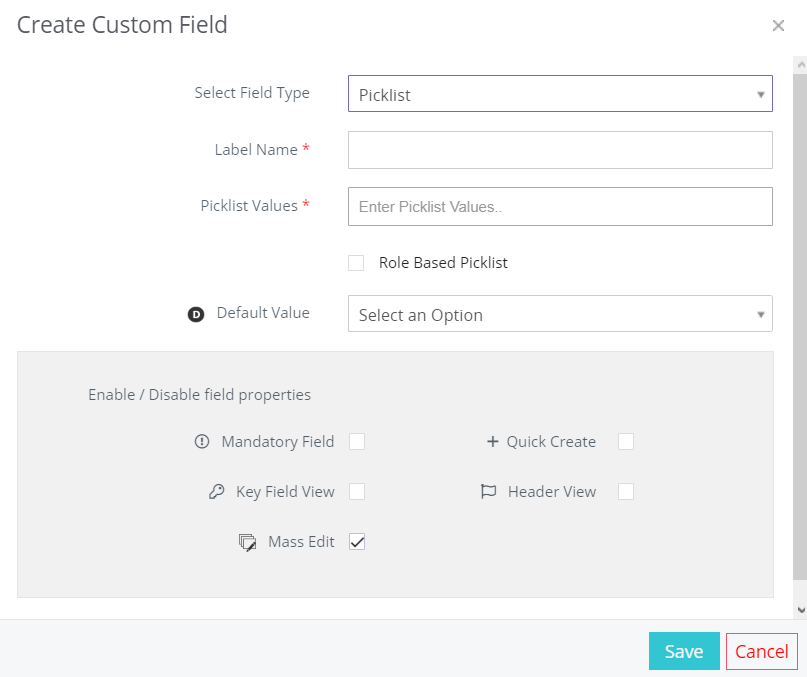
To create a custom field, press the Add Custom Field button on the right side. Enter the field details in the resulting pop-up window.
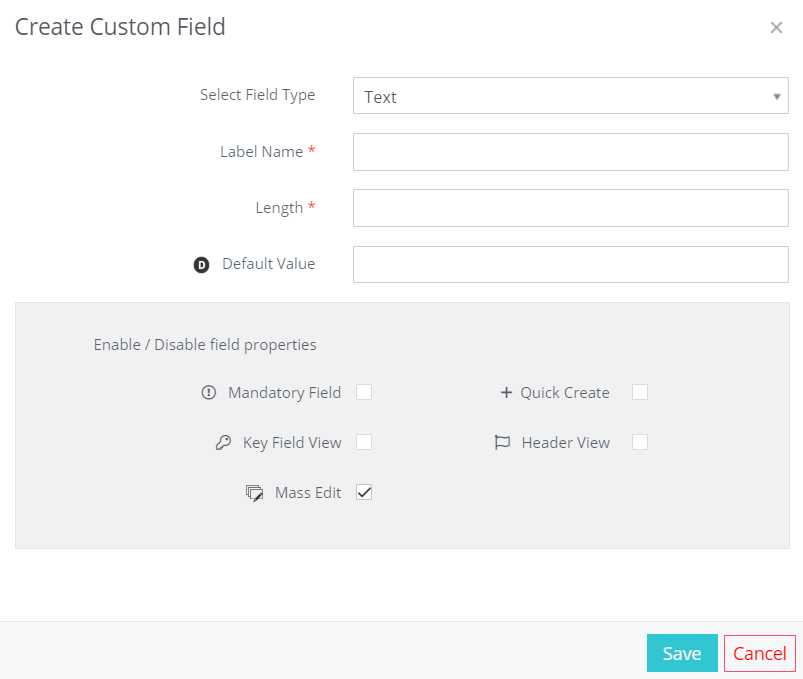
You can configure the field name in the Label Name box and specify the field length in the second mandatory option.
Don’t forget to provide the default value and enable or disable special field properties for your custom field.
After you enter all the relevant information, click Save.
Simply CRM supports a number of different field types. Keep reading for a detailed breakdown of all available field types.
| Field Type | Description | Information |
| Text | Used to add text | Label: Provide field name Length: Provide field size Maximum characters: 255 |
| Decimal | Used to add decimals | Label: Provide field name Length: Provide field size Decimal: Provide number of decimal places Maximum characters: 59 |
| Integer | Used to add integers | Label: Provide field name Length: Provide field size Maximum characters: 255 |
| Percent | Used to add percentages | Label: Provide field name |
| Currency | Used to add currencies | Label: Provide field name Length: Provide field size Maximum characters: 255 |
| Date | Used to add dates | Label: Provide field name |
| Used to add email addresses | Label: Provide field name | |
| Phone | Used to add phone numbers | Label: Provide field name |
| Picklist | Used to add drop-down fields | Label: Provide field name Picklist values: Provide picklist values |
| Checkbox | Used to add checkboxes | Label: Provide field name |
| Text area | Used to add long text | Label: Provide field name |
| Multi-select Combo Box | Used to add the picklist field to select multiple values | Label: Provide field name Picklist values: Provide picklist values |
| Skype | Used to add Skype ID | Label: Provide field name |
| Time | Used to add time | Label: Provide field name |
| URL | Used to add website addresses | Label: Provide field name |
Create a custom Picklist field
In addition to default fields, you can also add Picklist fields to your instance of Simply CRM. Follow the instructions given below to create a new Picklist field.
Press the Add Custom Field button in the top right corner and enter the field details in the resulting pop-up box. Select Picklist as the field type.
Then, you can start adding Picklist values. Enter value L1 and press Enter to add a Picklist value. You can repeat this until you have the necessary number of values.
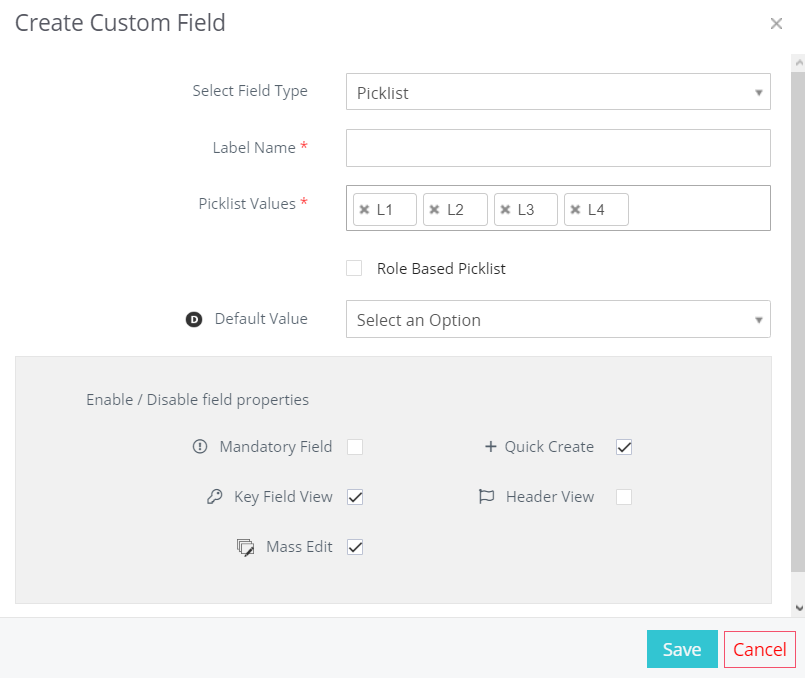
Set the default field value and check or uncheck the specific field properties listed in the pop-up box.
When you finish adding all the details, press Save to create your custom Picklist field.
Rearrange fields
Simply CRM lets you freely rearrange your fields and move them across blocks. Follow these steps to rearrange your fields:
- In the Layouts & Fields of a specific module, click on the field that you want to move.
- Drag the field to your preferred locations.
- Press the Save Layout button to confirm the changes.
Edit field properties
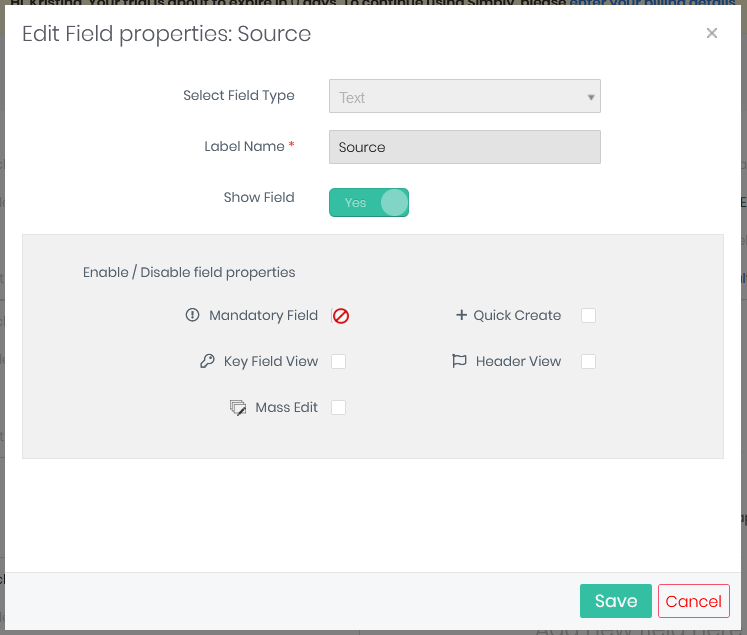
Once you create a field, the system will forbid any changes in the Field Type and Label Name properties in order to preserve the data structure and integrity. If you need a field with a different Field Type and/or Label Name, you can create a new field and configure its values as necessary.
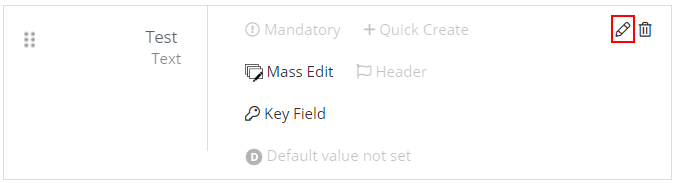
Simply CRM allows you to edit the field properties by pressing the pencil icon in the top right corner of the field’s block.
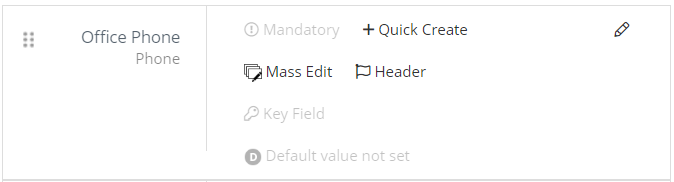
In the resulting pop-up window, you’ll be able to edit the following settings: Mandatory Field, Key Field View, Mass Edit, Quick Create and Header View. Each of these options can be enabled or disabled for custom fields.
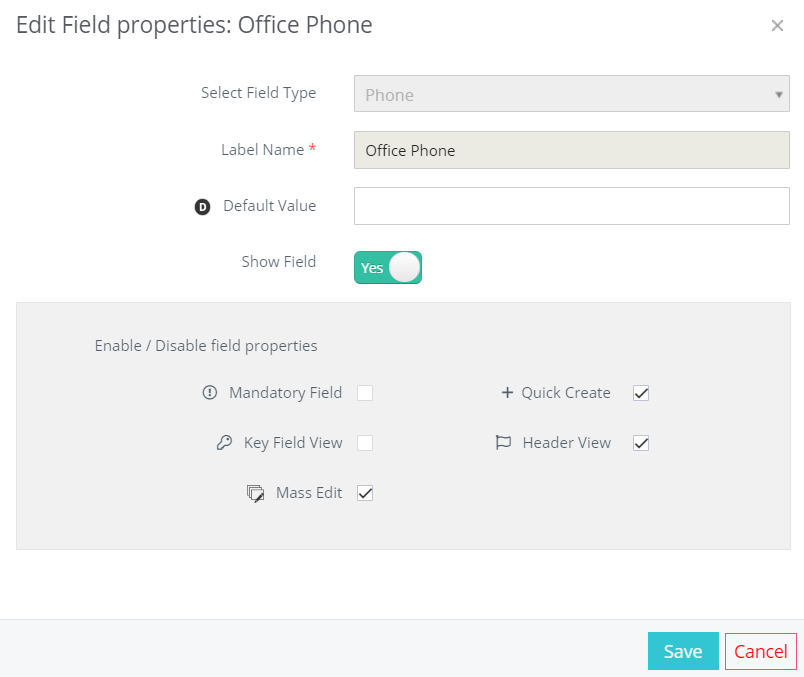
When editing preset fields, some of these properties may be limited to preserve data integrity.
You can check whether or not a field property can be edited by simply hovering over it in the pop-up window. If the cursor turns into a warning symbol, the property cannot be edited.
After you finish customizing the field properties, click Save to confirm the changes.
Make fields mandatory or non-mandatory
Simply CRM lets you have complete power over fields. This means you can select which fields are mandatory or non-mandatory. Mandatory fields must always be filled in and you cannot create or import any records without entering data in the mandatory fields.
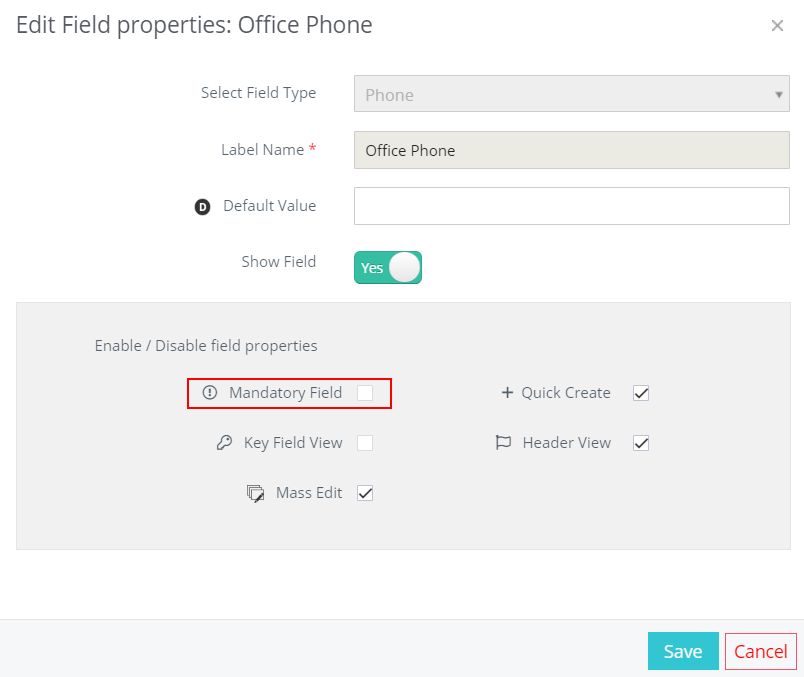
Here is how you can make a field mandatory in Simply.
Click on the Edit field button to open the edit pop-up box and check the Mandatory Field checkbox. Press Save to apply the change.
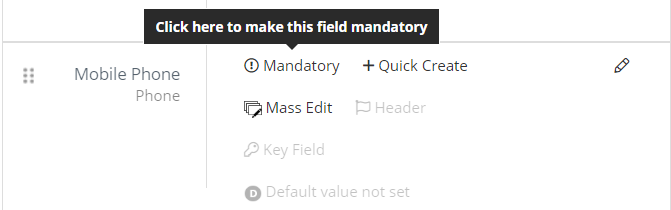
Alternatively, you can just click on the Mandatory option within the field.
If you want to make a field non-mandatory, follow the same procedure, but uncheck the Mandatory Field box.
Important: Some fields cannot be made non-mandatory. For example, the Last Name field in Contacts must be mandatory to create a relation between modules.
When an admin attempts to mark a field in an existing workflow, list, mailroom action, etc., he will receive a warning about the change.
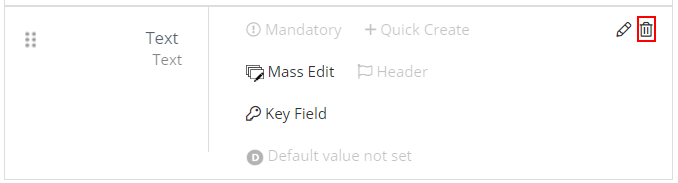
Delete fields
In case you no longer need your custom fields or you are not satisfied with the fields, you can delete them by pressing on the trash can icon.
You can delete a custom block by pressing the Delete Custom Block button in the top right corner.

When you delete a custom field, all data associated with it will be lost. If you want to preserve the data, you can hide the field to make it invisible to other users.
You can still view the hidden fields by pressing the View Hidden Fields button in the top right corner.
Important: You cannot delete the default fields, as they can only be hidden.
Hide fields
In case you need to preserve the data within the fields that you no longer need, you can use the hide option. Follow the instructions below to hide a custom field.
Click on the Edit option in the form of a pencil within a field.
In the resulting pop-up, press on the slider that says Show Field to turn it off. Click Save to update the field properties.

Important: Both default and custom fields can be hidden. However, mandatory fields can never be hidden.


