To help our clients use Simply CRM to its full extent, we have implemented support for the Google Calendar, which can easily be integrated into Simply. This article will explain how you can utilize all the features of Google Calendar within your instance of Simply CRM.
How to set up Google APIs
Before you start using Google Calendar, you will need to configure it in Simply. To achieve this, you will first need to open the Google API console and press on Select a project in the top left corner, as shown in the screenshot below.
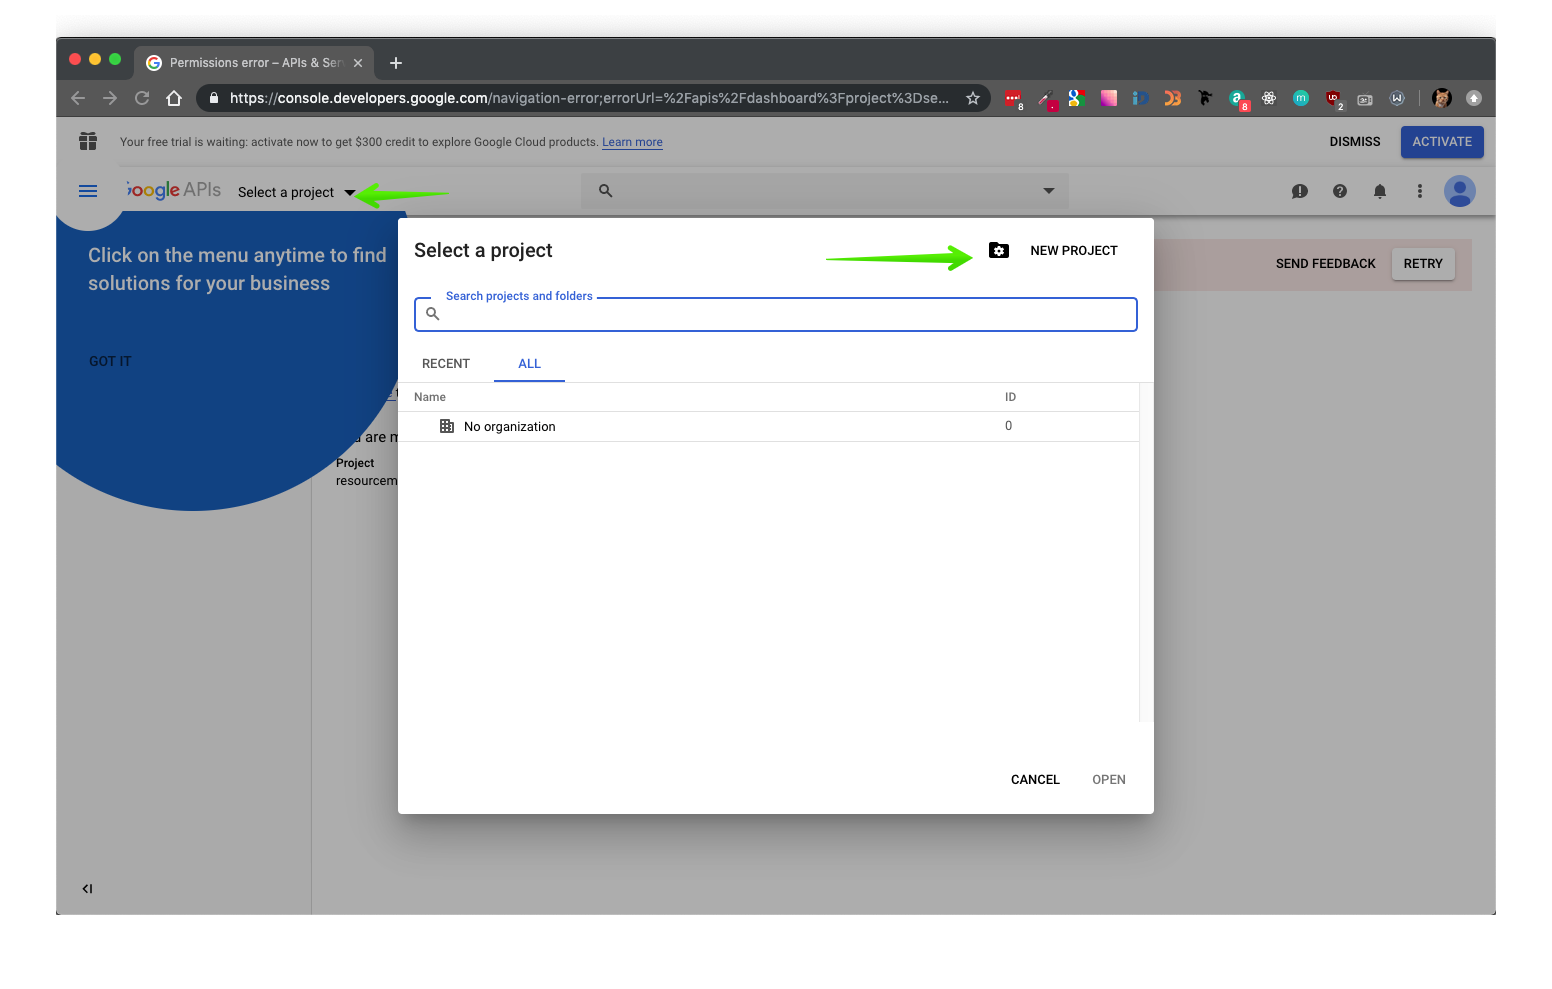
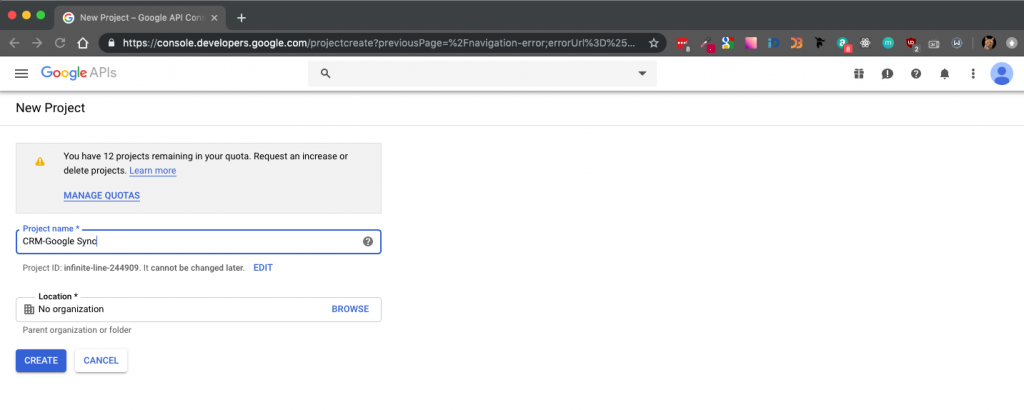
Press on New Project in the pop-up window and enter the project name.
Open the new API overview, as shown below.
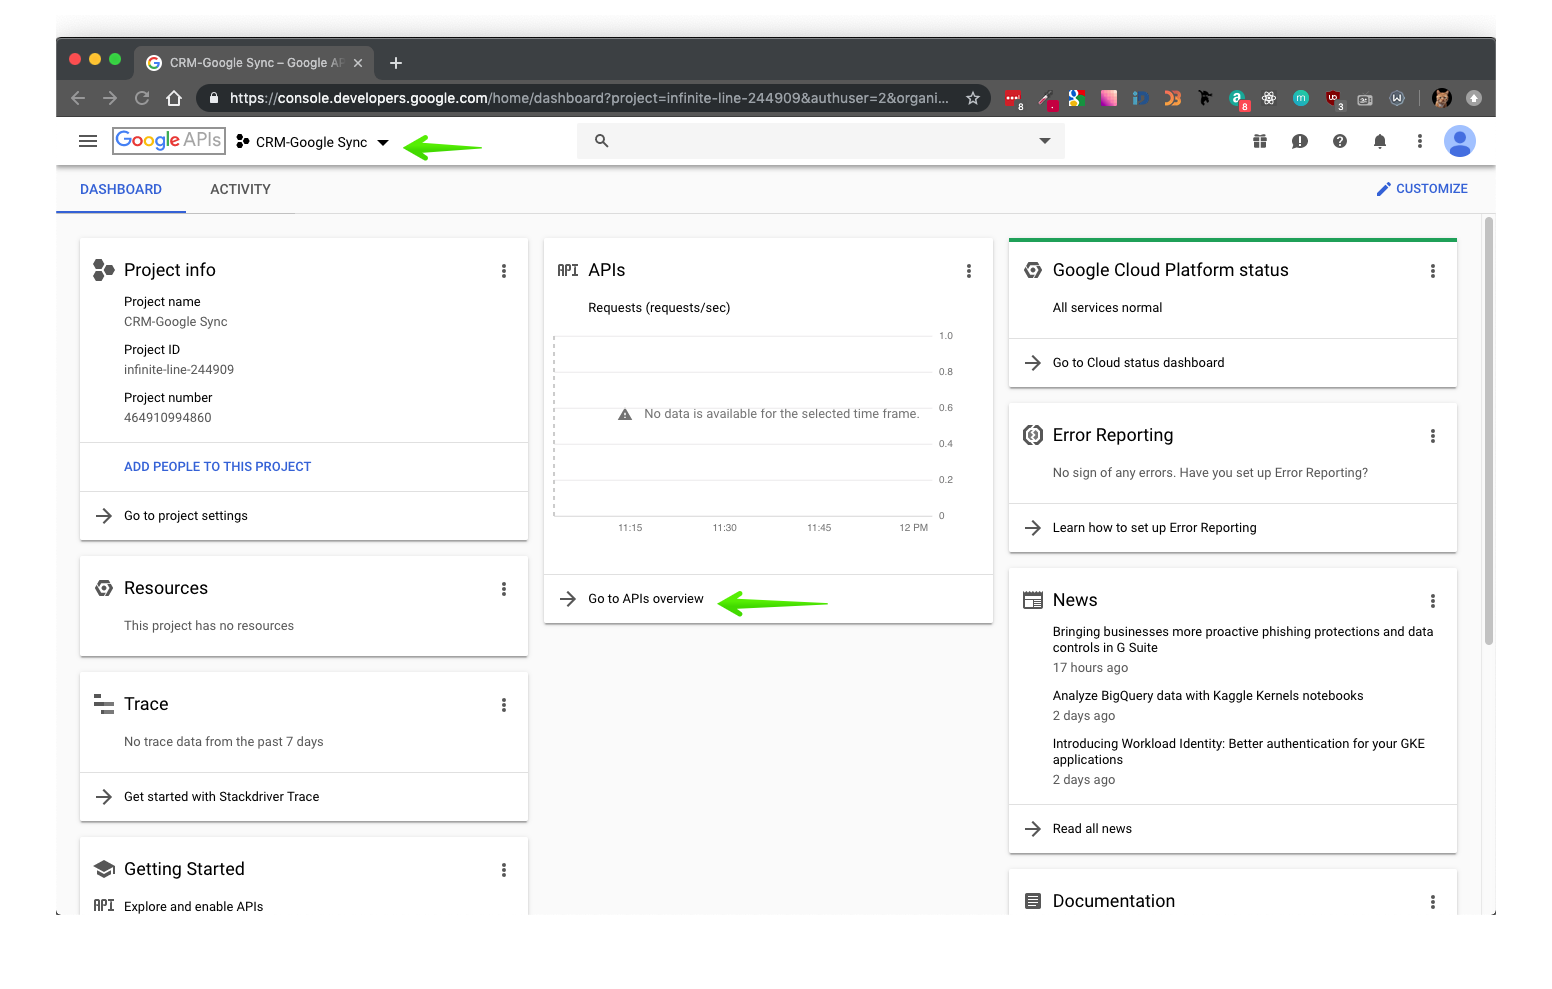
In the overview, press on the Enable Apps and Services button.

From the library, select and activate the Google Calendar API.
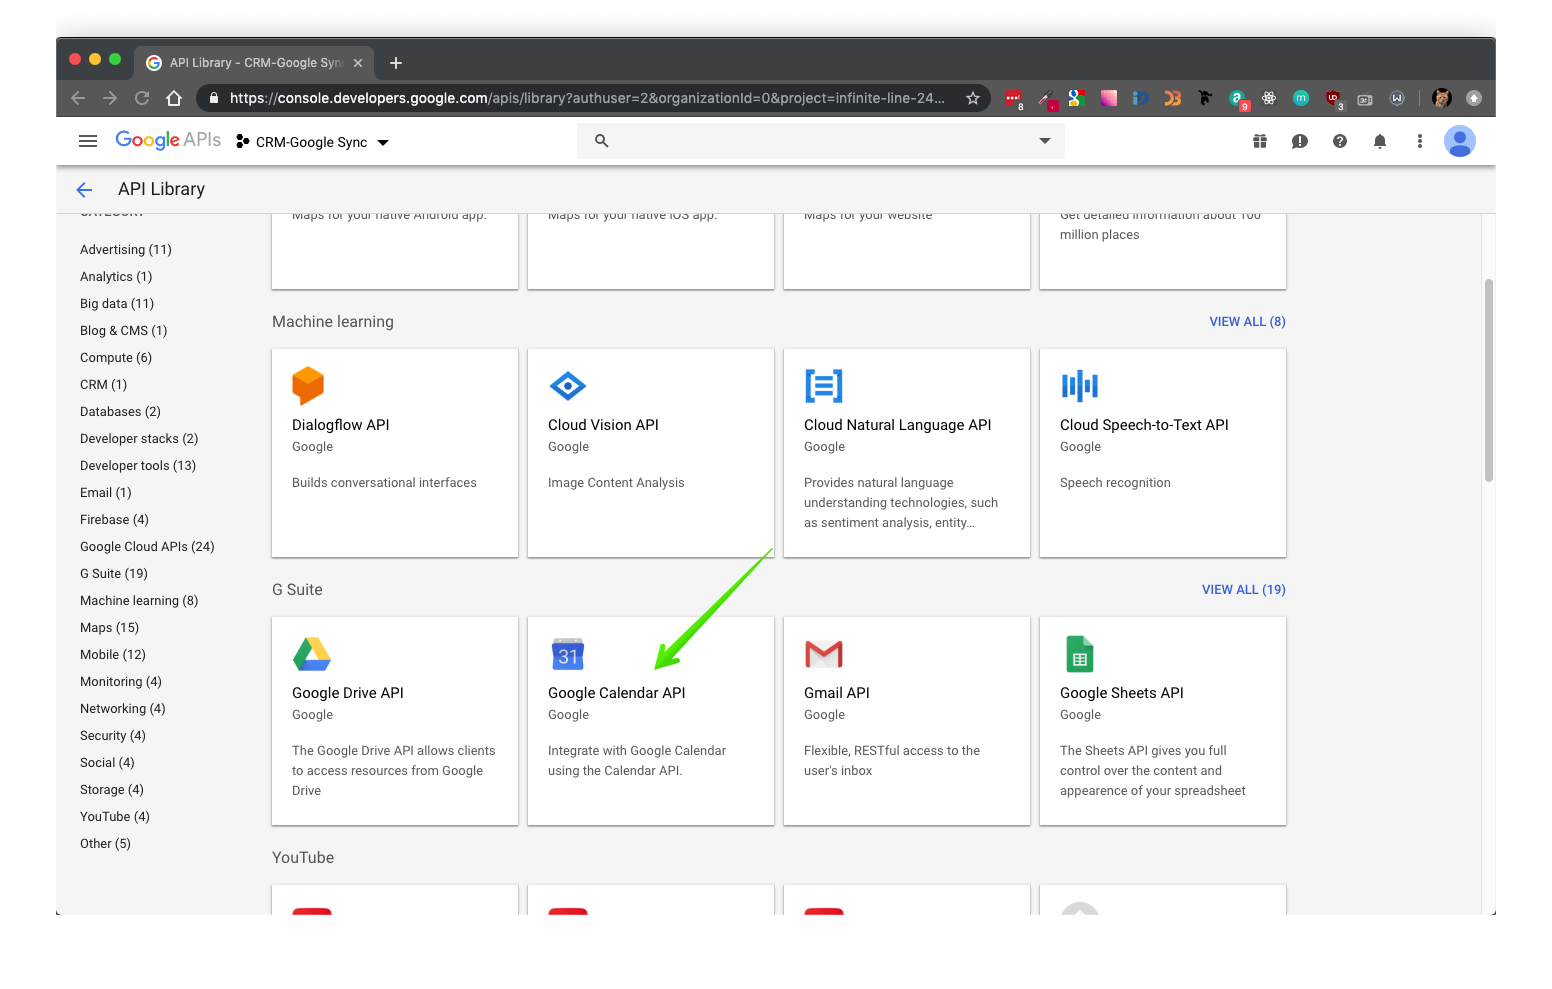
Then, search for the Contacts API and enable it.
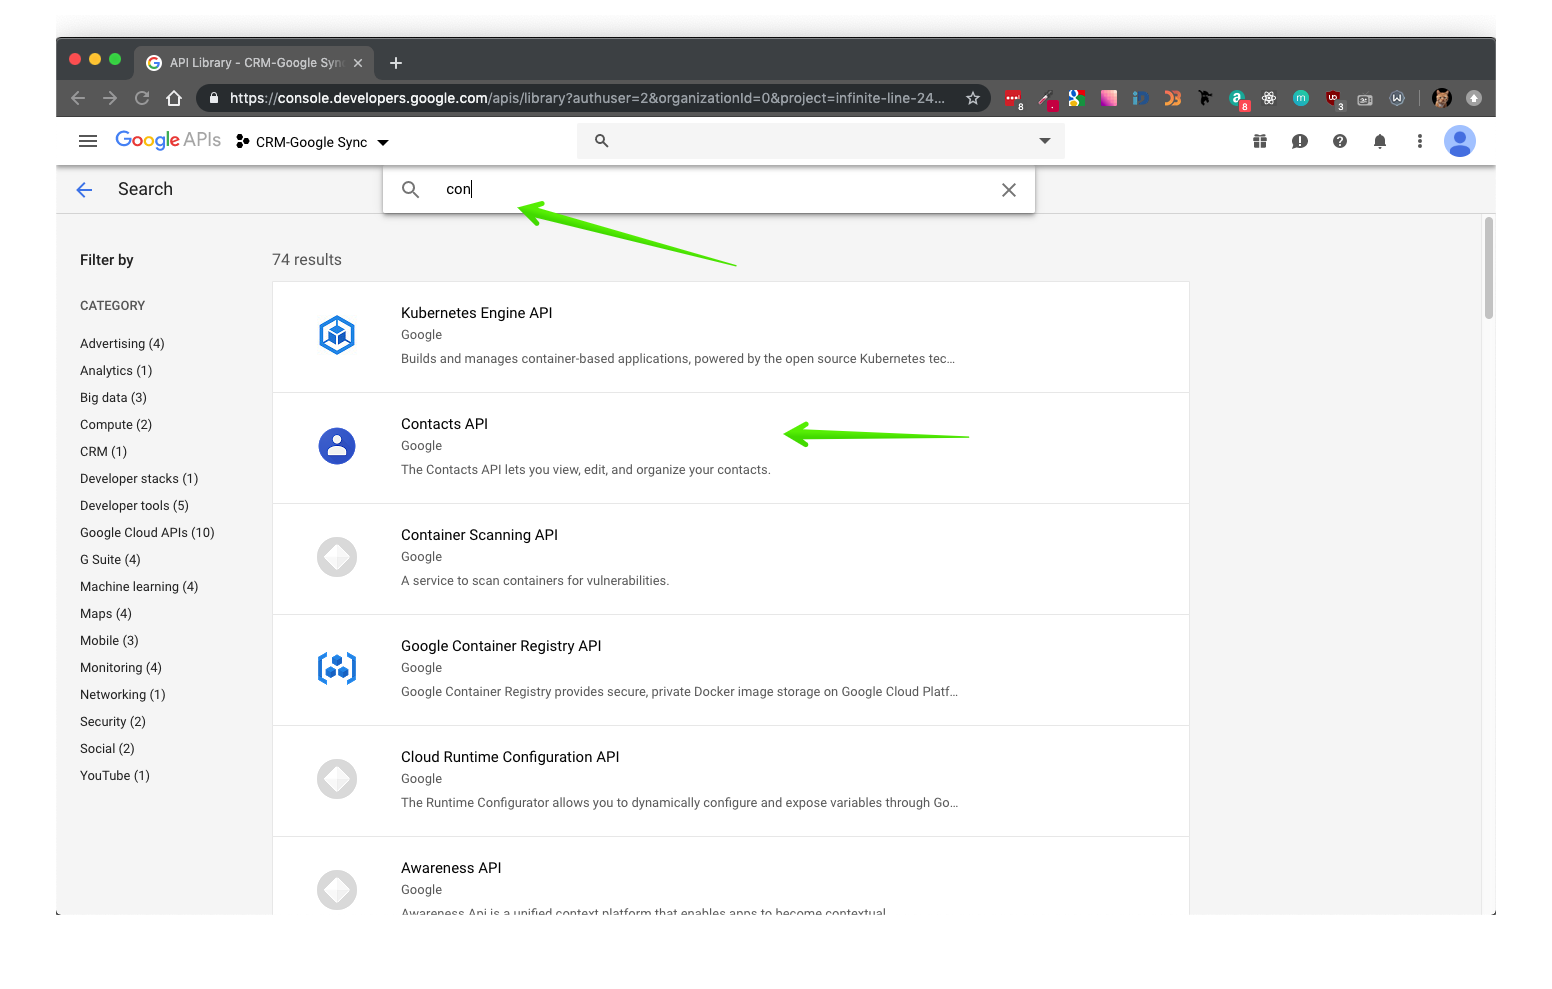
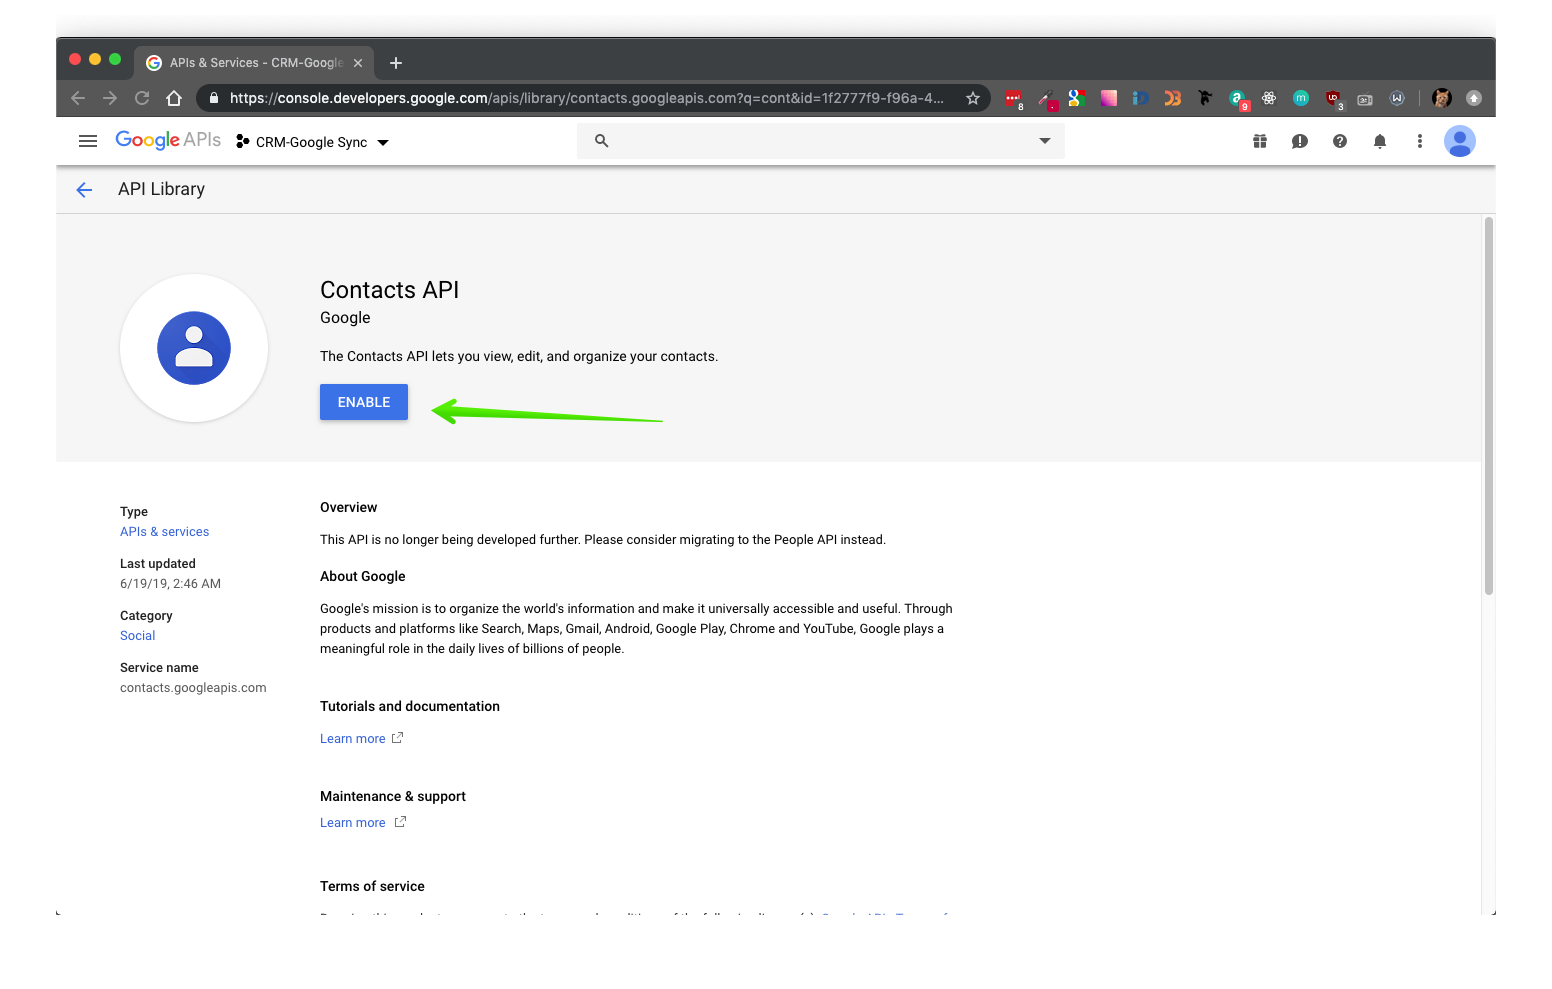
You can enable the Contacts API by pressing it on the results page and using the Enable button, as highlighted in the image below.
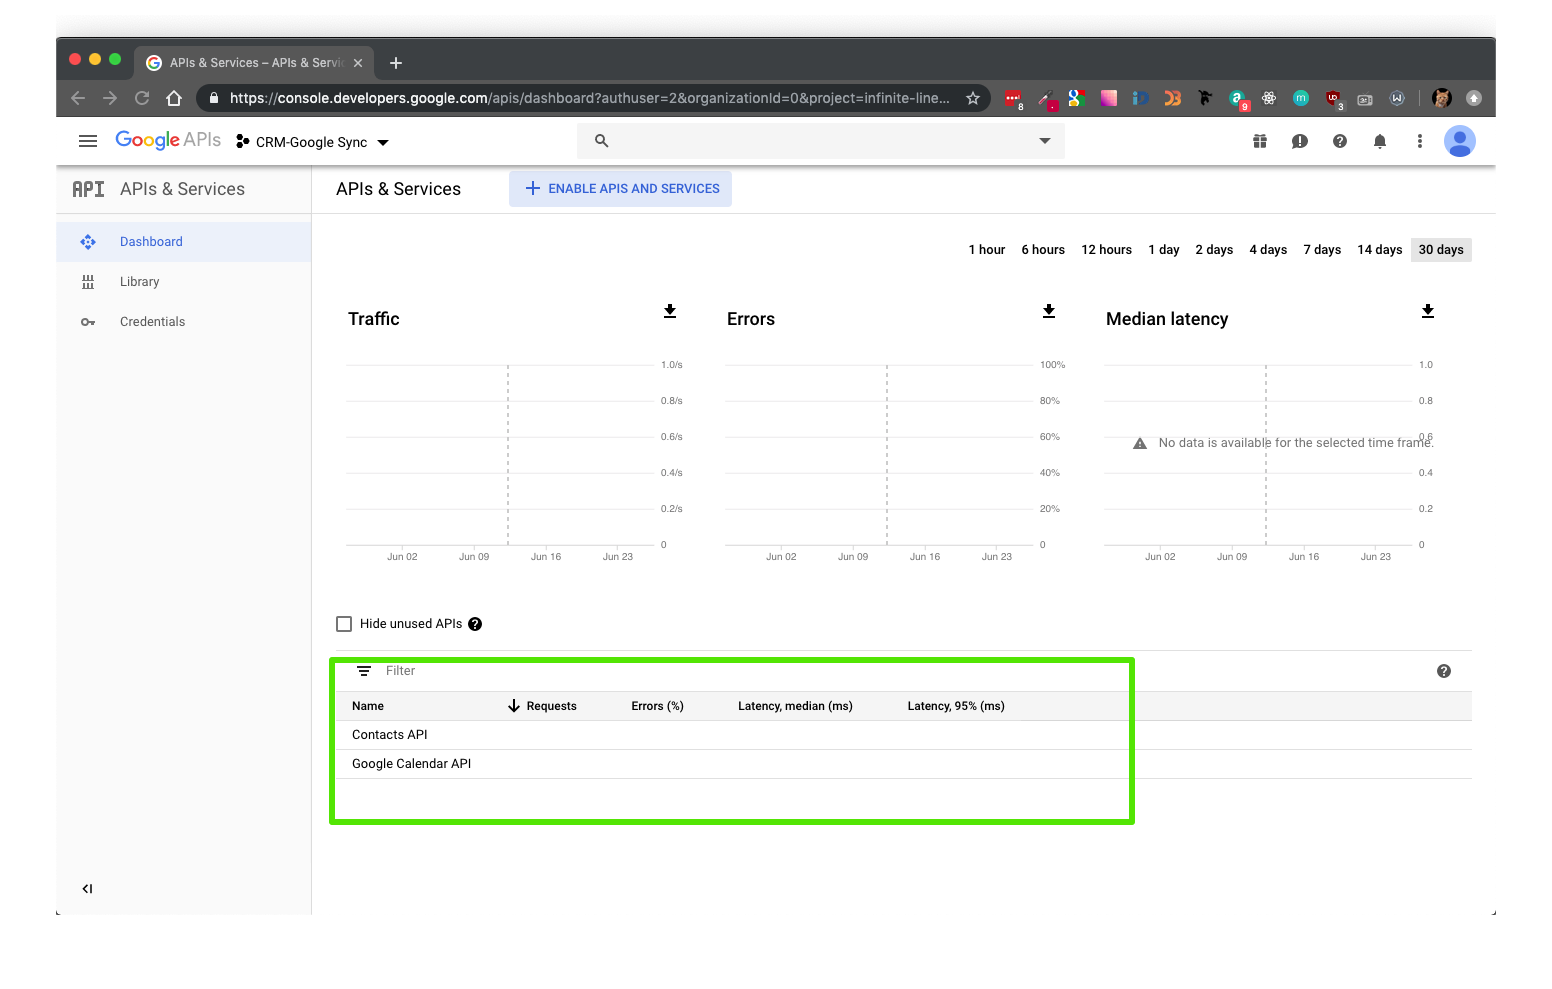
After you enable the Google Calendar API and the Contacts API, return to the project overview. It should show that you have activated the two APIs in the APIs & Services section.
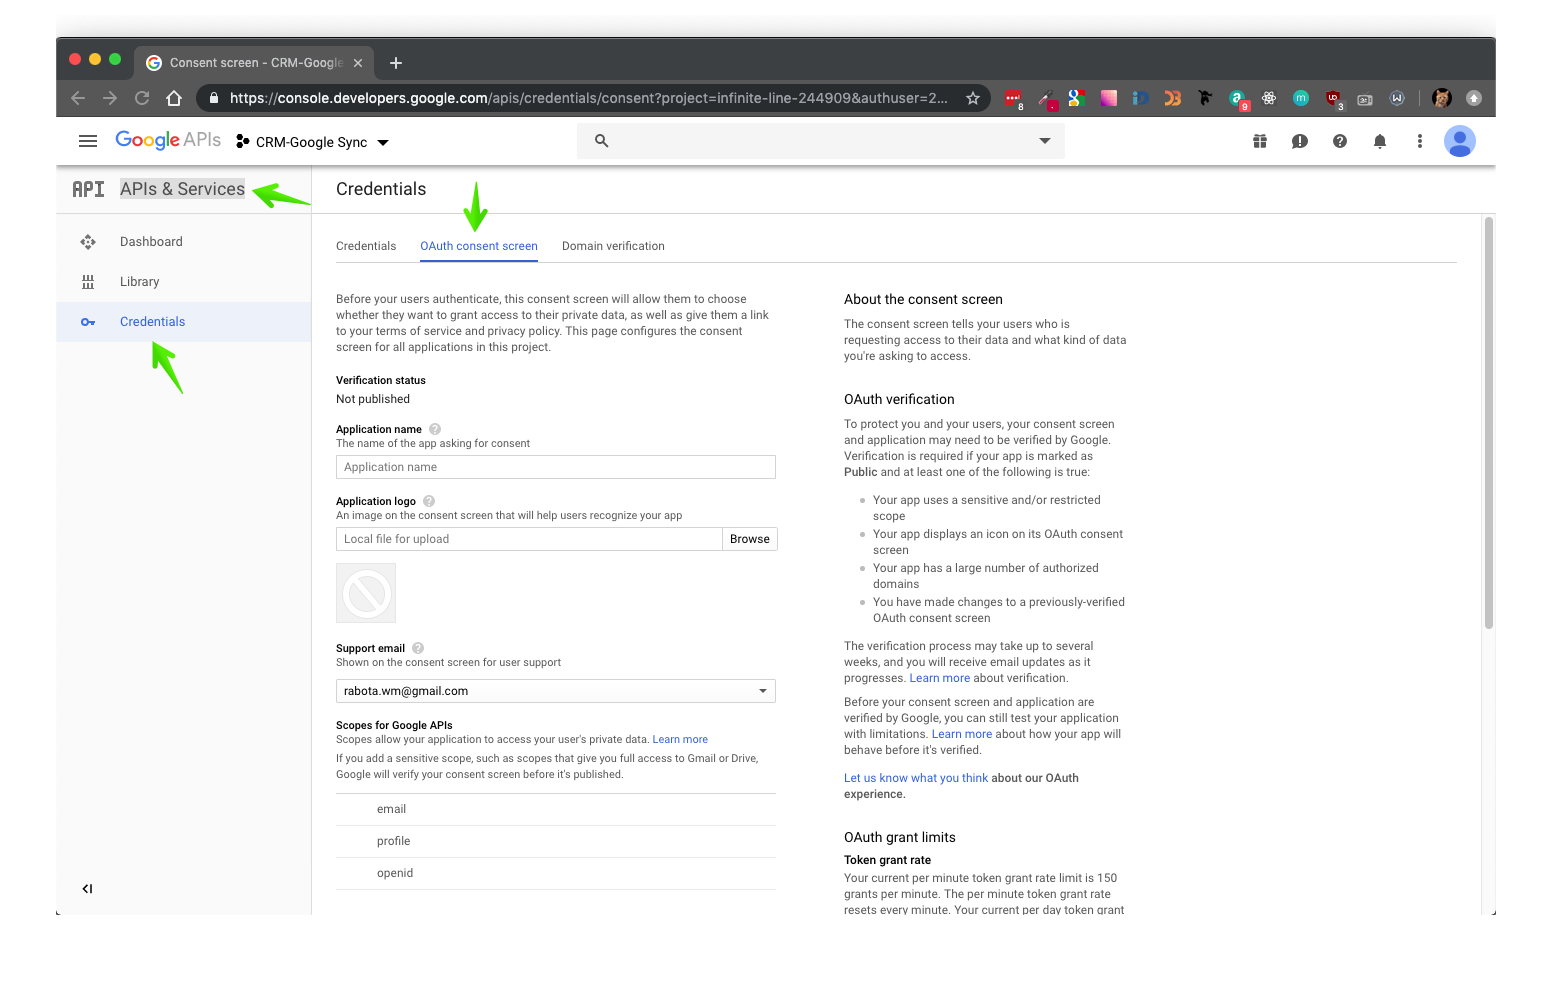
Now, when you open APIs & Services, you will need to select the Credentials tab on the left menu.
Under Credentials, choose OAuth Consent Screen and fill in the details. Set simplyhq.com and simply-crm.com as the authorized domains.
Enter yourcrmdomain.simply-crm.com as the application homepage link. Here, yourcrmdomain is a variable and you should enter the CRM domain that you selected when you set up your CRM instance.
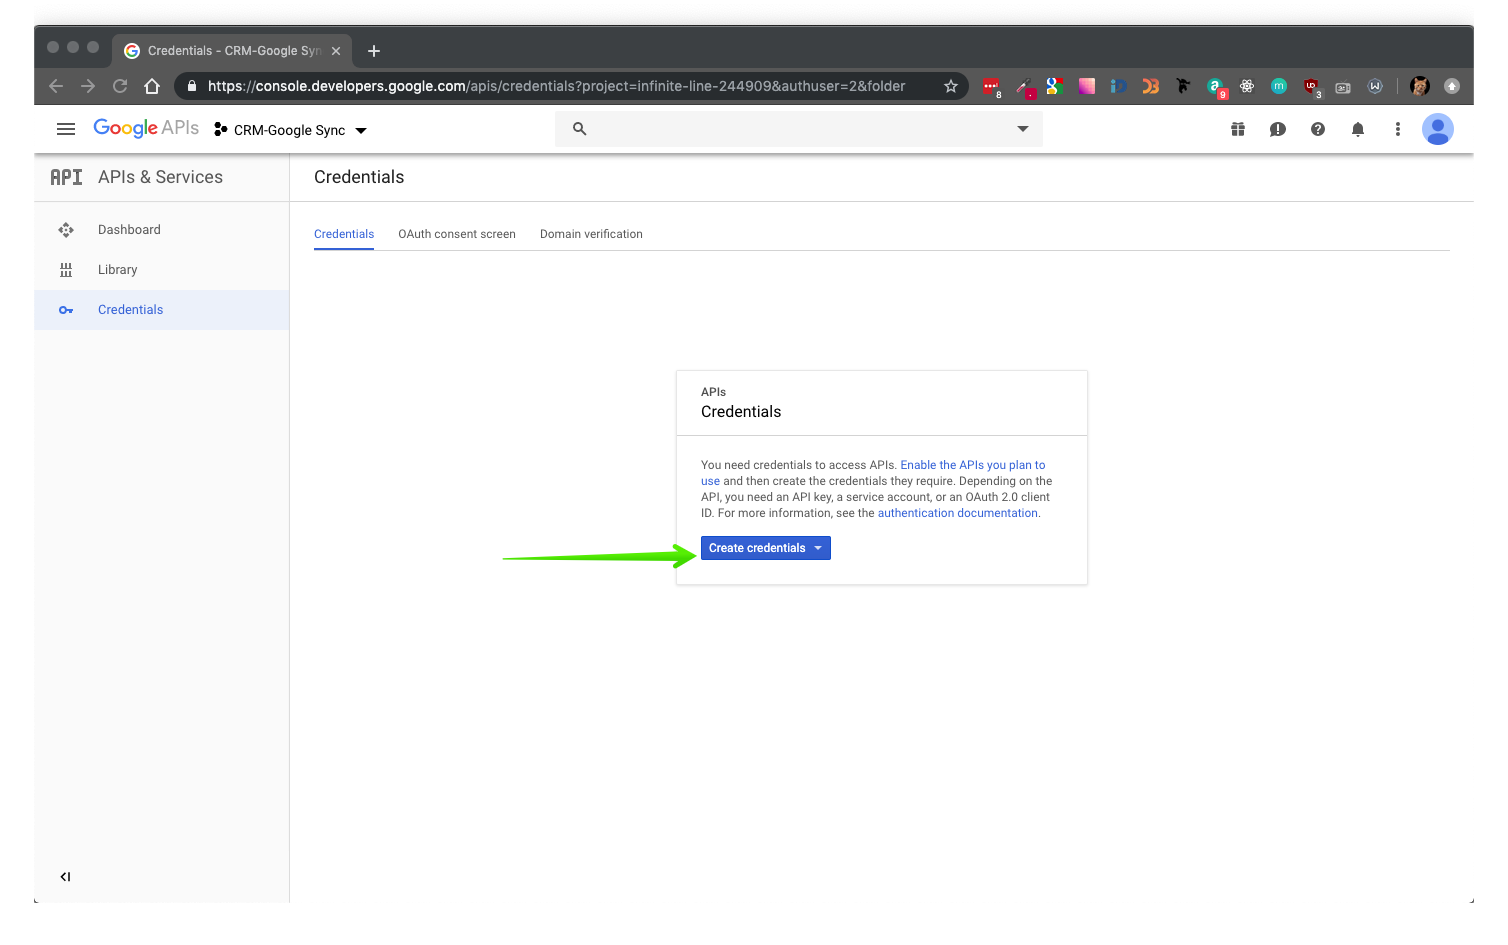
After that, you will need to create OAuth client ID credentials.
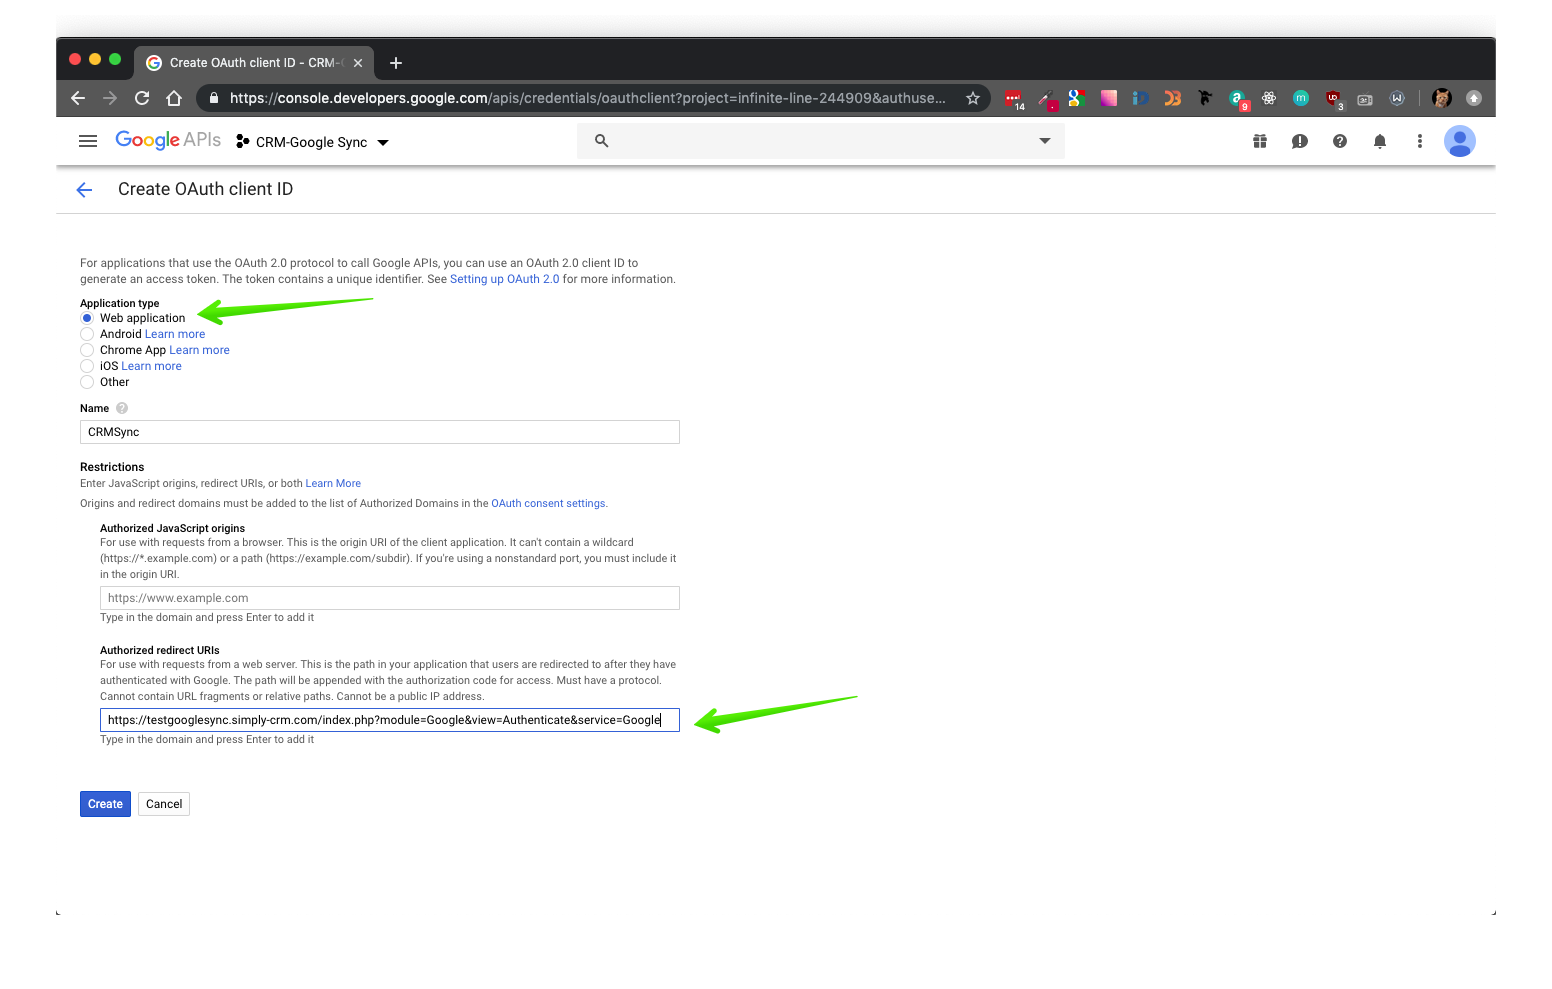
Choose Web application as the app type and set https://{your_CRM_URL}/index.php?module=Google&view=Authenticate&service=Google as the redirect URL.
Now, log into your instance of Simply CRM.
How to configure Google Calendar in Simply CRM
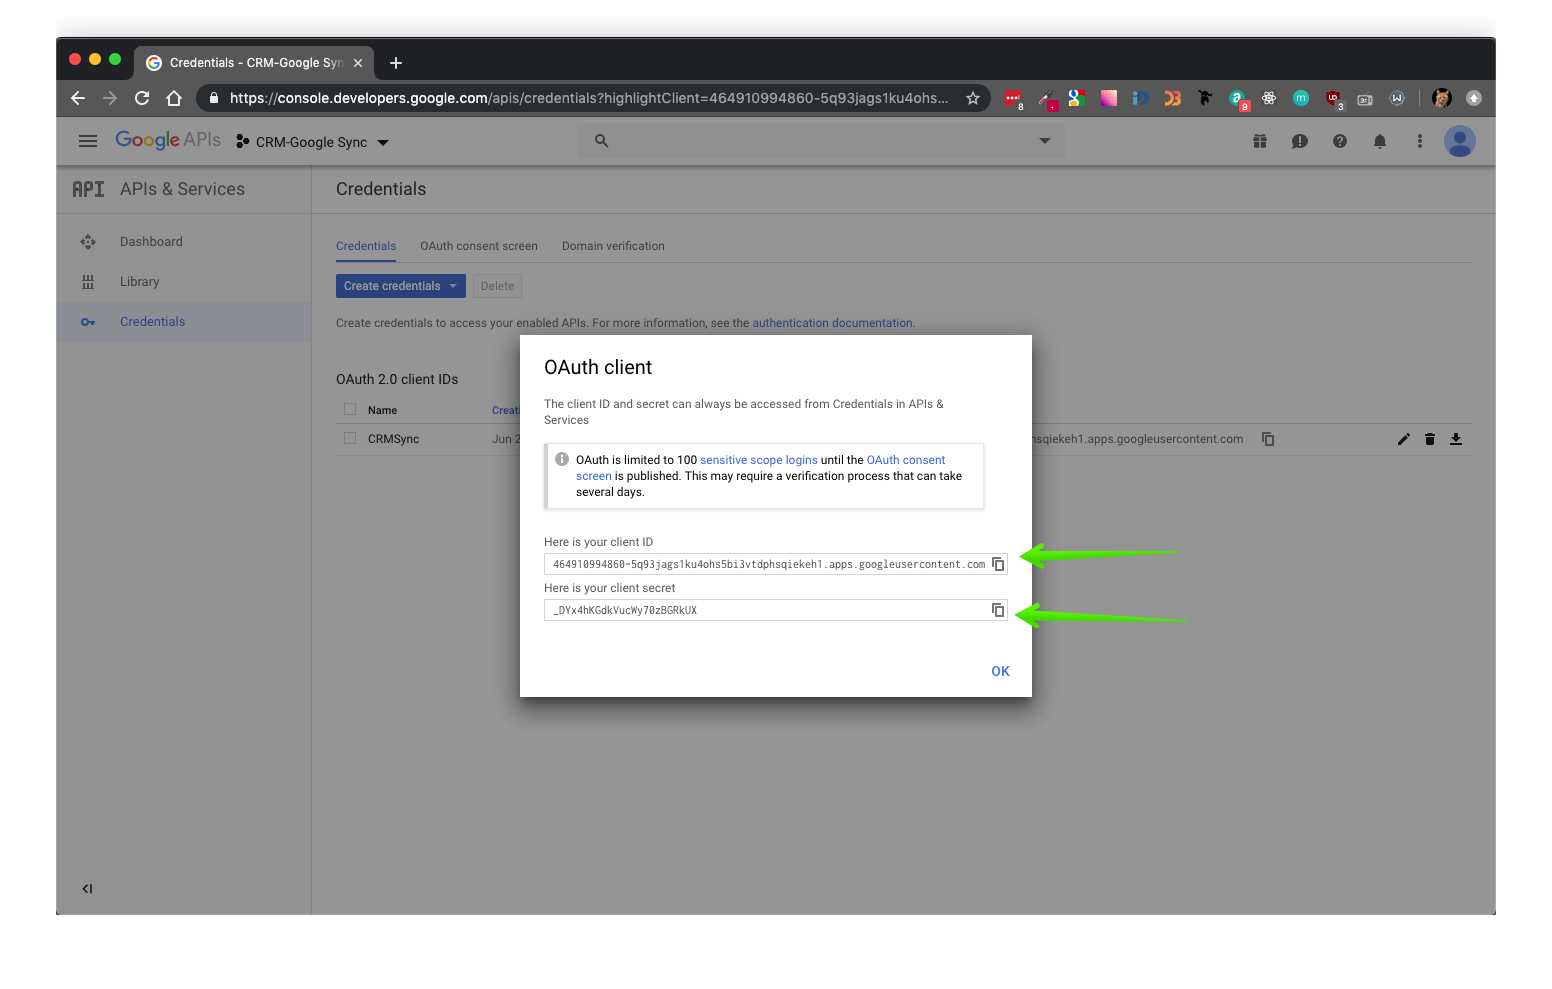
Copy the client ID and client secrets, go to CRM > Settings > Configuration > Configuration Editor and paste the credentials in the highlighted fields.

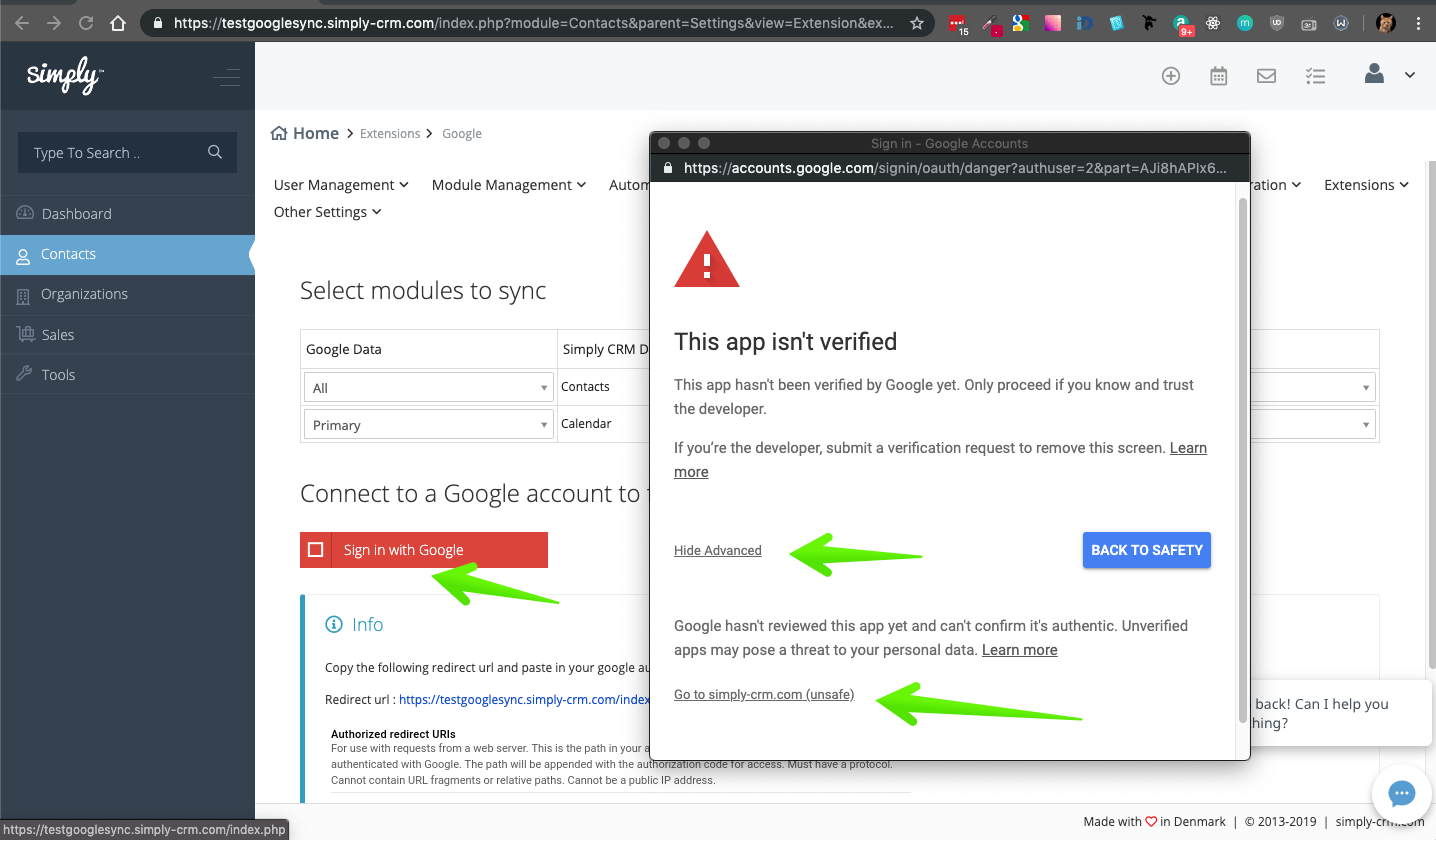
In Simply, open Settings and go to Extensions. Select Google and sign in with your Google account.
If you see a security alert, open the Advanced section and click on Go to simply-crm.com.
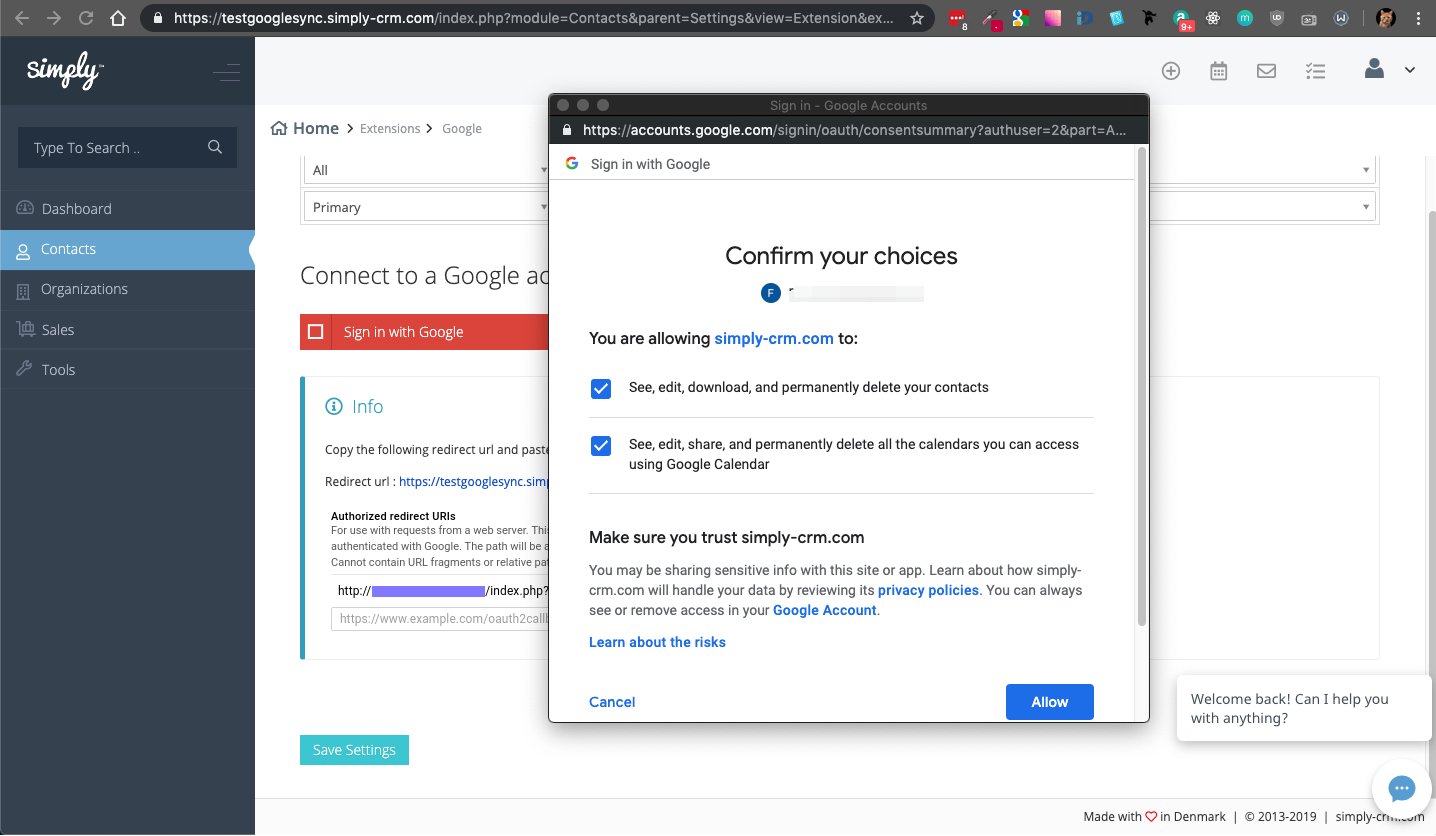
You will be asked to grant certain permissions to Simply CRM.
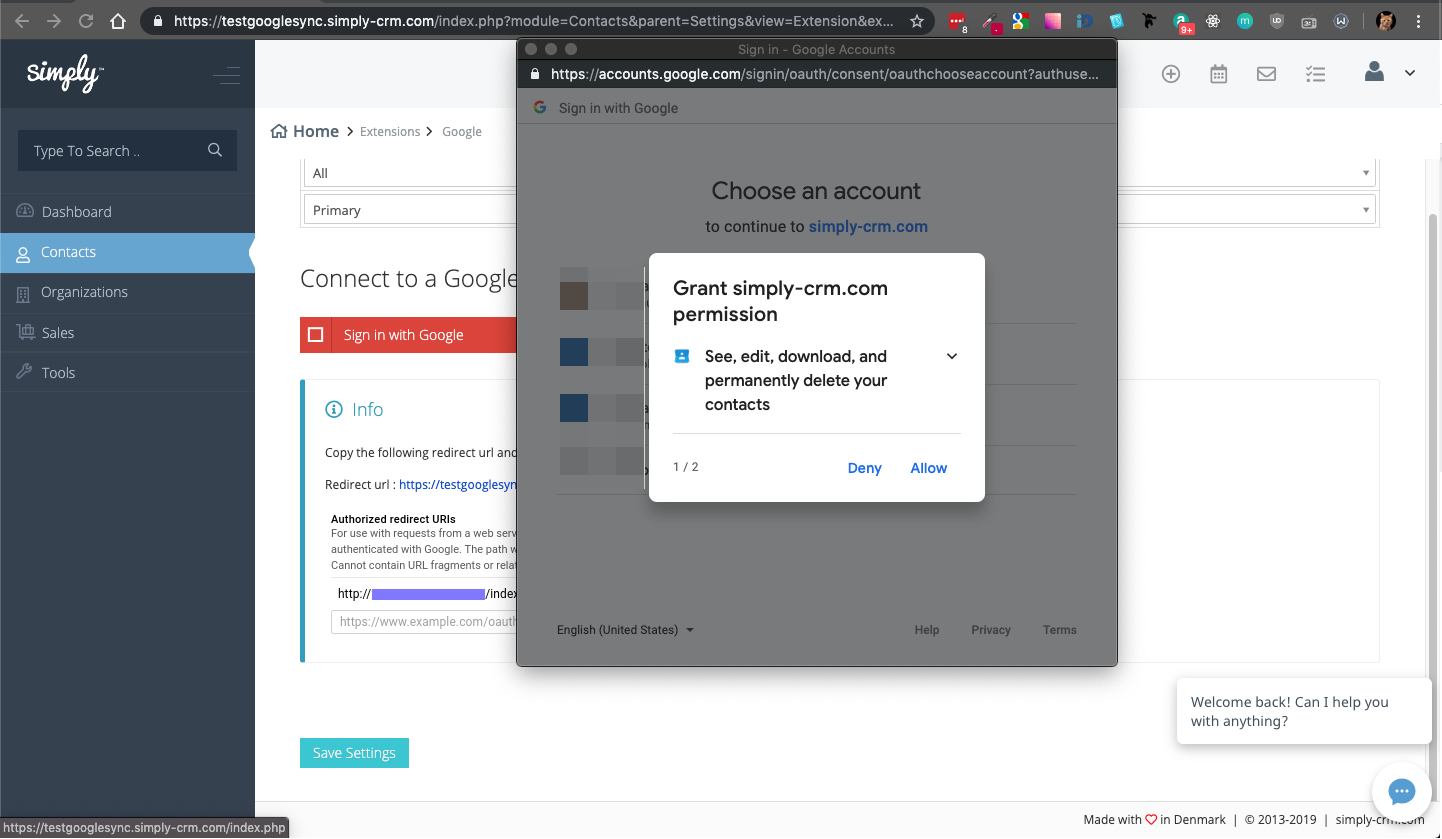
Press Allow and confirm the choice.
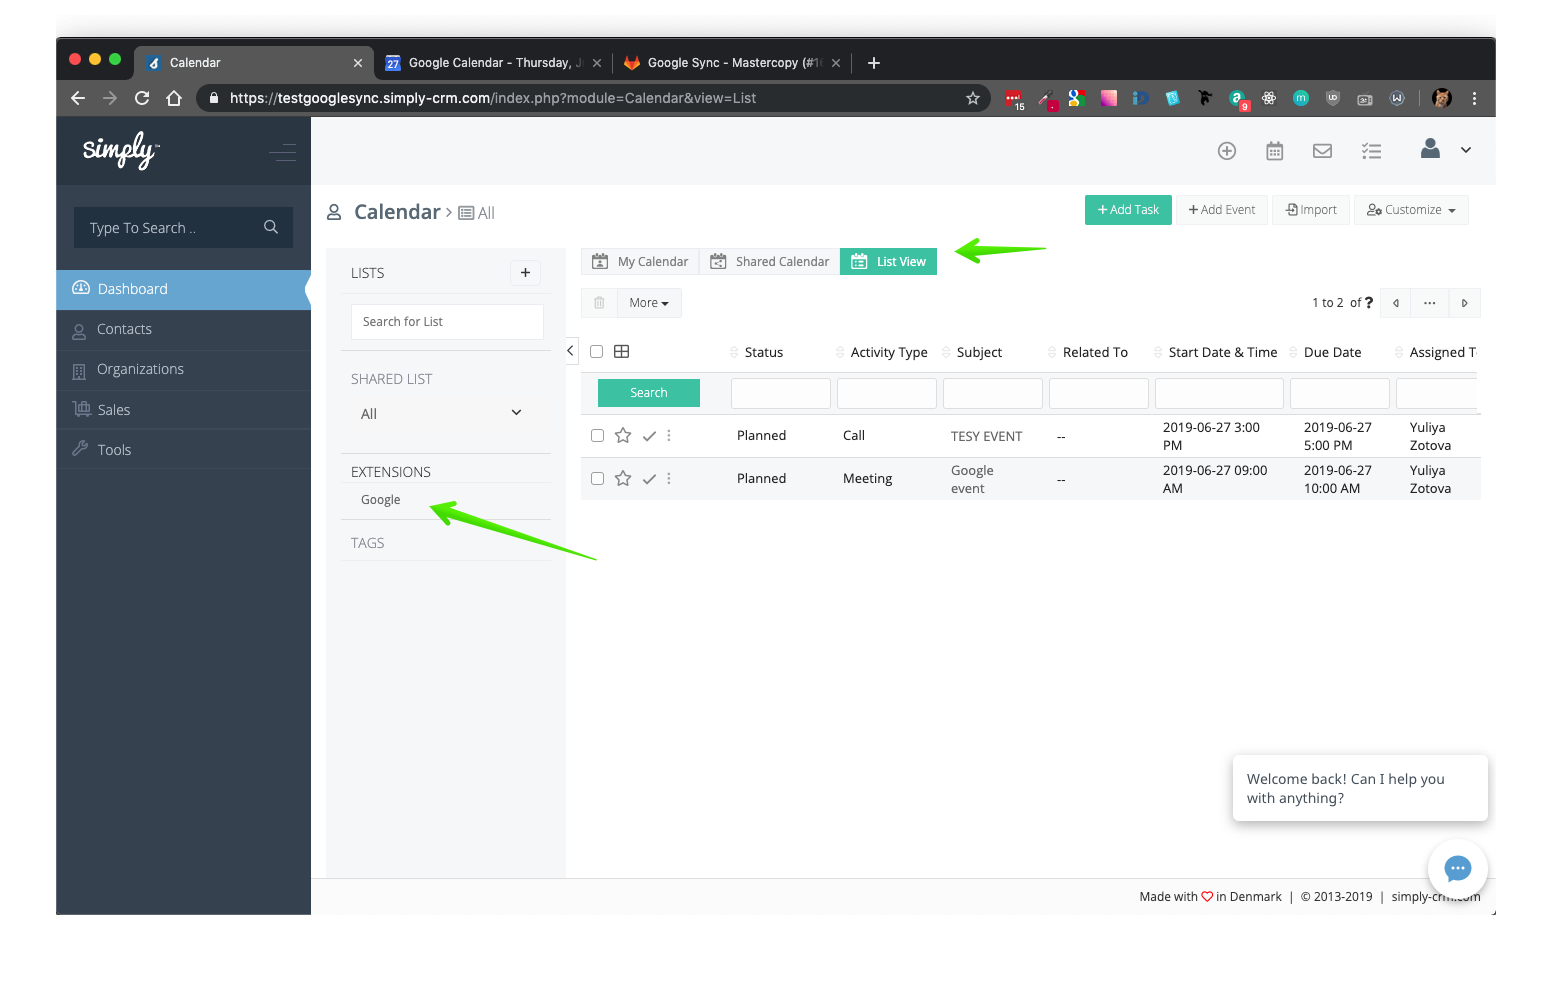
To make a sync, go to Calendar (or the Contacts module) and open its List view. From Extensions, select Google.
In the new window, press Sync Now.
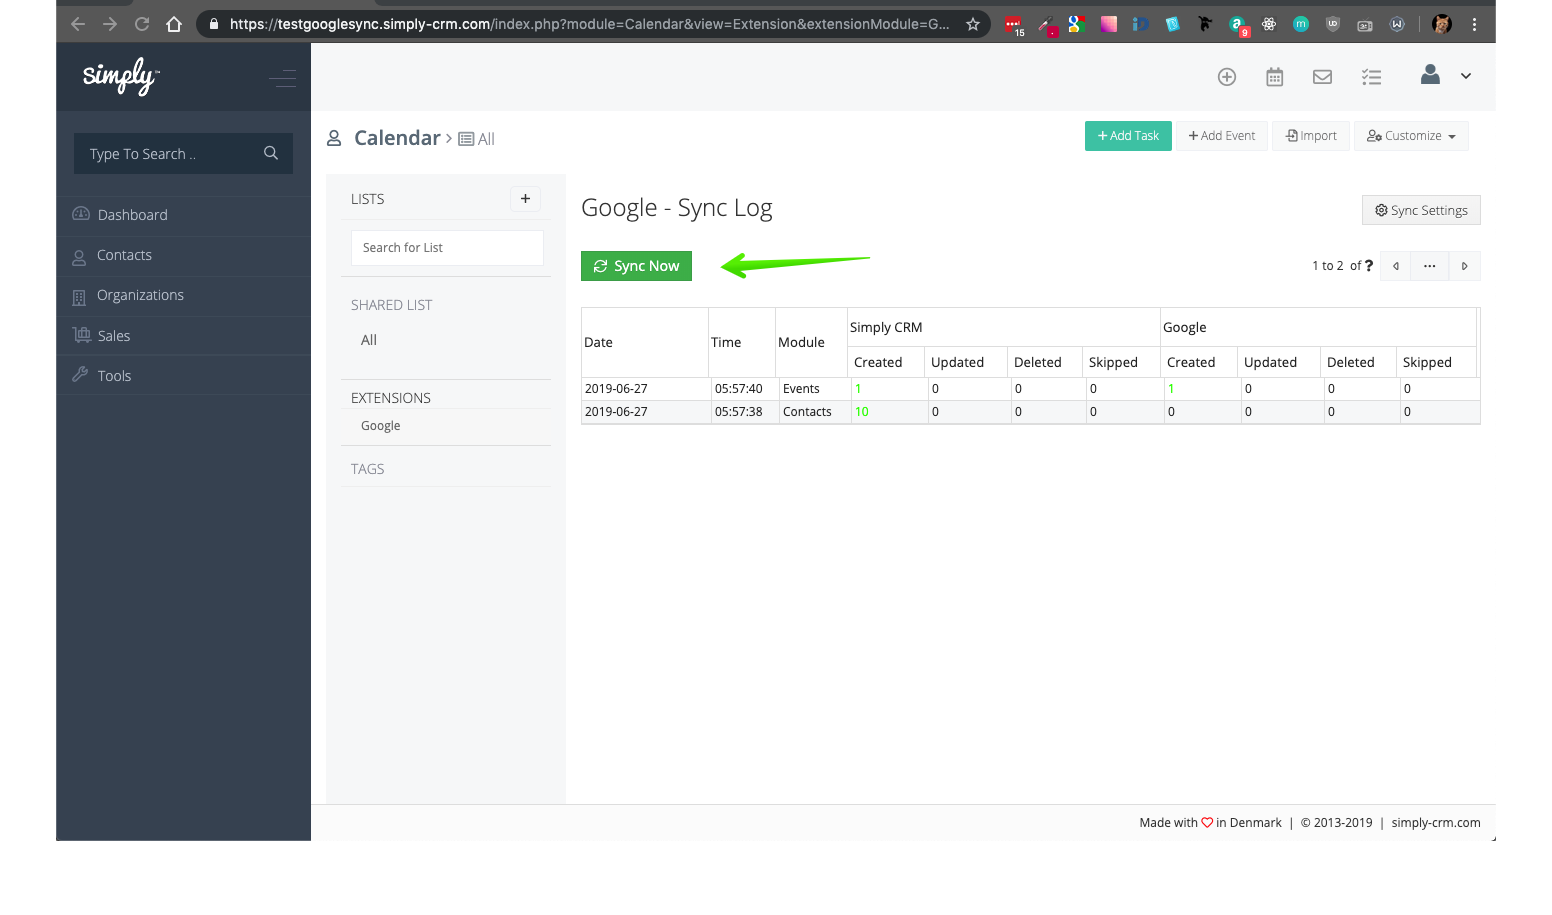
You have now successfully integrated Google Calendar into your Simply CRM instance and synchronized its data.


