When you integrate your MailChimp account with Simply CRM, you get a variety of new features and options in your instance. You can sync your data between the two system, create new contacts, run mass emailing campaigns as well as get a better overview of your data.
This guide will explain how you can get the most of our MailChimp integration and cover all the functions available in the MailChimp module.
Important: If you’re unsure how to integrate your MailChimp account with Simply CRM, please consult our detailed guide linked below.
How to integrate MailChimp with Simply CRM
How to use the MailChimp module
When you install the MailChimp module in Simply CRM, you’ll find it under Marketing in the main menu. Simply press MailChimp to open the module’s homepage.
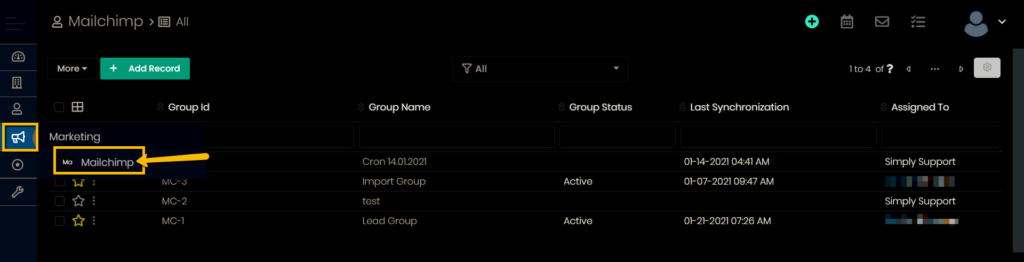
There, you’ll find the following functions:
- Two-way MailChimp sync
- Creating Contacts and Leads
- Creating or importing MailChimp groups
- List View, which includes the options: Details, Edit, Delete, Export, and Find Group Duplicates
- Detailed View, which includes the options: Add tag, Synchronize, Empty Log Display, Follow, Edit, Delete, Duplicate
- Adding documents to MailChimp groups.
Our guide will cover each available function and explain how you can use it in your instance of Simply CRM.
Create contacts or leads
Data syncs from your MailChimp audience to Simply CRM, and vice versa. During synchronization, the synchronization automatically creates contacts or leads depending on your MailChimp module configuration.
You can access the settings by visiting Settings > Other Settings > Mailchimp.
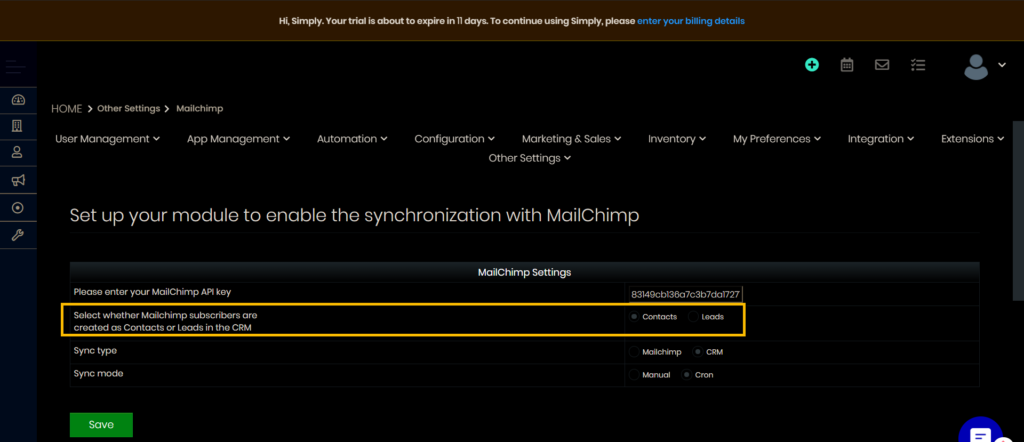
If you select Contacts, MailChimp subscribers will be created as contacts in Simply CRM. All contacts related to a group will be displayed in the Contacts tab of their group, as well as in the Contacts module.
If you select Leads, MailChimp subscribers will be created as leads in Simply CRM. The records will be displayed in the Leads module, from where you can move them to Contacts later on.
Create or add a MailChimp group
You can create or add a MailChimp group by clicking the Add Record button in the top left corner.
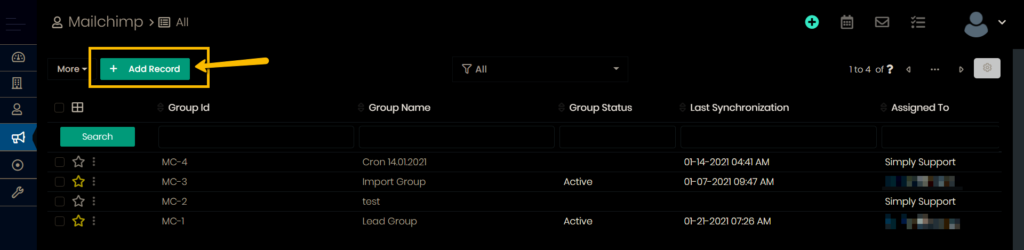
When you click on the button, you’ll be directed to a new page, where you’ll need to enter your MailChimp group information, as shown in the image below.
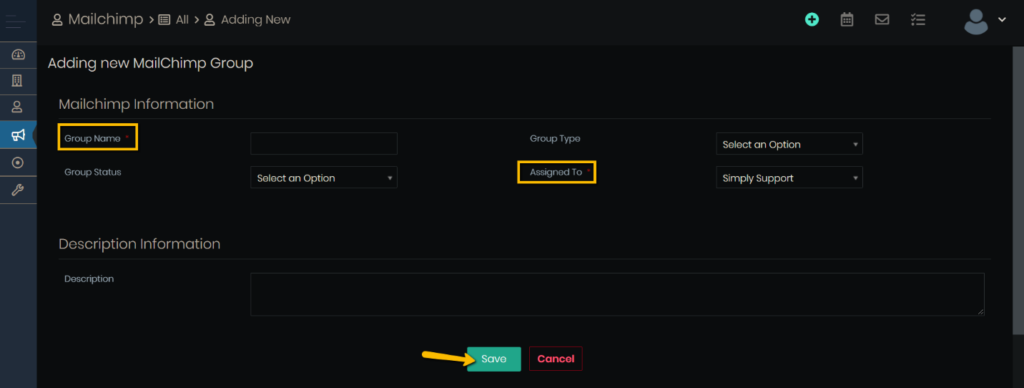
In order to create your MailChimp group, you’ll need to enter information in the mandatory fields titled Group Name and Assigned To.
Group Type, Group Status and Description act as optional descriptors here and you can leave them empty.
Press Save when you finish adding the information.
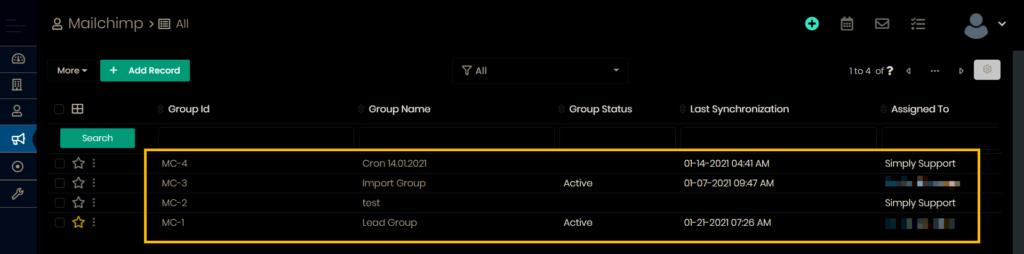
You’ll be redirected to the module homepage where you’ll see the list view of all MailChimp groups in your instance of Simply CRM.
Import a MailChimp group
If you wish to import your MailChimp group from an external file, click on the More button next to Add Record on the module’s homepage. From the drop-down, select Import.
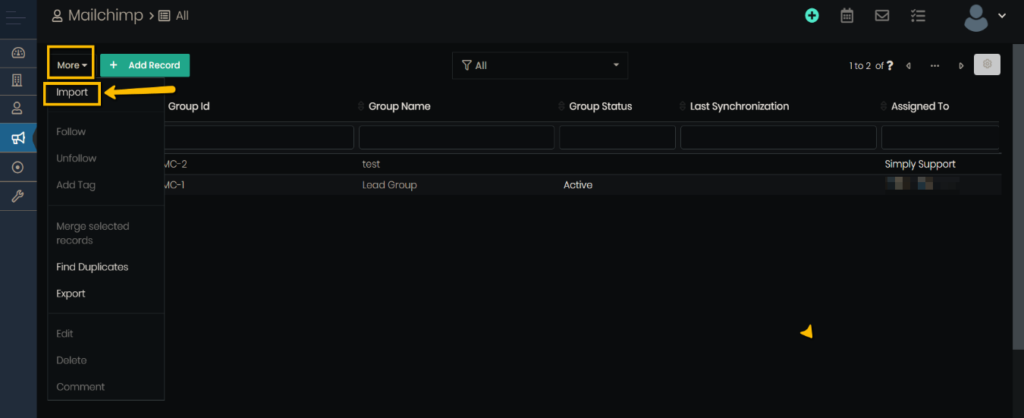
This will lead you to the Import MailChimp page shown below.
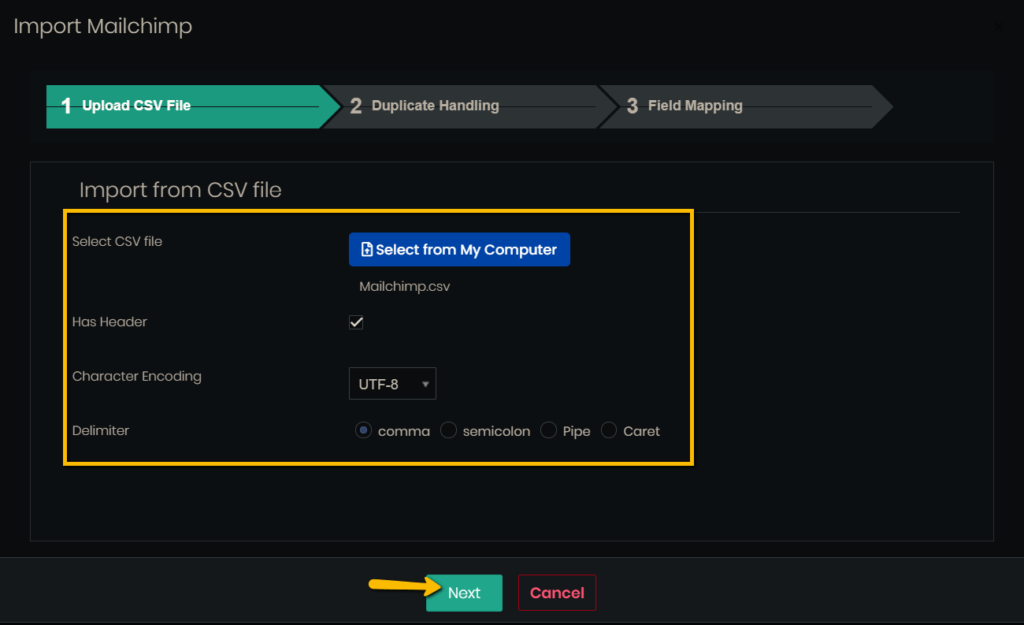
Here, you’ll first need to select the CSV file that you wish to upload from your computer.
When you locate and select your file, you’ll need to fill out the remaining fields on the page:
- Has Header – Tick or untick this box depending on whether your file contains a header row.
- Character Encoding – Choose the encoding format that you want to use. We recommend keeping the default format UTF-8.
- Delimiter – Choose what symbol will be used as the delimiter in your file. Keep the comma option selected for CSV files.
When you fill out all the necessary details, click the Next button to proceed to the Duplicate Handling tab.
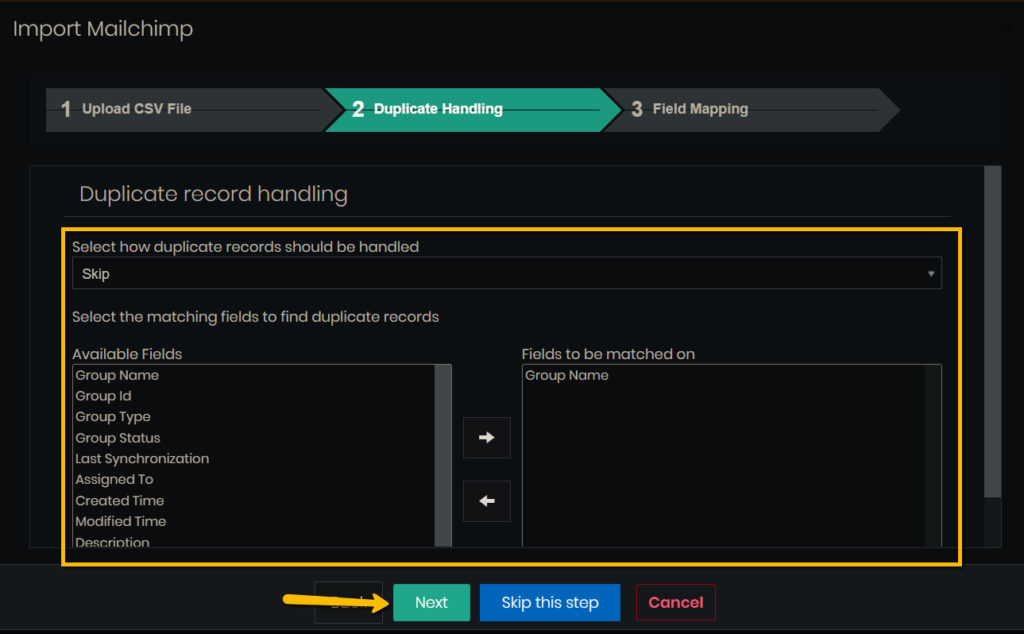
Here, you need to specify the matching fields and determine how the system will handle duplicate data.
Once you finish configuring the duplicate handling settings, press Next to move to the Field Mapping tab.
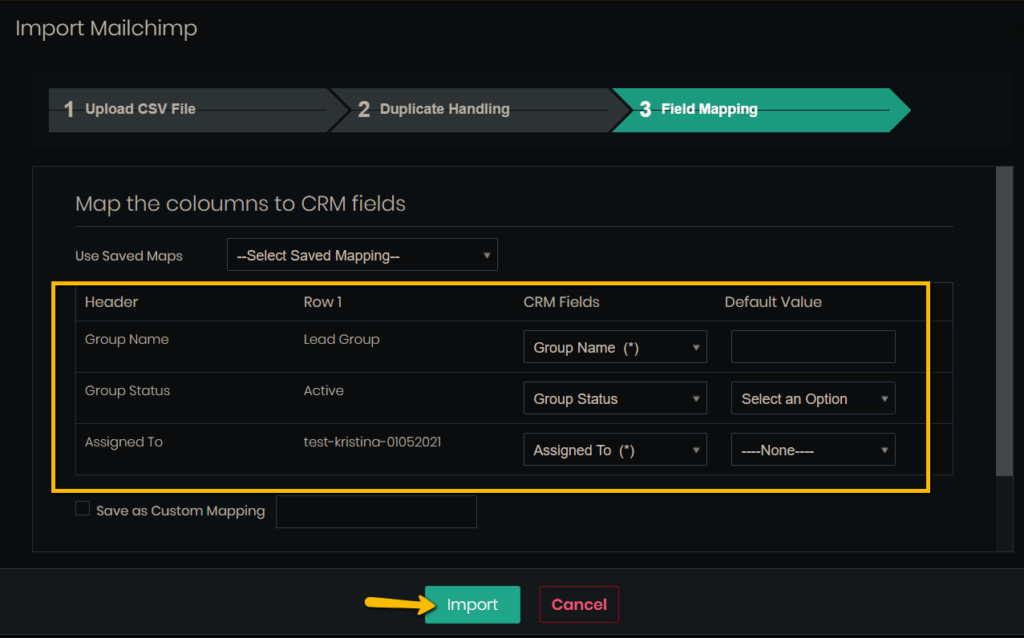
In this step, you’ll need to select how the CSV data will be mapped onto the Simply CRM records. Make sure that all selected fields have values.
Then, click Import.
You should soon receive a MailChimp import report along with its summary.
If you’re still not sure how to import records to Simply CRM, we recommend our detailed guide on importing records:
How to import records in Simply CRM
The list view of the MailChimp module
The MailChimp module homepage acts as a list view of all your records. From the list view, you can use the following functions: Details, Edit, Delete, Export, and Find Group Duplicates.
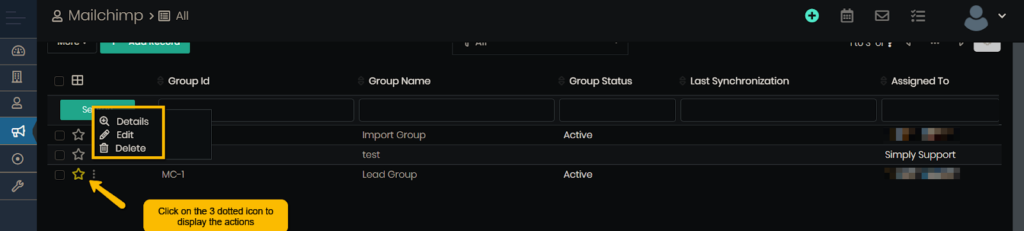
Press on the three dots next to a MailChimp record to reveal a drop-down menu with the following options:
- Details – Provides access to the detailed view of a record.
- Edit – Allows you to edit the MailChimp record.
- Delete – Removes the MailChimp record from your instance of Simply CRM.
If you press the More button in the top right corner, you’ll find the following options:
- Export – Lets you export the list of Mailchimp groups; you can choose to export all records, the current page or just the selected records in CSV or Excel format.
- Find Duplicates – Allows you to enter a match field and run a check to find any duplicate records in the list view.
The detailed view of the MailChimp module
To access the detailed view in the MailChimp module, simply press on any record in the list view (i.e. the module homepage). In the detailed view, you’ll find the following options:
- Add tag
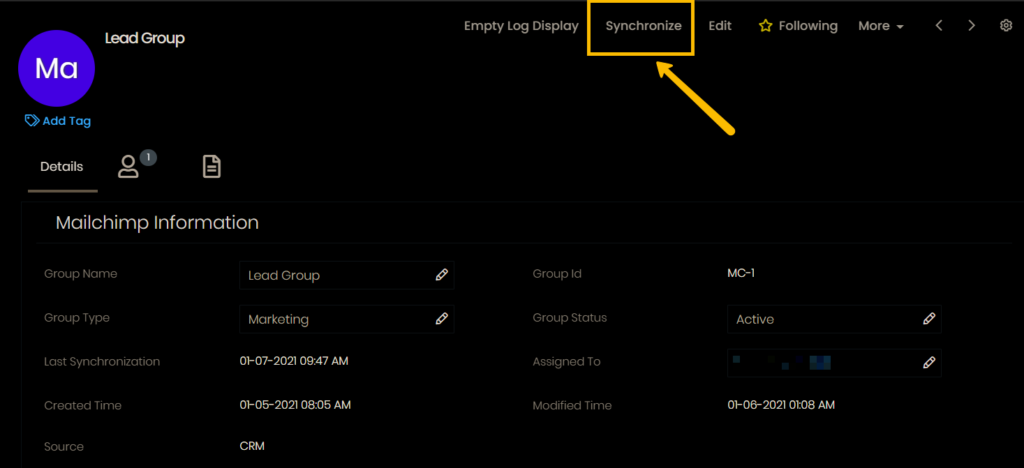
- Synchronize
- Empty Log Display
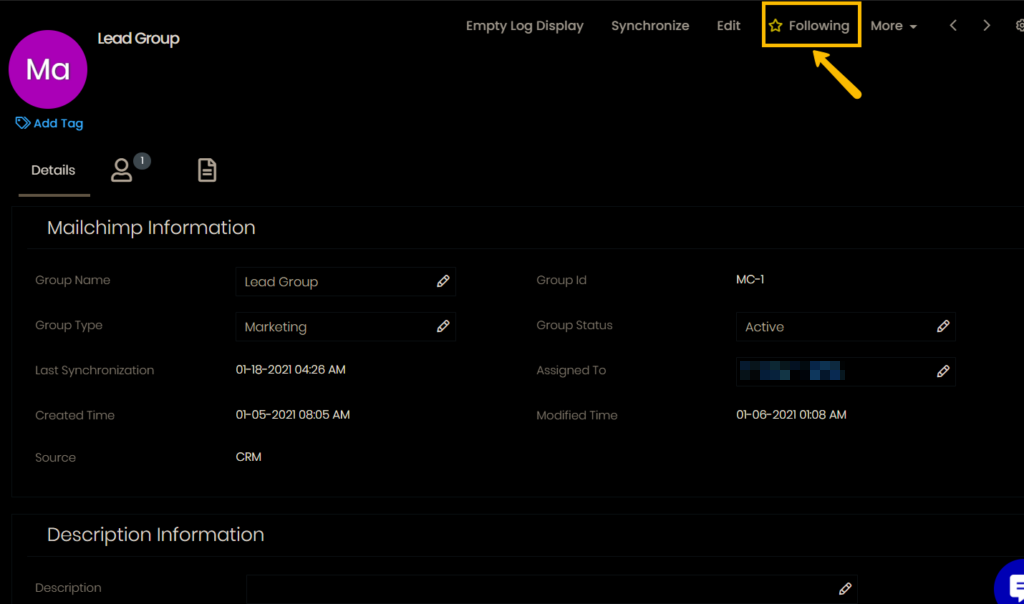
- Follow
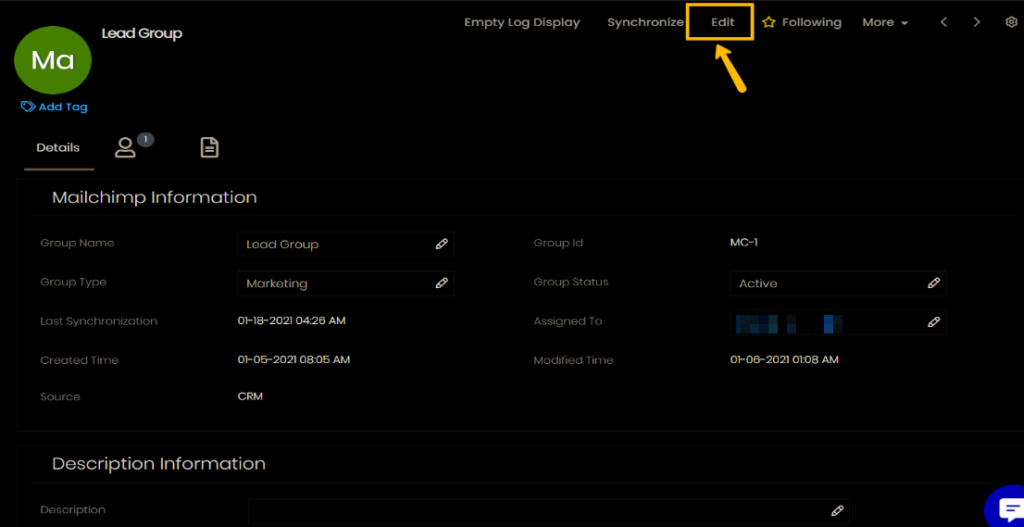
- Edit
- Delete
- Duplicate
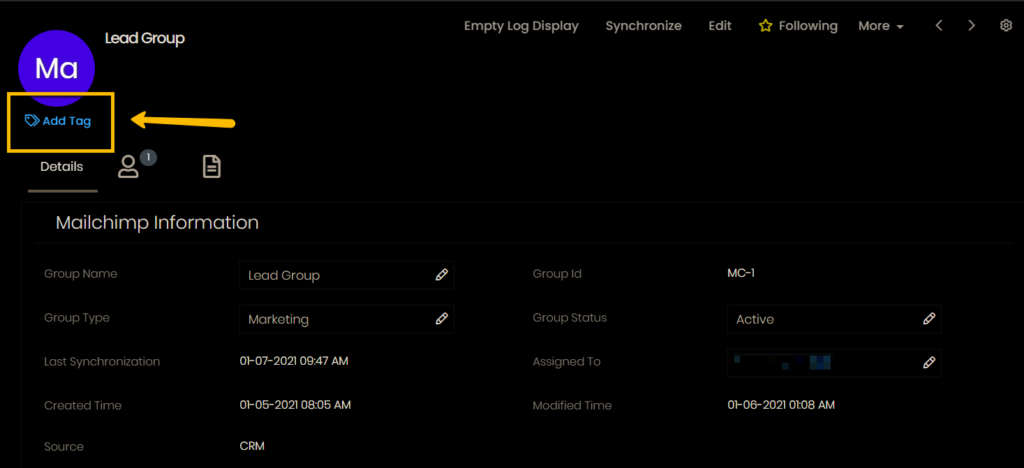
The Add Tag option can be found in the top left corner and it allows you to assign tags to the MailChimp record, which helps you better organize your contacts.
Synchronize lets you sync the selected record with MailChimp. The record will be added to the sync queue and once the sync is finished, the fields Last Synchronization and MailChimp Synchronization History will receive new values.
The Empty Log Display function removes all data from the MailChimp Synchronization History field.
The Follow option allows you to keep a closer eye on the selected MailChimp record. Toggle this button if you want to mark the record with a star symbol in the list view.
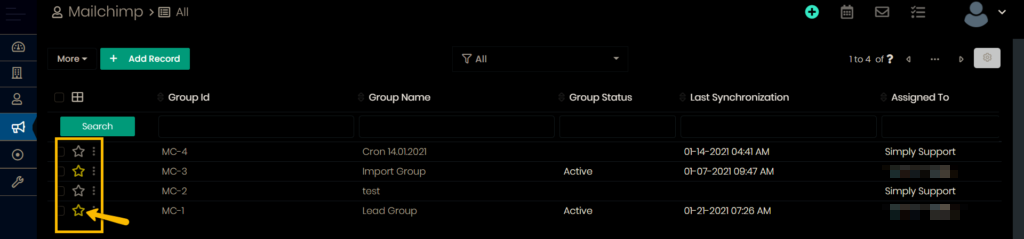
The Follow option is also available in the Contacts module. When you follow a record, it becomes marked with a star in the list view, as shown below.
Edit lets you customize the record and change its data. This option allows you to edit the following fields by pressing the Edit button or the pencil icon next to the fields: Group Name, Group Status, Group Type, Assigned To and Description.
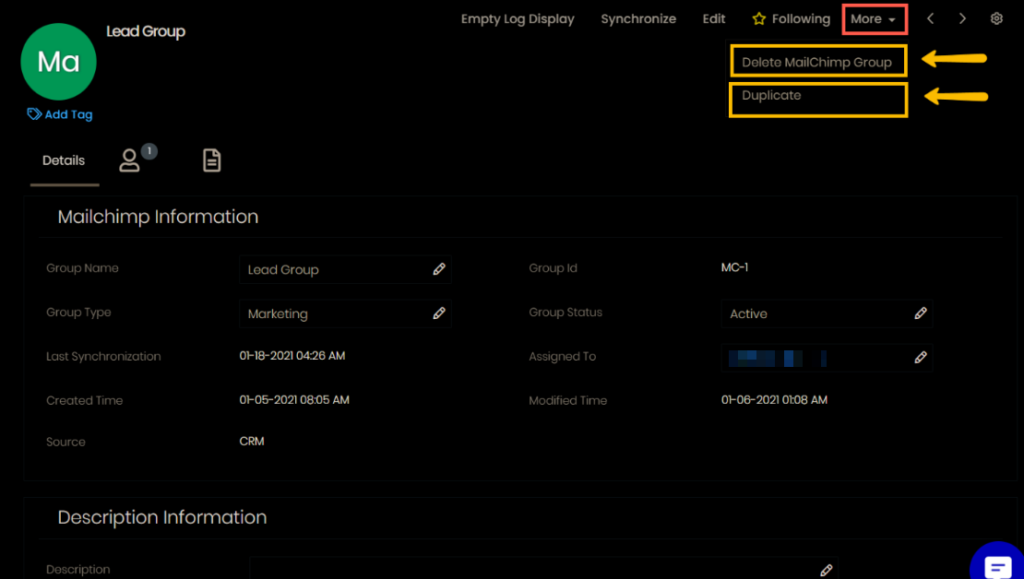
Under the More button, you can find the options Delete MailChimp Group and Duplicate.

Use the Delete MailChimp Group option if you want to permanently remove the group record from your instance of Simply CRM.
Duplicate will clone the record with all its data.
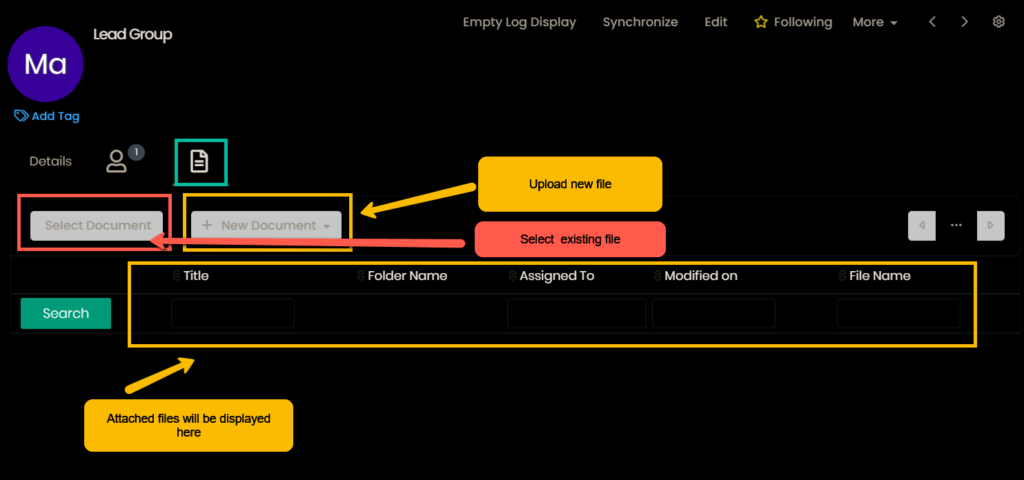
Add document to MailChimp group
You can use the Documents widget in Simply CRM to attach a document file with a MailChimp group. The Documents widget comes with two options:
- Select Document – Allows you to choose an existing document and attach it to the selected MailChimp group.
- New Document – Lets you upload a document from your device, link a file URL or create a new document and associate it with the selected record.
Still need help with MailChimp integration? Don’t hesitate to contact our support through Live Chat or email.


