Simply CRM allows you to create picklists fields in which the users can only select one of the defined options.
Picklist field values
Picklist field values represent drop-down fields within which only one of the available options can be selected. For example, Lead Status in the Leads module is a picklist field.
In Simply CRM, you can use picklist fields to add new values, edit or delete existing values. It’s important that you understand that picklist values depend on the user roles. Users can only access the picklist values assigned to their role.
How to add a custom field to an existing picklist
Simply CRM allows you to a custom picklist field within an existing picklist. After you add the custom field, the users will be able to select them in the corresponding module.
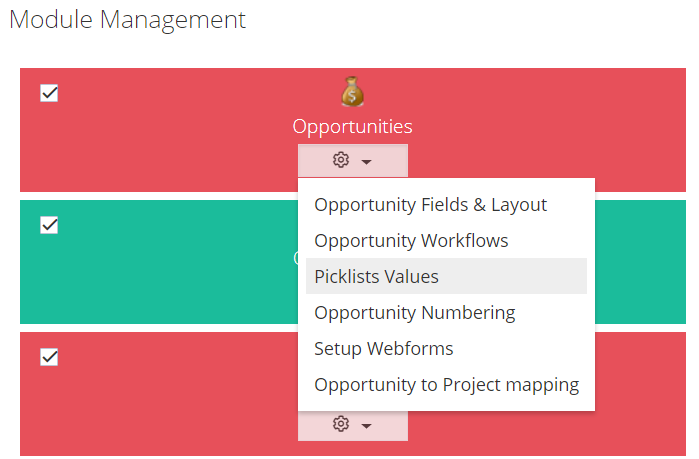
To add a new picklist value, click on the Customize button for a module of your choice. Select the Picklists Values option from the drop-down menu.
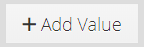
In the new window, press the Add Value button.
Enter the new picklist value in the Item value field and select which user roles can access it. Select the preferred colour from the palette and assign it to the new picklist value.
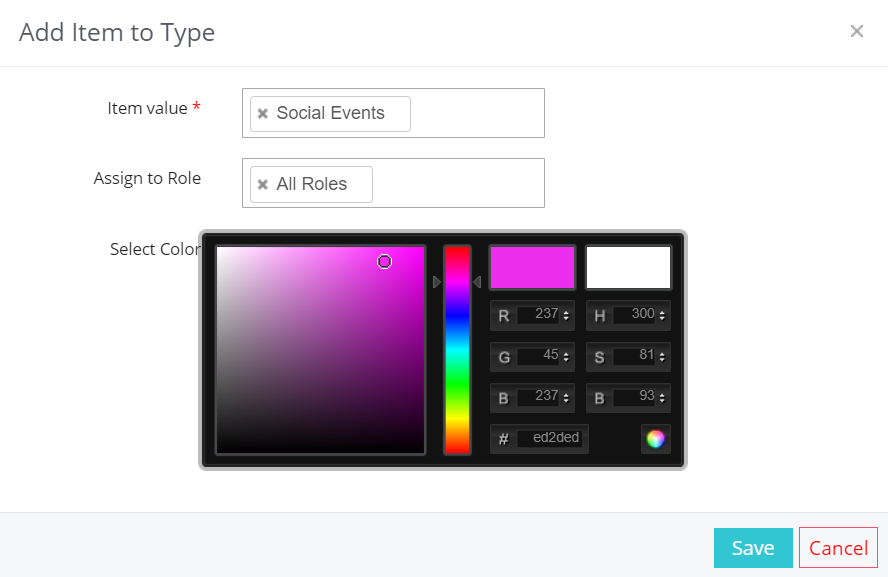
Press Save.
The new picklist value will become visible in the All Values tab.
How to customize existing picklist values
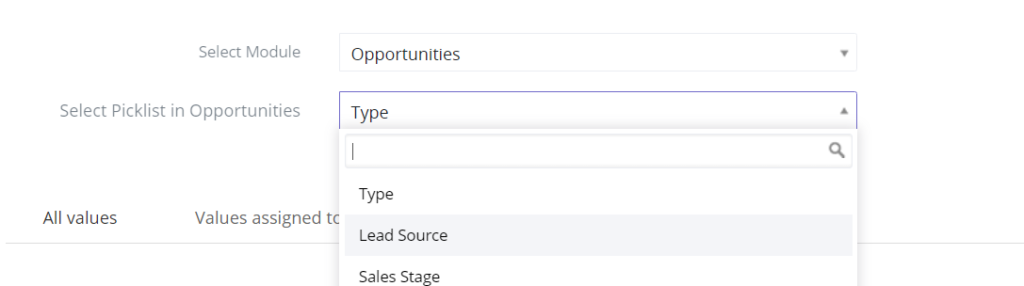
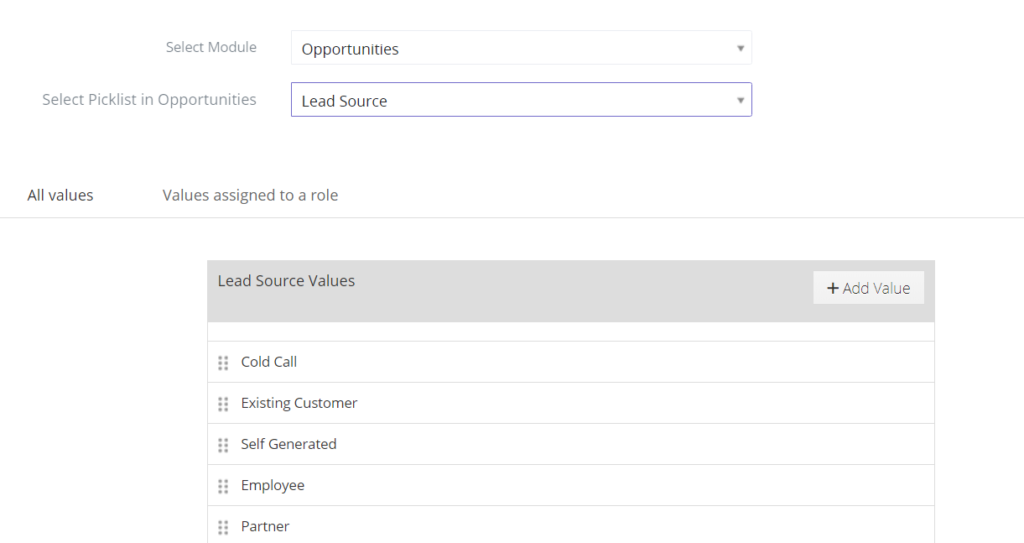
To edit an existing picklist field value, you will have to select the Module from the Select Module drop-down and Select Picklist in [Module Name]. The Select Picklist option will allow you to choose from the set of all existing picklist fields within the module.
Rearrange existing picklist values
Simply CRM also allows you to edit the order of picklist values within a certain picklist field. You are free to select the sequence according to your personal requirements.
Follow the instructions below to rearrange the picklist values.
Select the desired module and the picklist field.
When you click on the picklist field, simply drag and drop the field to your preferred location.
Edit or rename existing picklist values
You can edit and rename the existing picklist values within a certain picklist field.
To rename a picklist value, select the desired module and picklist field.
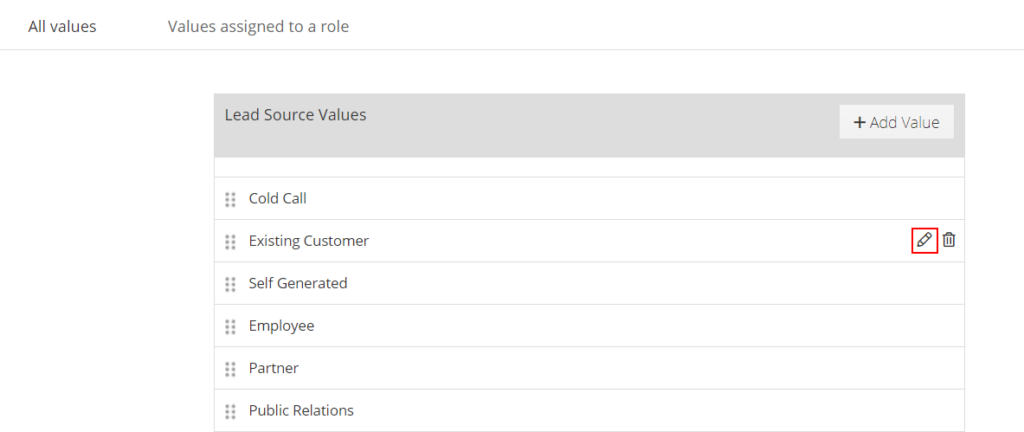
Then, go over the All Values list, hover over the desired picklist field and press on the pen icon to edit its name.
In the resulting pop-up window, enter the new field name and press Save.
Delete existing picklist values
In case you no longer need a picklist field value, you can easily delete it.
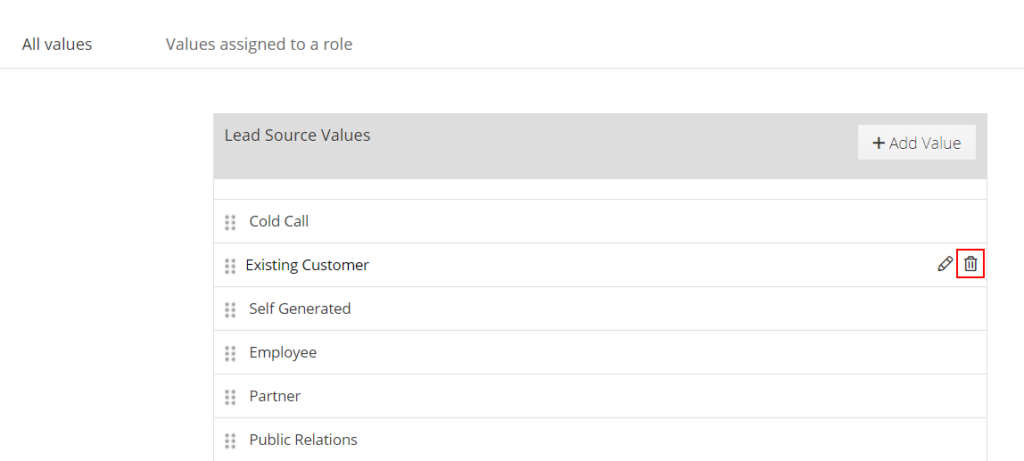
To remove an existing value, go to the All Values list, hover over the desired picklist field and press on the trash can icon.
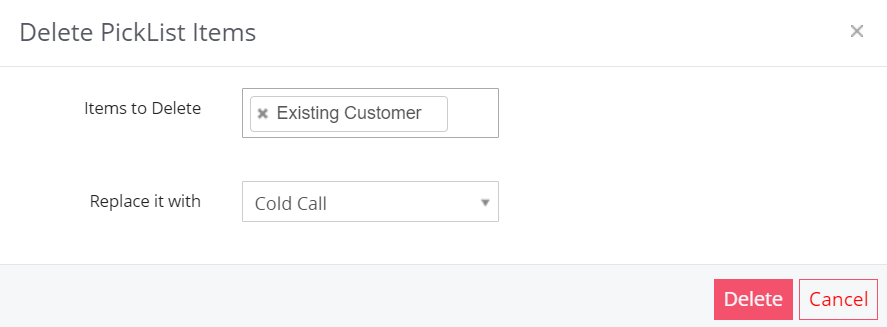
Press Delete in the resulting pop-up window.
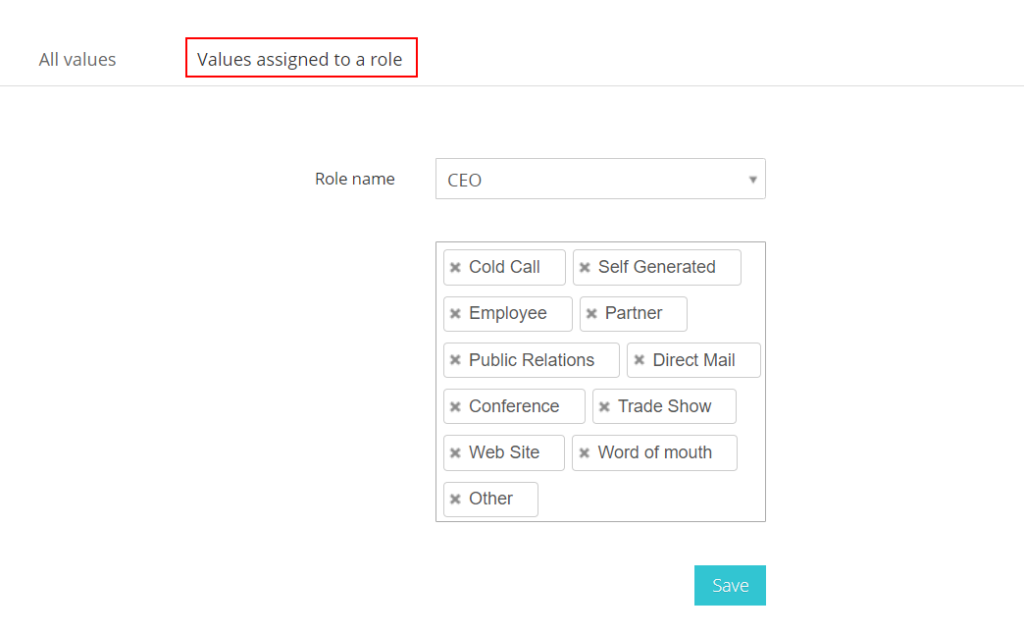
How to assign picklist values to specific roles
To assign a picklist value to a specific role, open the Values assigned to a role tab. Click on Role Name and select the desired role.
Press Save to confirm the changes.
Important: The new item value will be added to the desired role and only users with the specific role will be able to access and use the picklist values.


