When your company operates a large number of data records, it often becomes hard to navigate through a vast sea of data and locate the necessary information.
To help you better organize your records, Simply CRM allows you to create color-coding rules, which will automatically paint your records in a specific color.
This way, Simply CRM creates a more visual overview that’s easier to use and navigate, even for absolute beginners. All you need to do is define the colors that you want to use and set the conditions under which your records will be colored.
This in-depth guide will explain how to activate color lists, walk you through all of their settings and help you organize your data in Simply CRM.
How to activate color lists
In order to set up color lists in your Simply CRM instance, you’ll first need to activate the color lists application. To do that, log into your account and open Settings. Click on App Management and select Apps.
Scroll through the apps until you find Color Lists. In the Color Lists block, press the green Activate button in the bottom right corner.
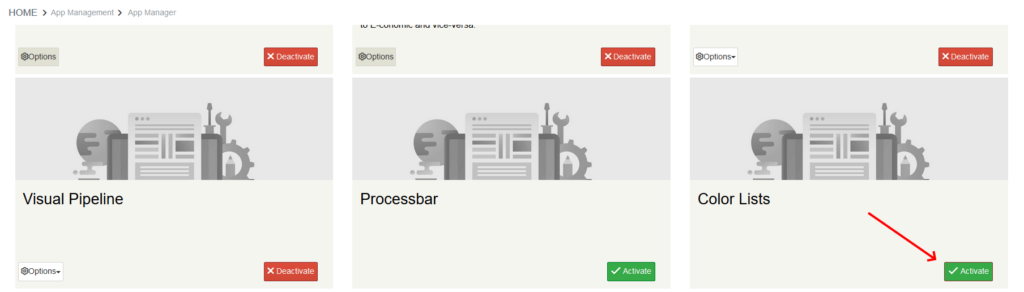
When you activate the app, the button will convert to Deactivate. At the same time, a new button will appear on the left side of the Color Lists block.
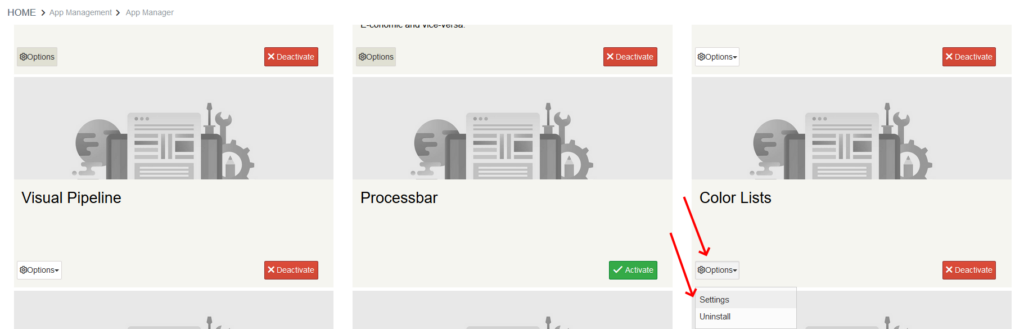
Press the Options button within the block and select Settings. This will open a new window in which you’ll be able to configure your color lists.
How to configure color lists
When you open the color list settings, you will be redirected to the app management page shown below. Press the Add Color button in the top left corner to initiate the color list configuration process.

This will open the following pop-up window in which you’ll configure your color list options.
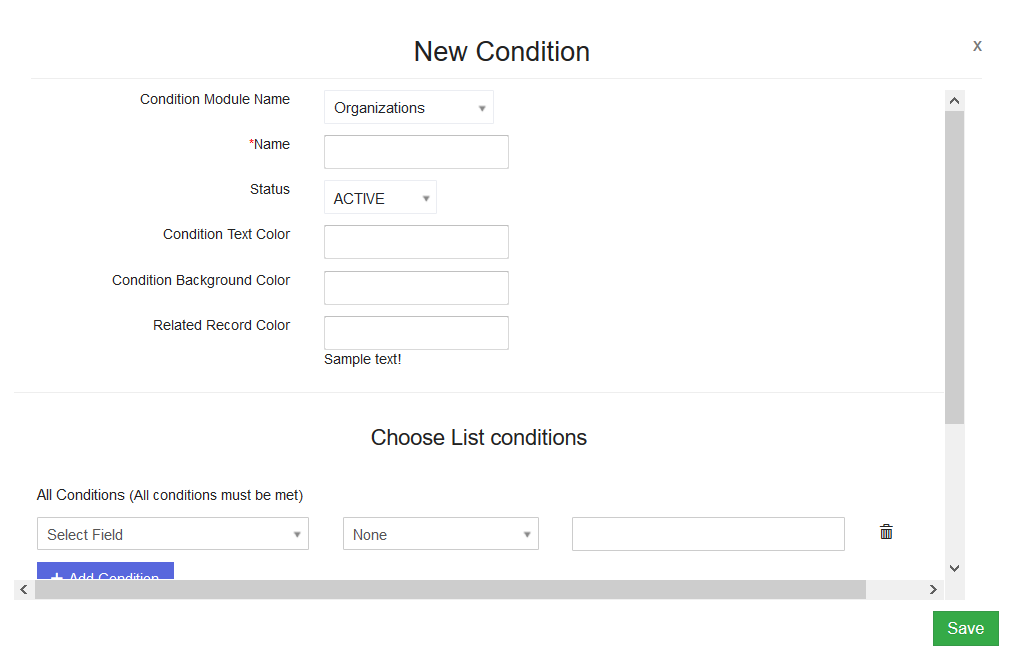
The table below defines all available options and explains how you can use them to set up color coding on your records.
| Option | Description |
| Condition Module Name | Specifies where the color list will be applied, i.e. allows you to choose which module will use the color list. |
| Name | Determines the name of the color list. |
| Status | Allows you to turn your color list on or off in accordance with your needs. |
| Condition Text Color | Specifies the text color of all the list view information available for the records that meet the conditions defined in the color list. |
| Condition Background Color | Specifies the background color of all records that meet the conditions defined in the color list. |
| Related Record Color | Specifies the text color of all records that meet the conditions defined in the color list. |
Once you configure these settings, you’ll need to define the conditions under which the colors will be applied to your records.
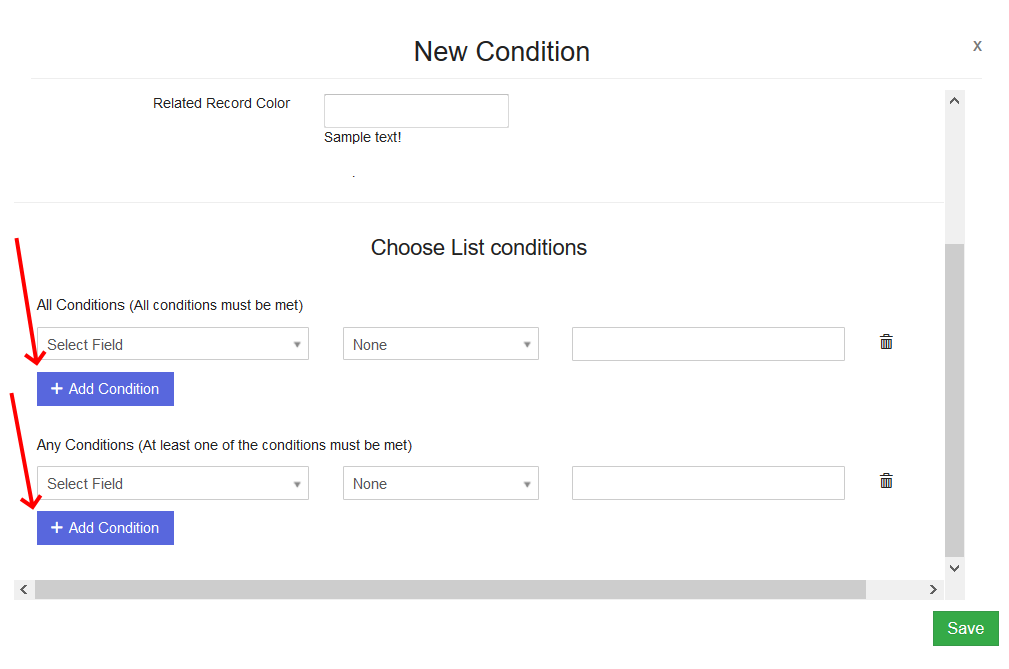
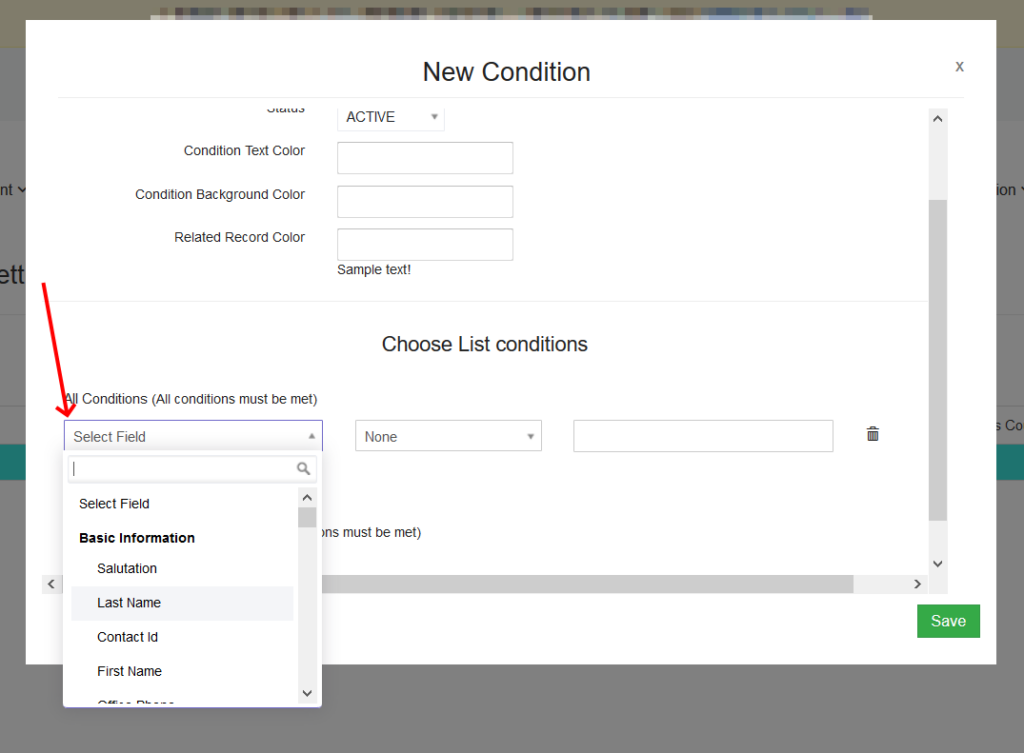
To define a condition, press on the Add Condition button. In the first field, select what information will be checked when the system performs a lookup.
Keep in mind that this field functions like a picklist. This means that you’ll only have a limited number of options at your disposal, depending on the module that you selected for the color list earlier.
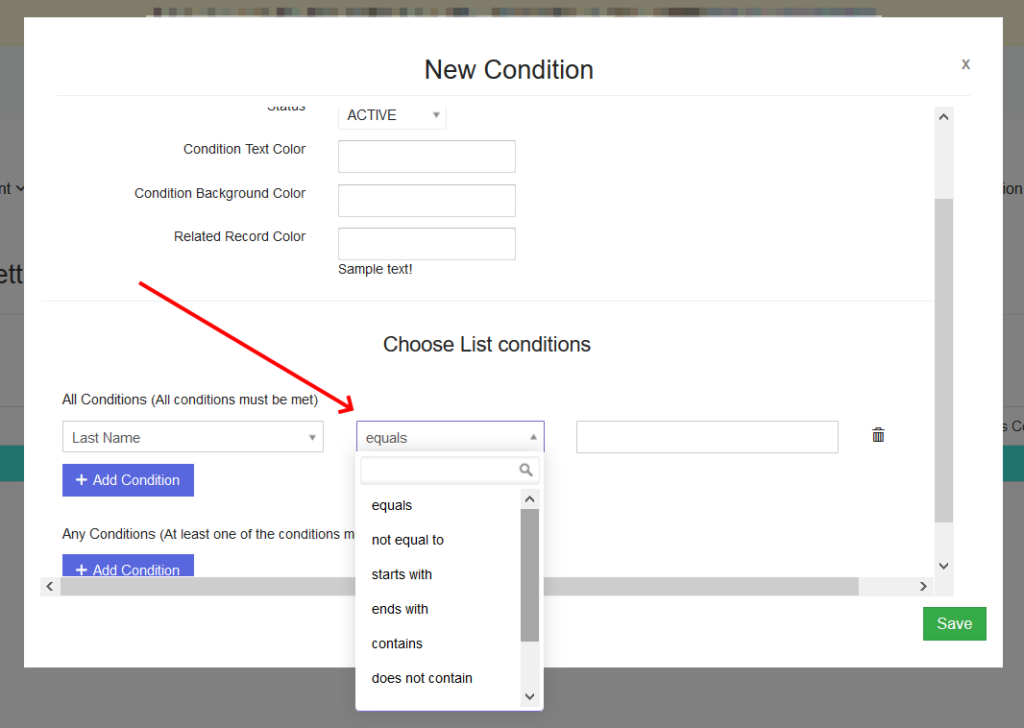
The second field allows you to define what criteria needs to be fulfilled in regards to the information selected in the first field. Here, you can choose between equals, not equal to, starts with, ends with, contains, does not contain, is empty and is not empty.
Important: In order to configure this criteria, you must first fill out the first field and define what information will be checked.
In the third field, you define the value that the field must respect in accordance with the criteria selected in the second field. For example, if you select First Name in the first field, equals in the second field and enter Wayne in the third field, you’ll only color the records whose first name is set to Wayne.
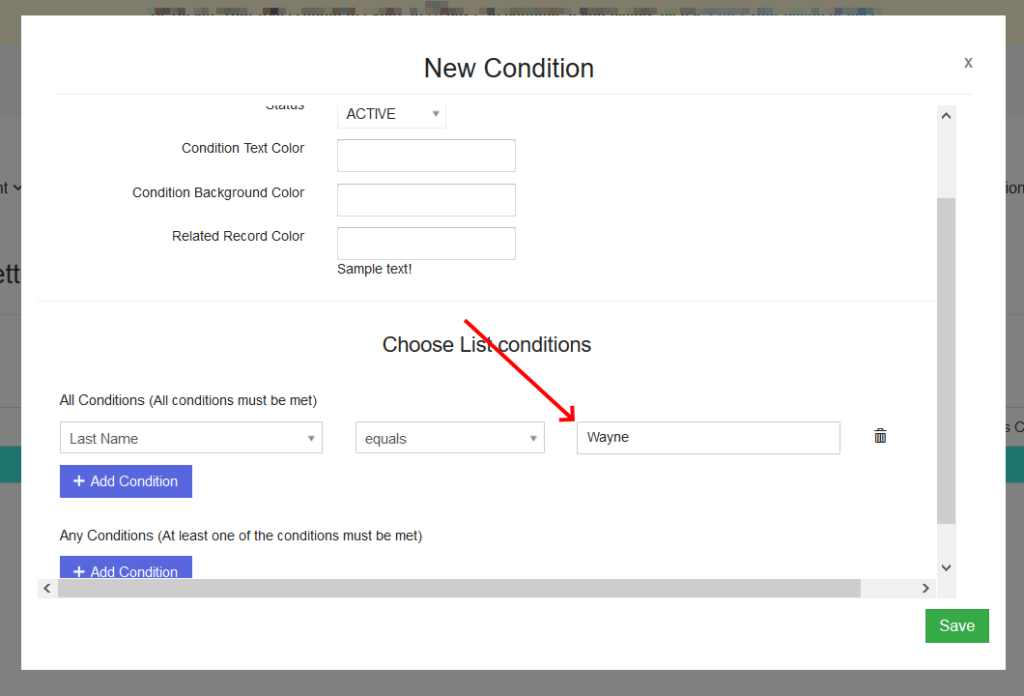
Important: If you define multiple conditions under All Conditions, the records will be colored only if the records meet all conditions. However, if you define multiple conditions under Any Conditions, the records will be colored even if they meet only one of the conditions you defined.
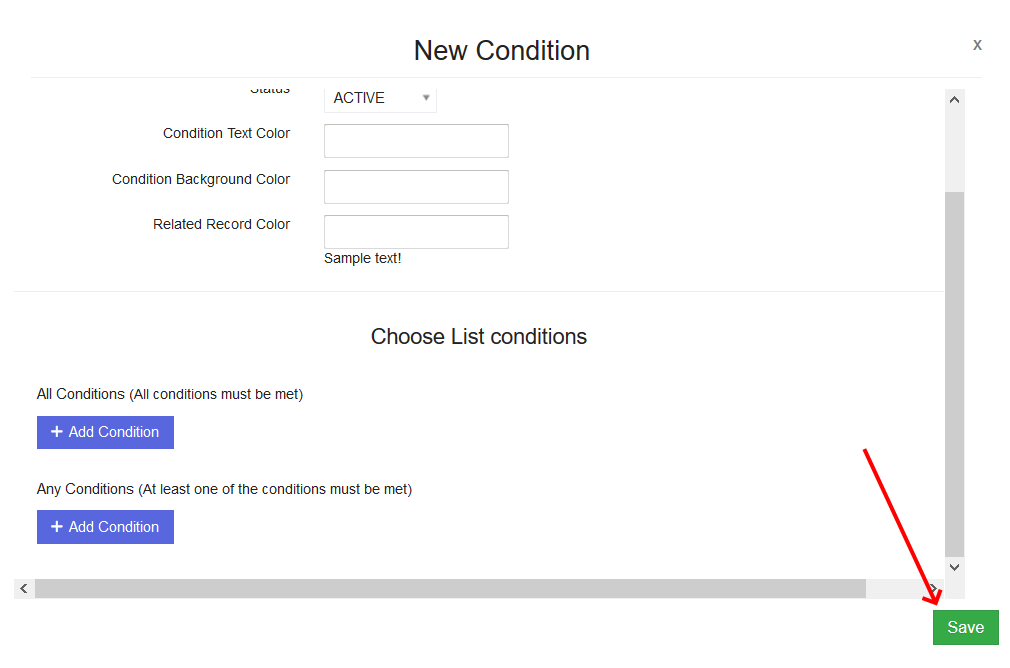
When you define your conditions, press Save to confirm the color list settings.
Important: If you do not set up any conditions, Simply CRM will color all records in the module you selected when configuring your color list.
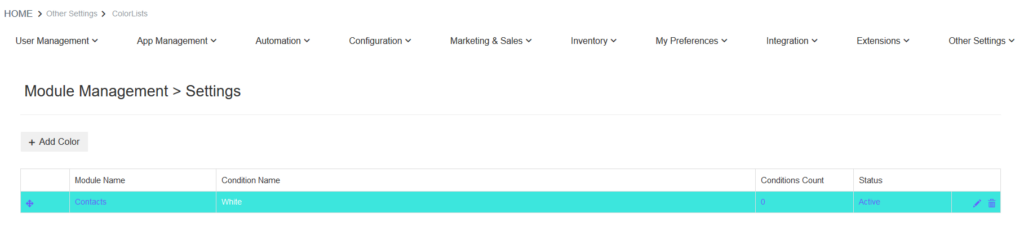
When you save your color lists, the new color will appear in the Color Lists app homepage, displayed as a record that meets the conditions you defined. You can see an example color list below.
How to edit color lists
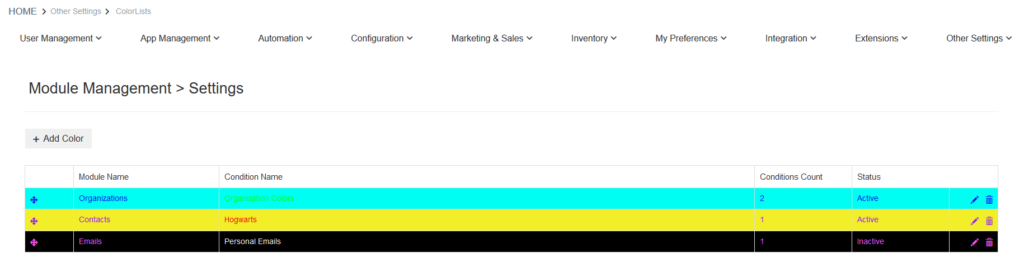
If you need want to edit a color list, open the Color Lists module by following the path: Settings > Other Settings > Color Lists.
There, you’ll see a list of all color lists that were created in your instance of Simply CRM, as shown below.
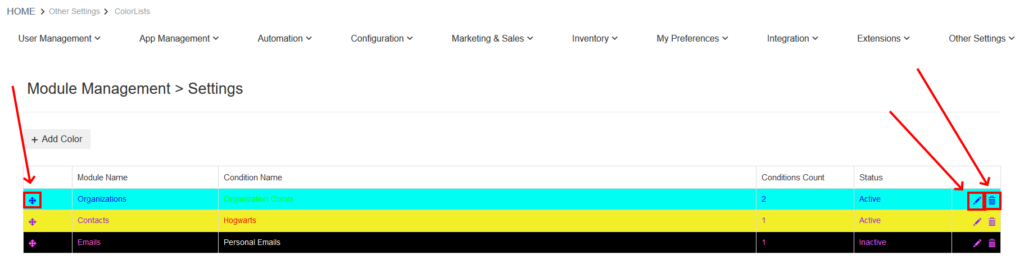
Here, you can edit or delete your color lists. To edit a color list, press on the pencil icon in the right corner. This will open the settings pop-up window that we described earlier and allow you to re-configure the color list.
If you want to delete a color list, press the recycle bin icon next to it.
You can also change the order of color lists in your module by holding the arrow icon on the left side, and then simply dragging and dropping the list to its new place.
An example of a color list
To illustrate how color lists can help you organize your Simply CRM data, we will now walk you through the set up process and examine how the color list affects your records.
For example, let’s configure a color list that will automatically paint all records belonging to an organization titled The Hogwarts School of Magic.
To achieve that, we’ll head over to the Color Lists app and press on the Add Color button.
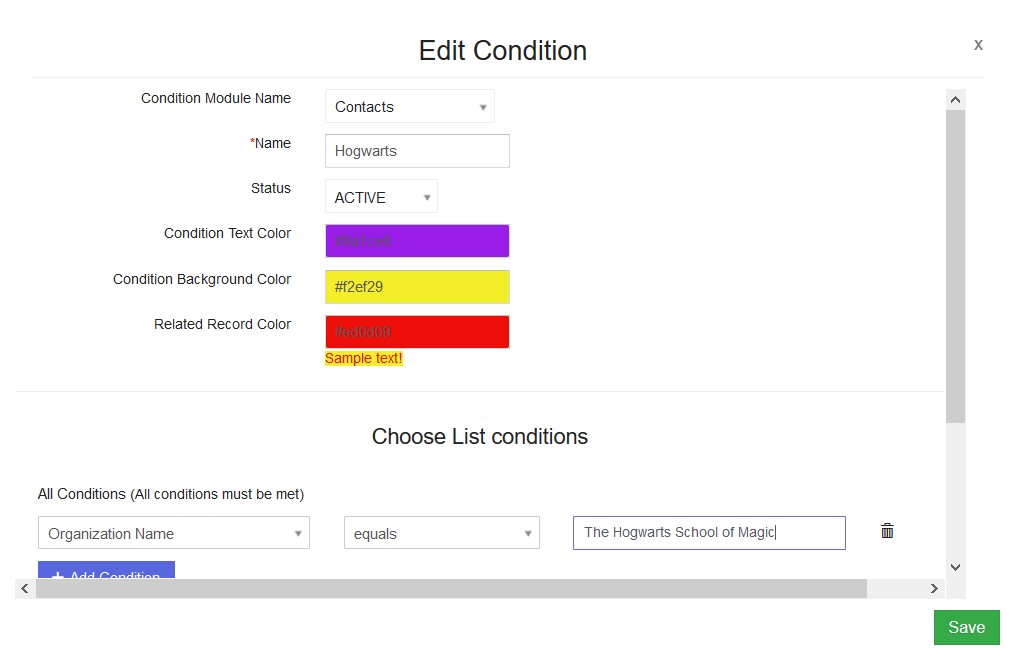
For Condition Module Name, we’ll choose Contacts, because the lookup will be performed on contacts (even though we’re checking their parent organizations). We’ll use Hogwarts as the color list name.
We’ll keep the status Active and then we’ll configure the colors. We’ll set the Condition Text Color to purple, Condition Background Color to yellow and Related Record Color to red, for example.
Under All Conditions, we’ll specify Organization Name equals The Hogwarts School of Magic.
Now, this is what our color list configuration window looks like, once we define all the settings mentioned in this article.
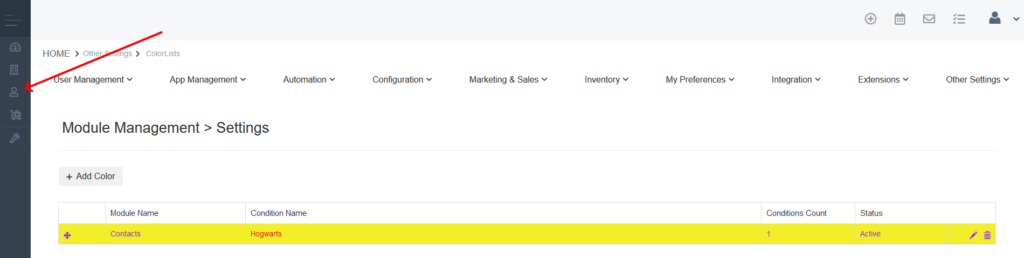
When we press Save, the color list will appear on the Color Lists app homepage, as shown below.

If you want to see what this color will look like in the Contacts module, on which we decided to apply the color list, press on the Contacts option on the left menu.
In the Contacts module, all records that satisfy the conditions defined in the color list will automatically be painted as specified in the color list settings.
You can see what that looks like on our example below.
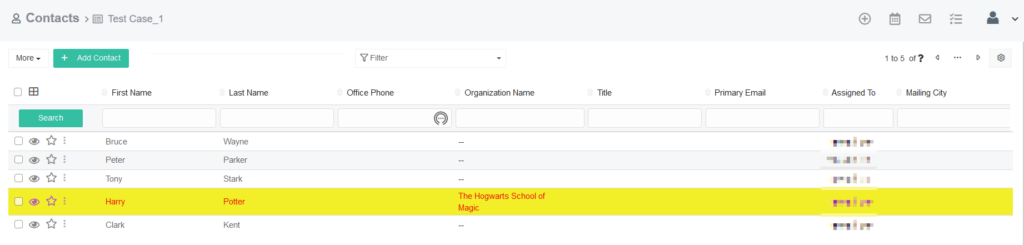
This allows you to quickly identify all the records that belong to a specific organization. If you don’t want your records to remain colored all the time, you can simply deactivate your color list by setting its status to Inactive.


