Simply CRM integrates WordPress and WooCommerce to provide you with real-time information about your customers, products and orders on your eCommerce website. The WordPress and WooCommerce Integration module in Simply CRM functions as an extension of the WooCommerce plugin, which means you must have the plugin installed to sync your data with Simply CRM.
How to install the Simply CRM integration plugin
The installation process is fairly simple.
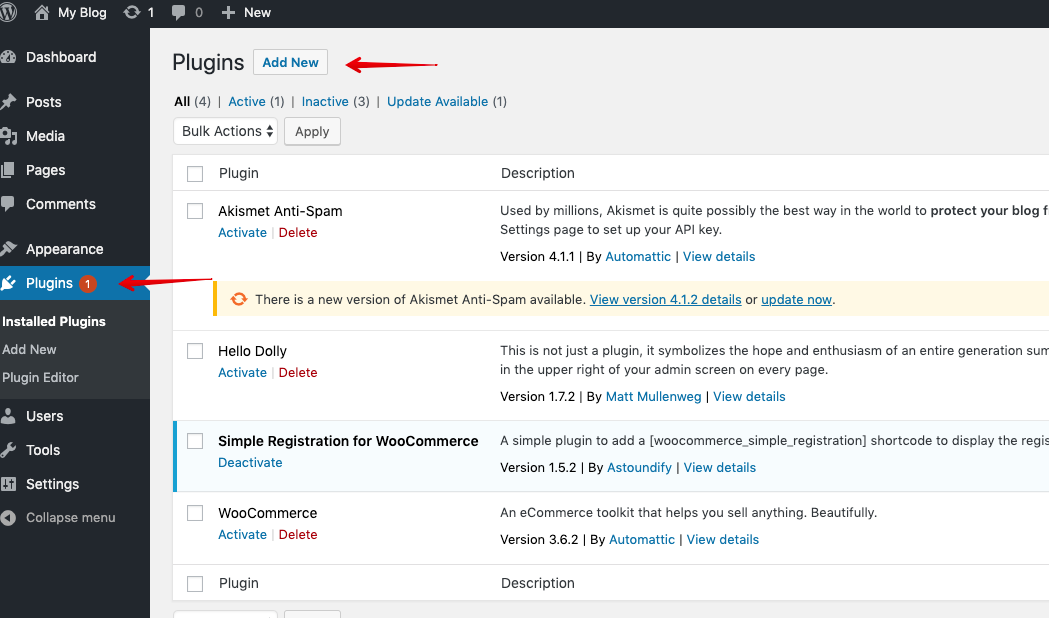
Open your website’s WordPress dashboard and open the Plugins tab on the left menu. Under Plugins, select the Add New option to initiate the installation process.
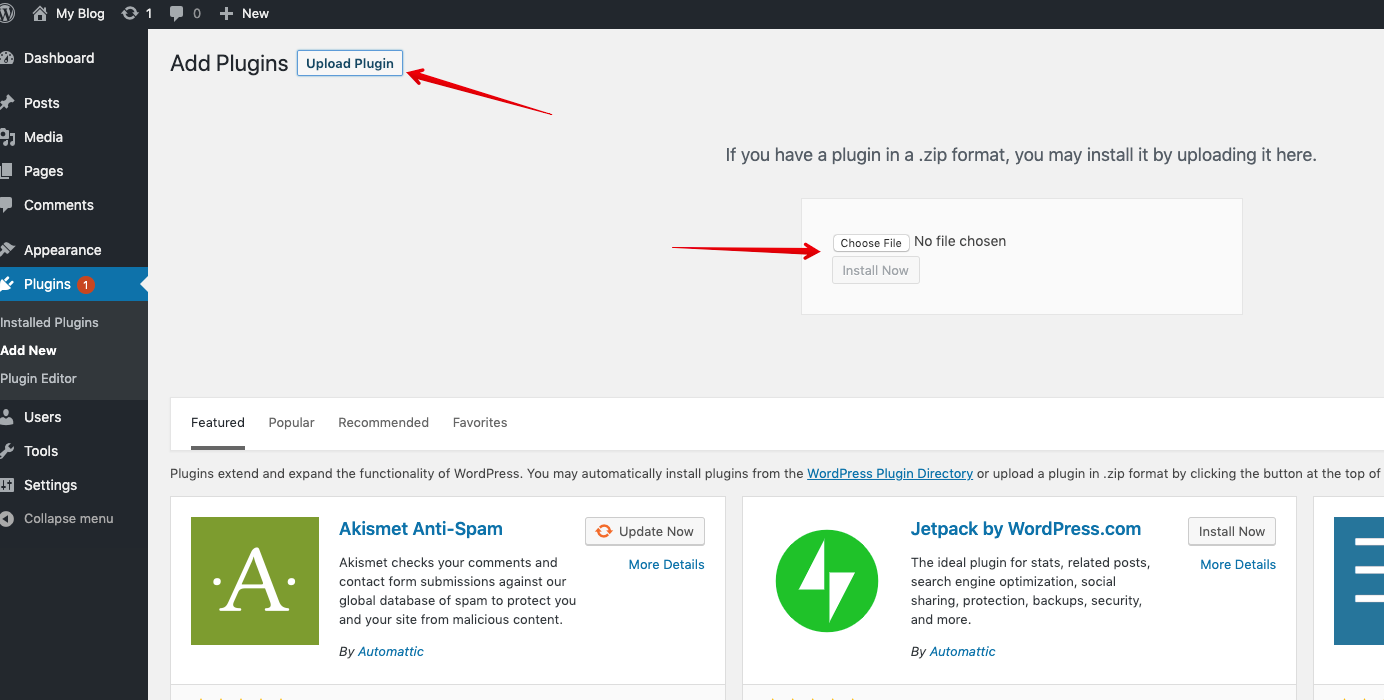
In the new window, press on the Upload Plugin button and choose the module file from your computer.
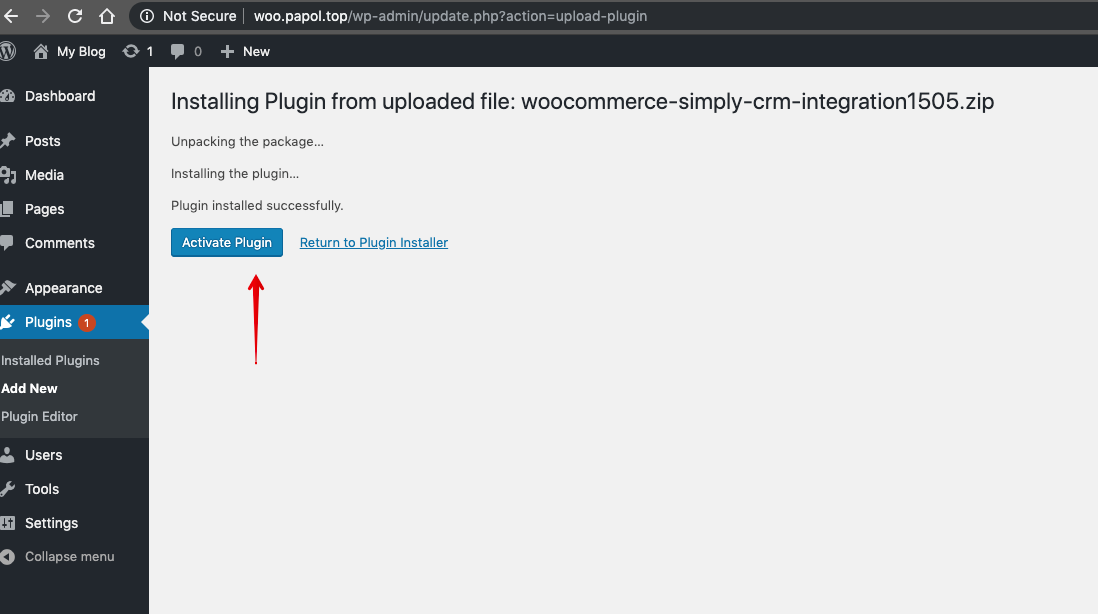
After the plugin is installed successfully, you will need to activate it. Keep in mind that the module will not work unless you activate it after the installation.
How to configure the integration settings
After you install the module, you will need to configure its settings before you can start using WordPress/WooCommerce data in your Simply CRM instance.
Follow the steps outlined below to configure the module settings.
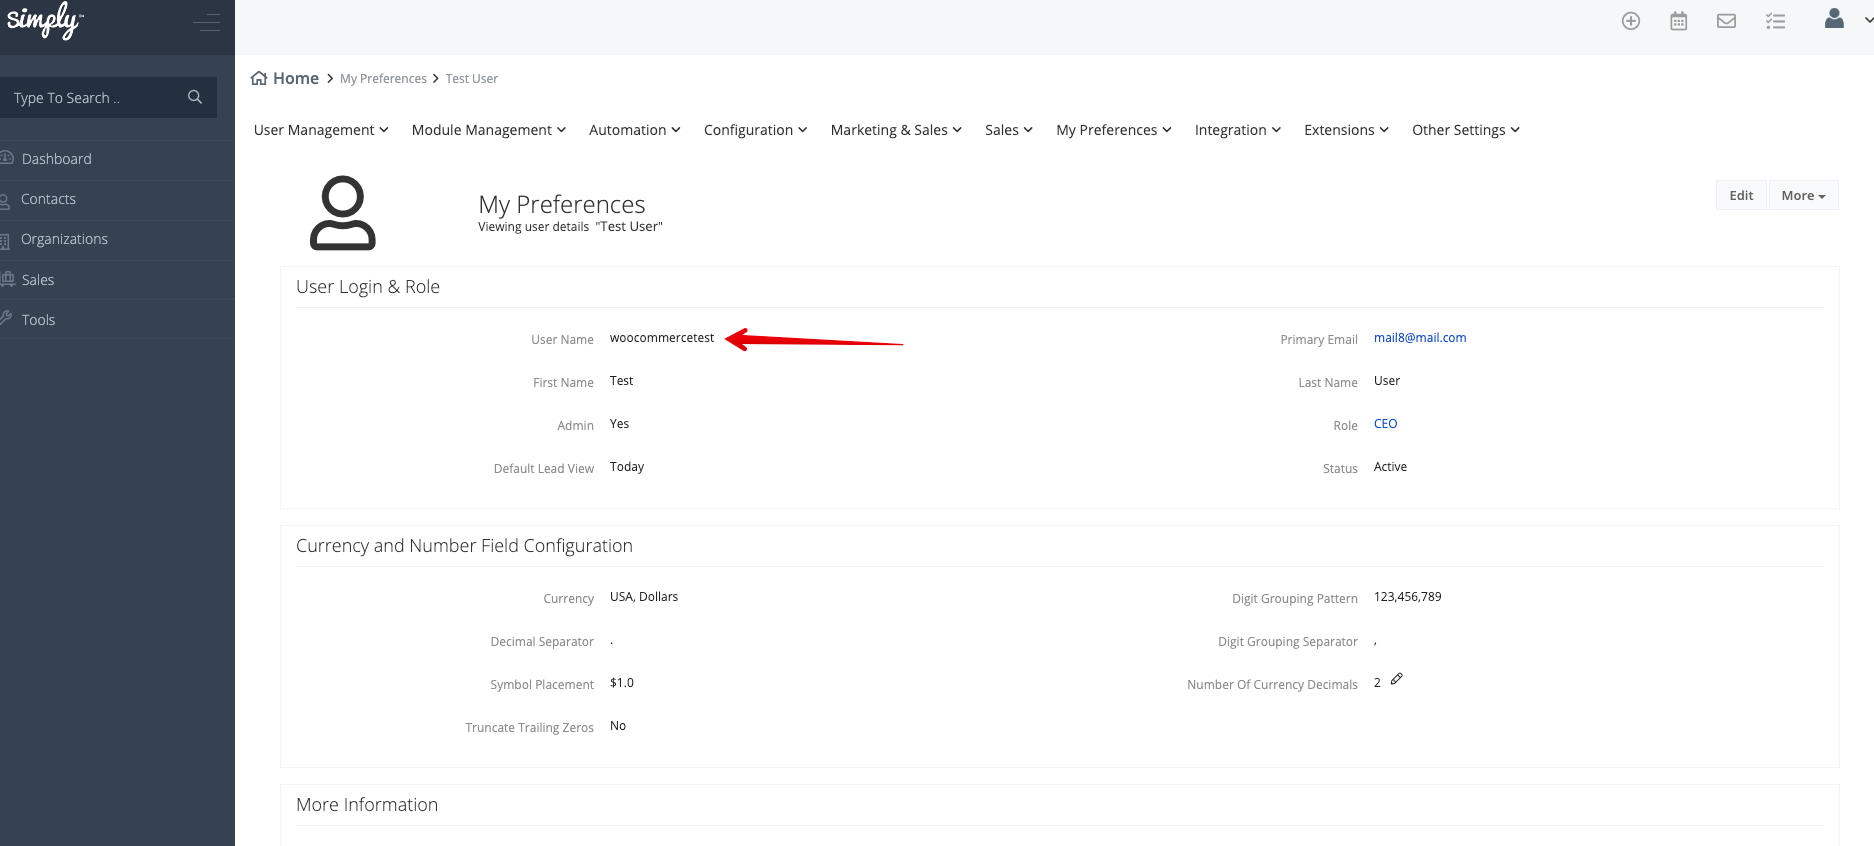
In your Simply CRM instance, open the My Preferences window.
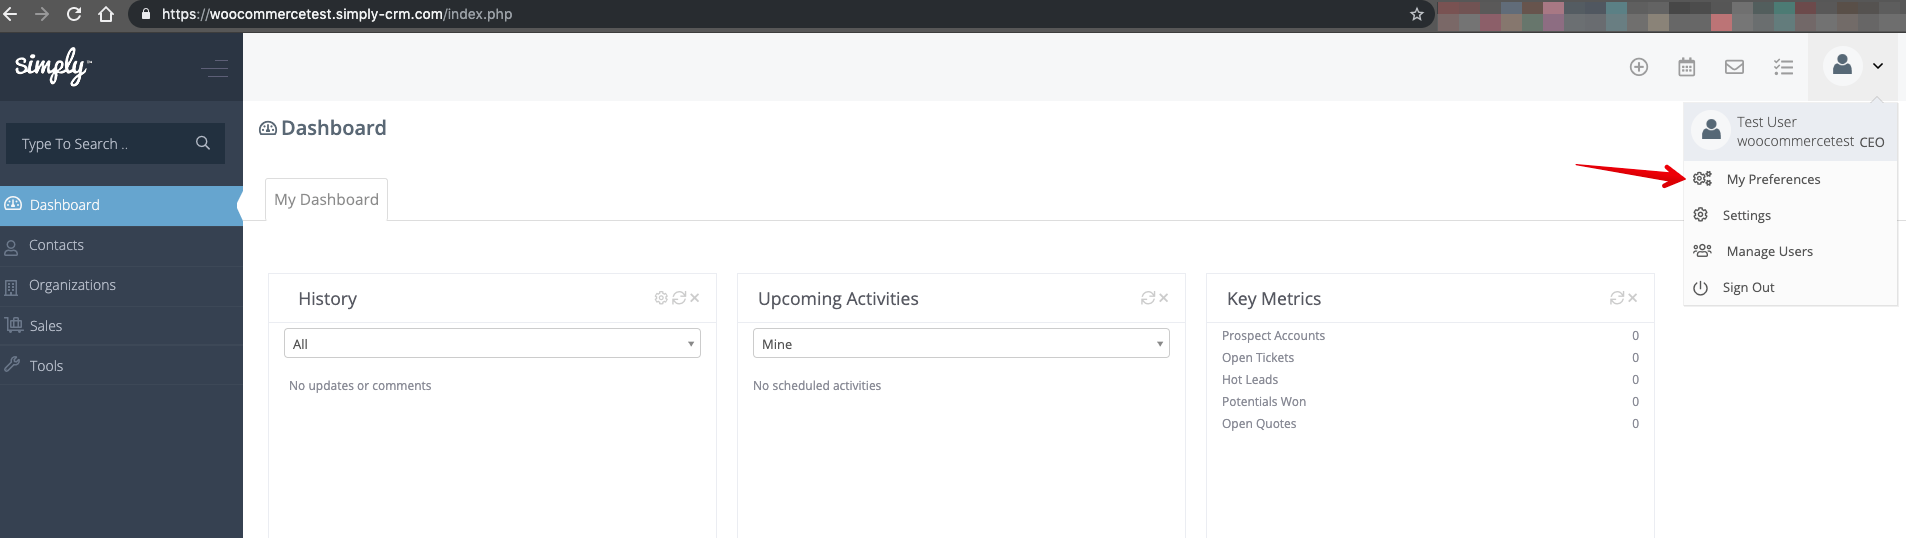
From the User Login & Role section, copy the user name to the Simply CRM integration module plugin, which you can access on your website’s dashboard, as shown in the screenshots below.
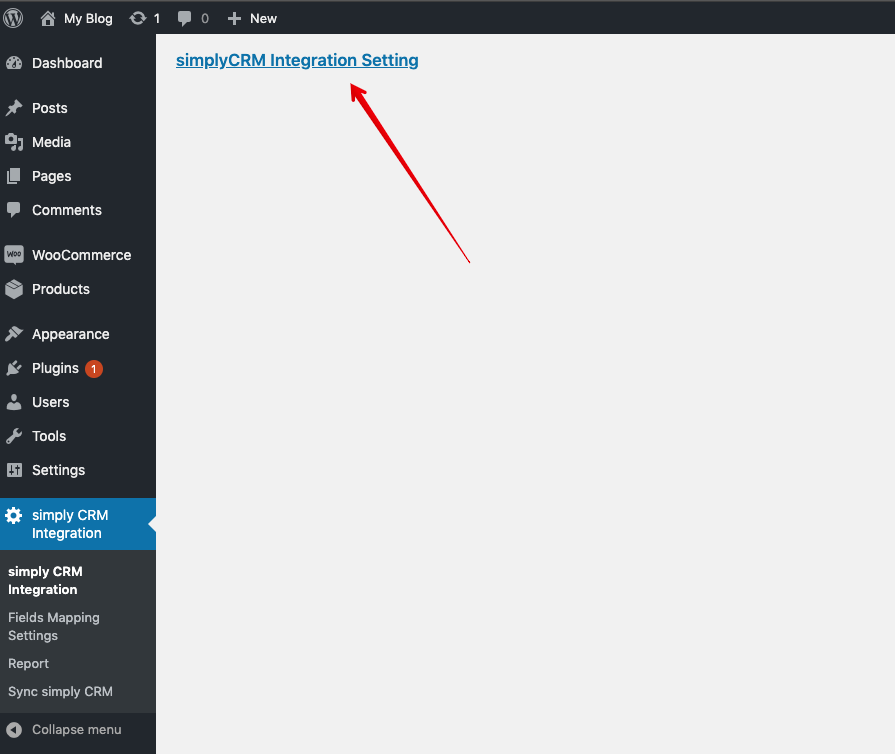
In the Simply CRM module plugin, open the Settings page.
Alternatively, you can open the WooCommerce plugin and its settings. From there, go to the Simply CRM integration tab on the WooCommerce settings page.

Paste the user name into the appropriate field.
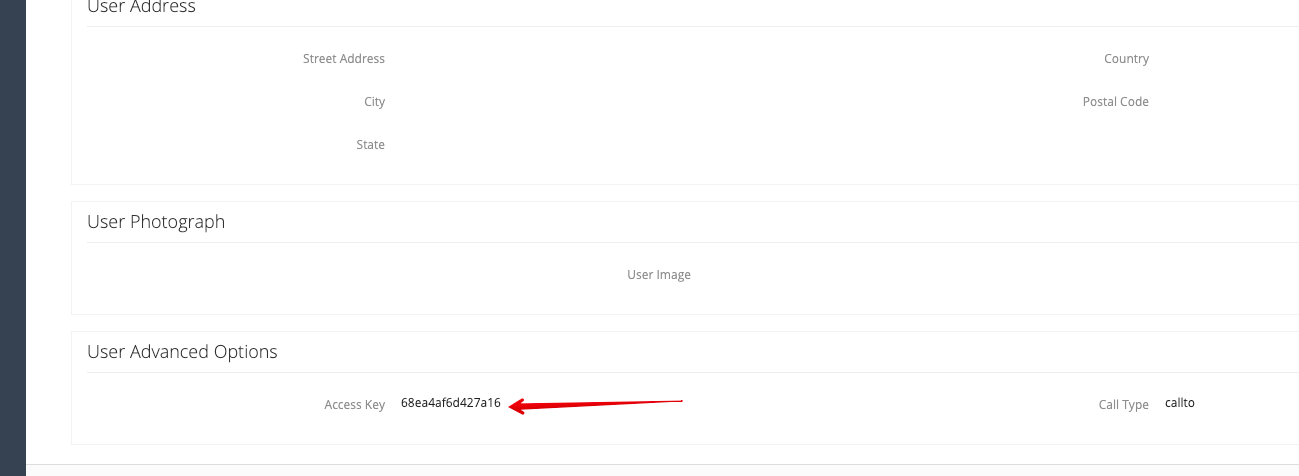
Return to Simply CRM and scroll down to the bottom page to find the User Advanced Options. Then, repeat the same procedure with the access key.
WooCommerce options
When you add the user name and the access key to the WooCommerce plugin, you will notice that the plugin offers additional options to you, as can be seen in the following screenshot.
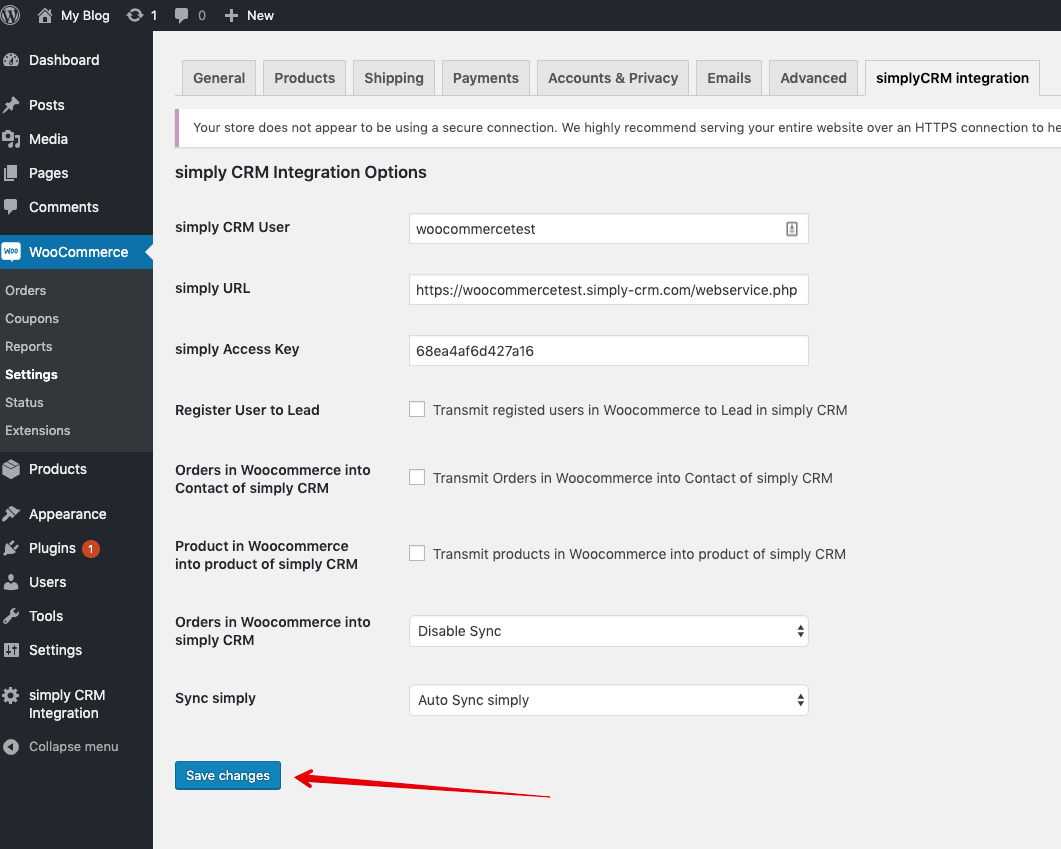
The following table breaks down all of these additional options and provides a brief description of each option.
| Option | Description |
| Simply CRM user | Refers to the user name from Simply CRM |
| Simply URL | Refers to: https://yourdomain.simply-crm.com/webservice.php |
| Simply Access Key | Refers to the access key from Simply CRM |
| Register User to Lead | Converts users registered in WooCommerce to leads in Simply CRM |
| Orders in WooCommerce into contact of Simply CRM | Converts customers from the orders in WooCommerce to contacts in Simply CRM |
| Product in WooCommerce into product of Simply CRM | Syncs products from WooCommerce and saves them as products in Simply CRM |
| Orders in WooCommerce into Simply CRM | Syncs the settings for WooCommerce orders |
| Sync Simply | Syncs records with Simply CRM |
The last two options in the table allow you to choose from a drop-down menu. For Orders in WooCommerce into Simply CRM, you can select the following options:
- Disable sync – The orders will not be synced.
- Sales Orders – The orders will be synced as Sales Orders in Simply CRM.
- Invoices – The orders will be synced as Invoice records in Simply CRM.
For Sync Simply, you can choose from the two following options:
- Auto Sync Simply – The records will be synced with Simply CRM immediately after you create them.
- Add to Queue – The records will be synced only after you manually run the synchronization process.
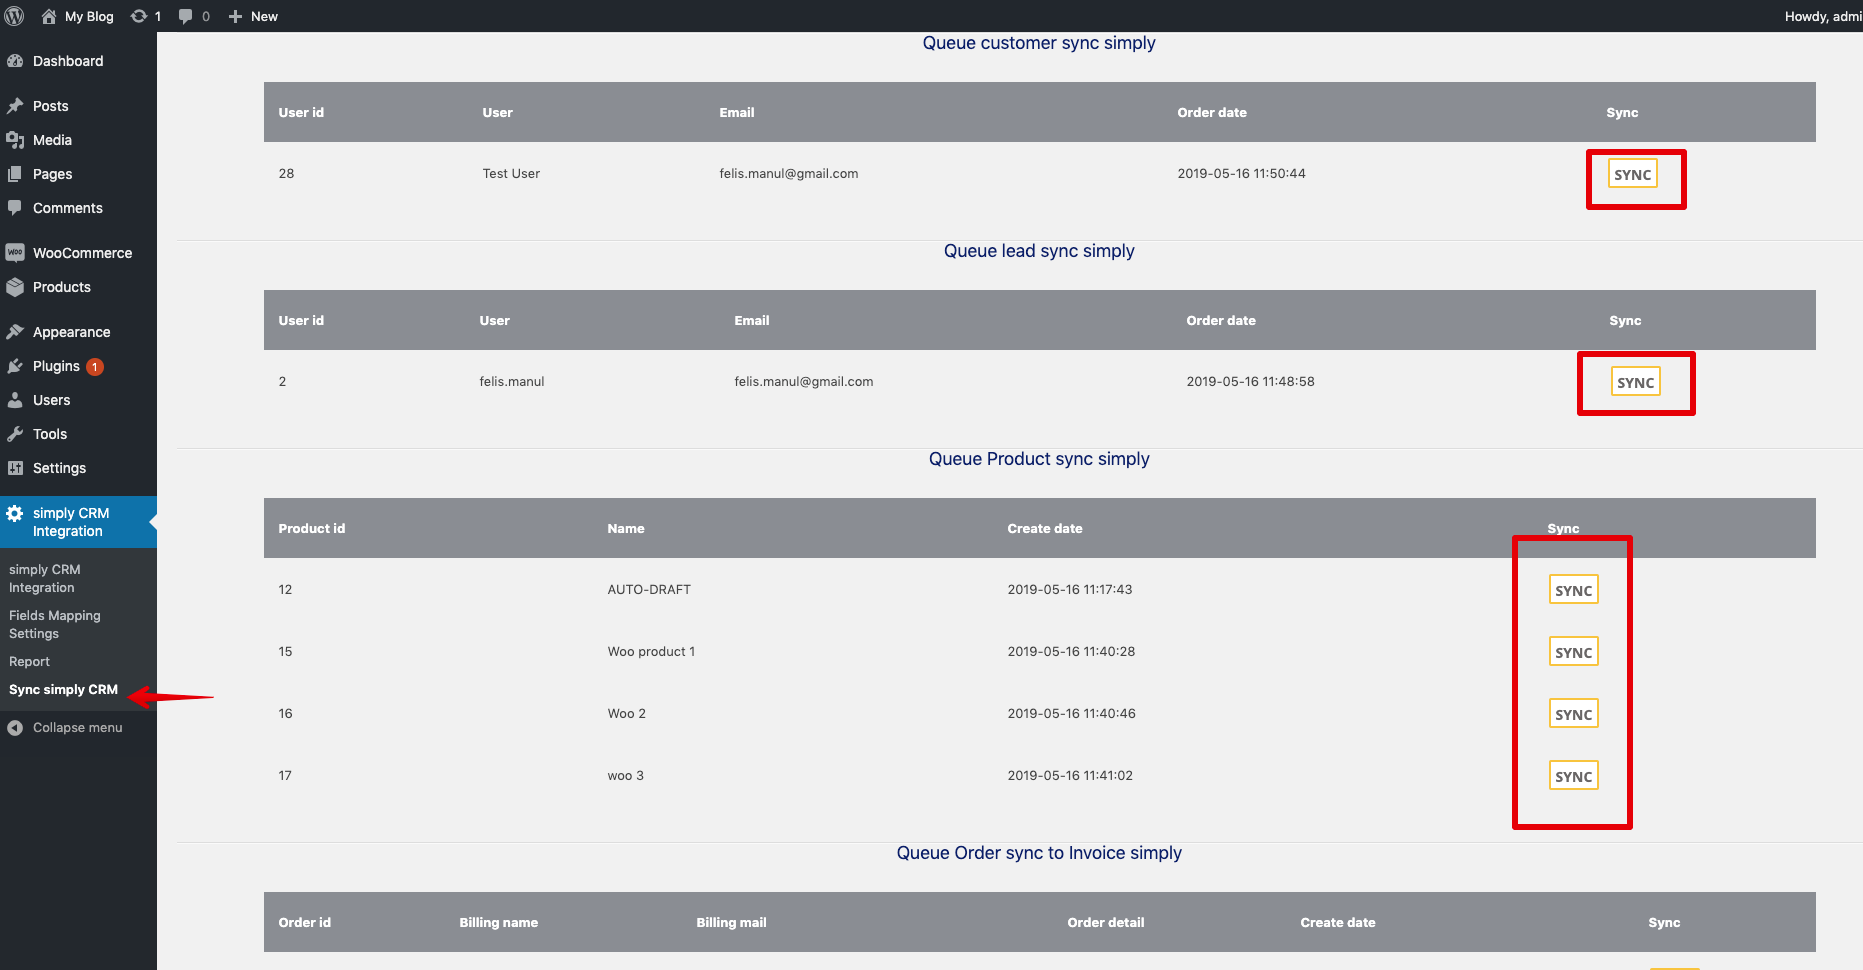
How to sync your data
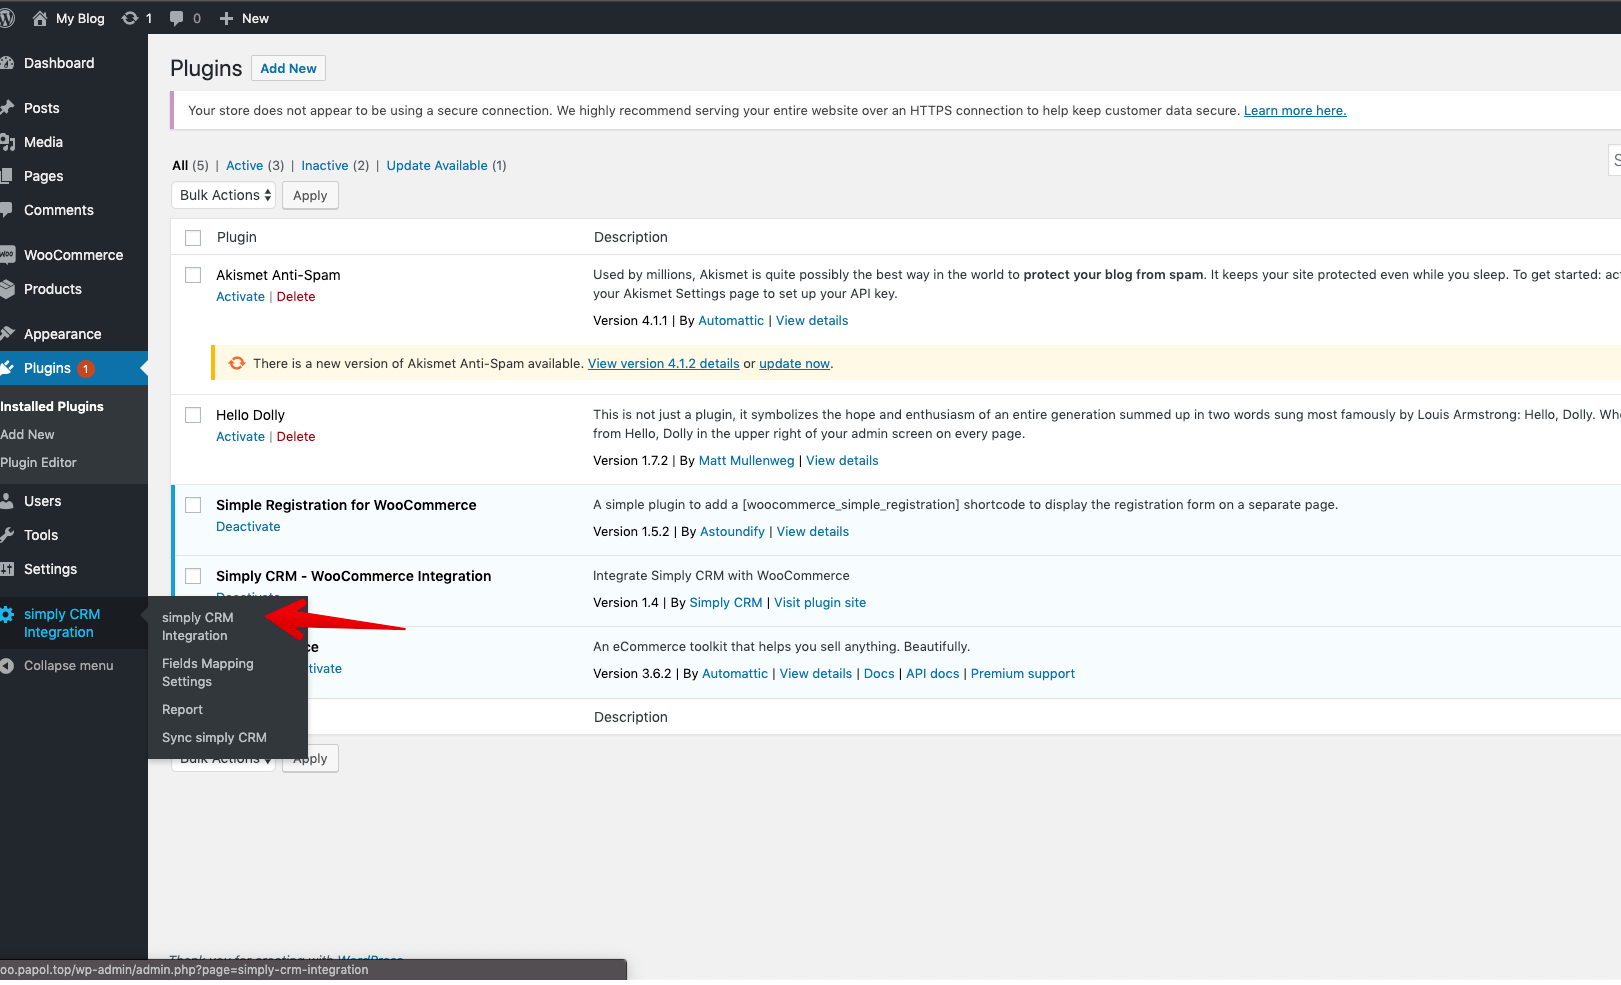
To sync WordPress/WooCommerce and Simply CRM, open the Simply CRM Integration tab on the left menu. Choose the Sync Simply CRM option and press on the Sync buttons in the new window.
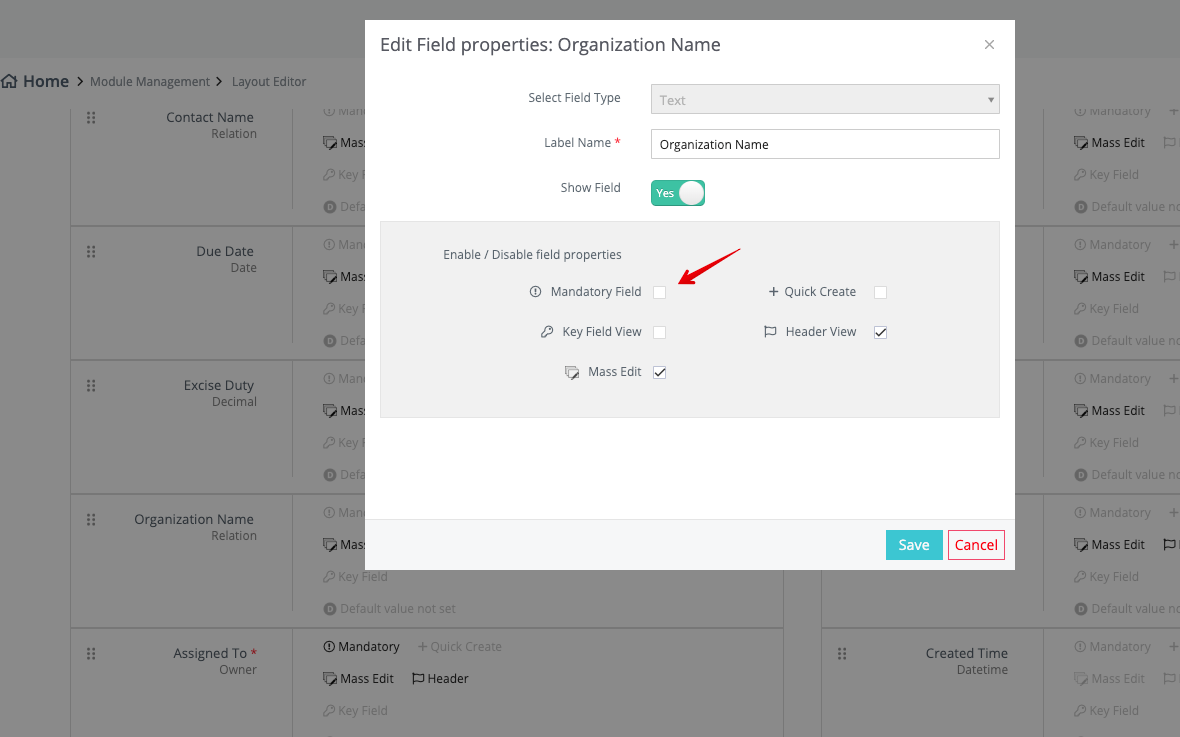
Before you perform a sync, make sure that the Organization Name in the Invoices and/or Sales Orders module in Simply CRM is not set as mandatory. You can do this by opening the Settings window in your instance of Simply CRM.
On the settings page, choose Module Management and Module Layouts & Fields. Select the necessary module (Invoices or Sales Orders).
This will open a window with all fields within the chosen module. Find the Organization Name field and press on the pencil icon that appears when you hover over the field.
In the new pop-up window, uncheck the option Mandatory Field.
When you sync your WordPress/WooCommerce data with Simply, you will have all the important information available in your instance of Simply CRM. This will make it easier for you to manage your products, orders and payments, as well as create a better overview of your entire business.
If you run a WordPress or WooCommerce-based website, it’s highly recommended that you integrate your store with Simply CRM and sync your data, either automatically or manually.


