Billy’s Billing is a popular invoicing and accounting application that allows business owners and managers to track their incomes and expenses. You can find out more by visiting their official website at Billy.dk.
Simply CRM fully integrates the Billy’s accounting system into its dashboard and provides you with a complete overview of all your accounting data.
If you have a Billy account or want to set up Billy for your company, please follow the instructions below. We will help you set up an account and integrate it into your instance of Simply CRM.
Continue reading for more information.
Integrate Billy in Simply CRM
To integrate your Billy account with Simply CRM, you will need to perform the following steps:
- Set up a Billy.dk account
- Generate the Billy API key
- Configure your Billy account in Simply CRM
How to set up a Billy account
In order to integrate Billy in Simply CRM, you must first have an active Billy account. If you have a Billy account, feel free to skip this step. Otherwise, please follow the instructions below.
Visit the Billy.dk website and sign up for a trial account using the Opret gratis bruger option in the top right corner or simply fill out the registration form in the center of the homepage.

You will be automatically logged into your new account. Enter your company’s information and fill out all the forms necessary to complete the registration process.
Important: Unless you finish the registration process, you won’t be able to access the option to generate the Billy API key.
How to generate the Billy API key
When you complete the registration, click on the gear icon in the bottom left corner to open your account settings. In the new sidebar, select Adgangsnøgler to open the API Keys.
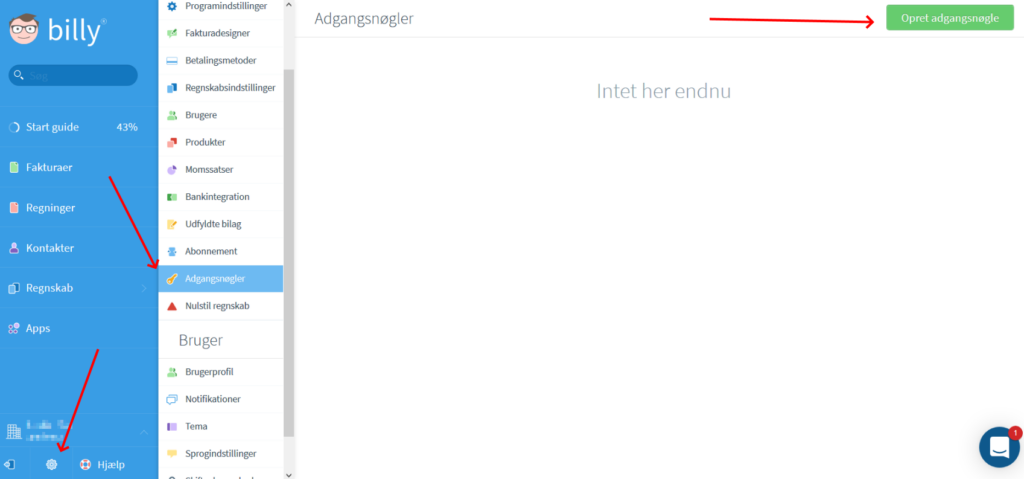
In the new window, press the Opret adgangsnøgle button in the top right corner, as shown in the image above.
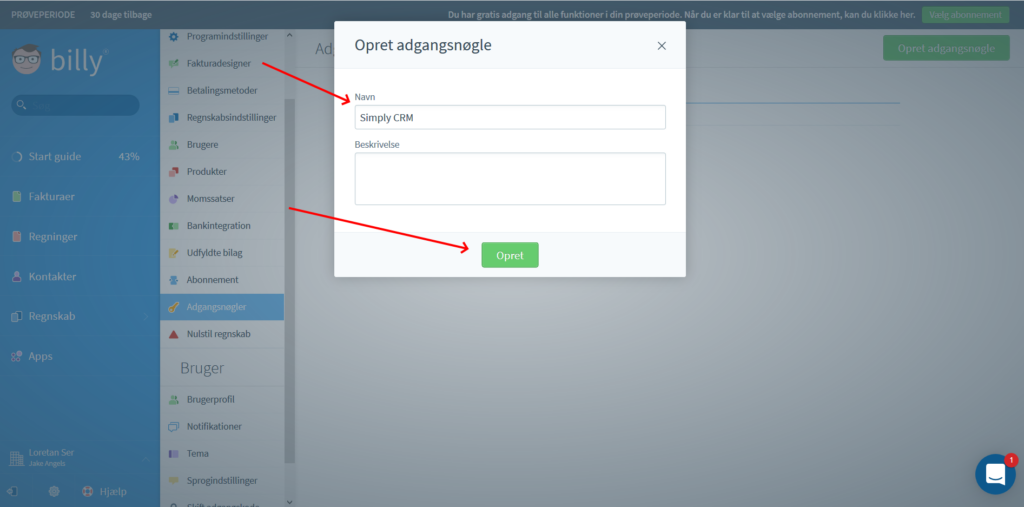
In the resulting pop-up window, enter the API Key name in the Navn field and press Opret.
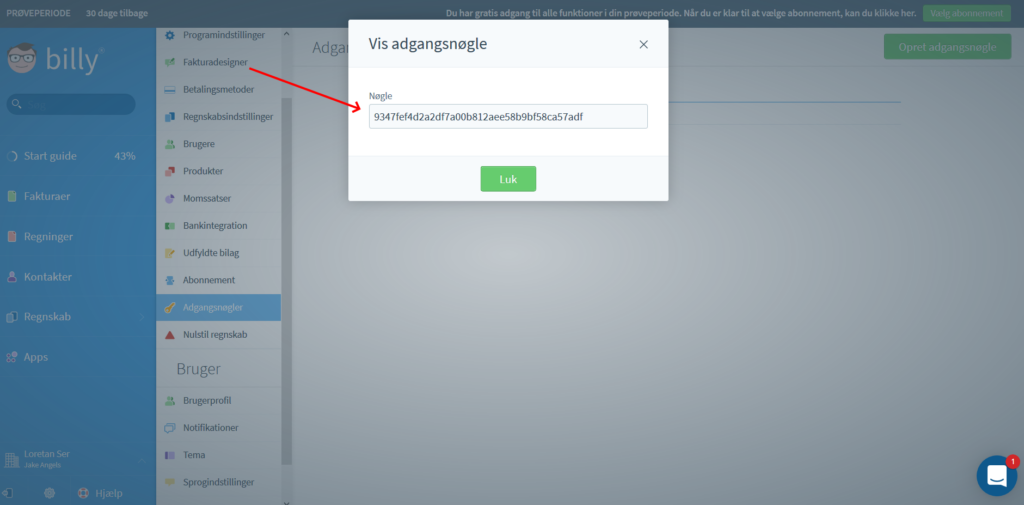
When you press the button, a new pop-up window with your API key will appear. Copy this key and then return to Simply CRM.
How to configure Billy in Simply CRM
When you log into your instance of Simply CRM, go to Settings. Press on Other Settings option and choose Billy’s Billing.

In the Billy module, press the Edit button and enter your API key in the API Key field. Then, press Save to confirm your settings.
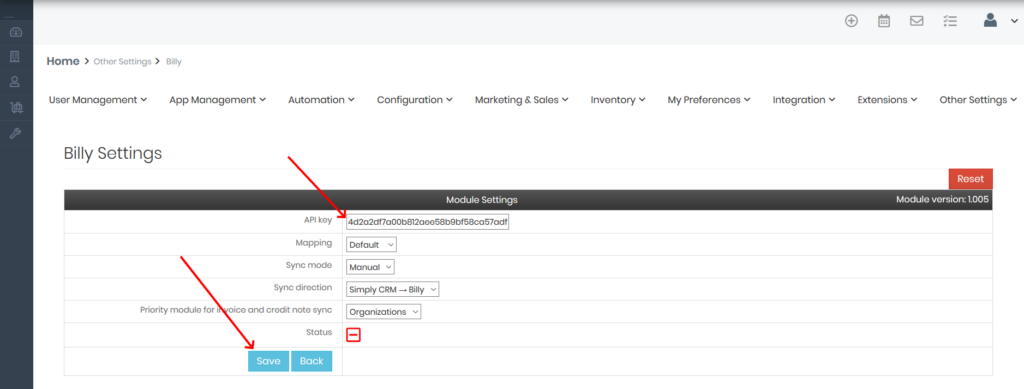
If you’ve entered the correct data, the Status icon will turn green.
When you enter your API key successfully, you will be able to change your Billy integration settings using the Edit button in the top right corner.
The following table breaks down all the options that you can configure.
| Option name | Option description |
| API Key | The key used to connect your Billy account with your instance of Simply CRM. |
| Mapping | Mapping allows you to match Simply CRM fields to their Billy counterparts to quickly transfer your data. You can choose between default and custom mapping. Default – all fields are preset. Custom – you choose how the fields will be mapped. |
| Sync mode | Sync mode describes how your data will be synchronized. Manual – the data will only sync when you press on the Sync button in the Billy module. Automatic – the data will sync automatically every three hours, starting from the next cron update. |
| Sync direction | Sync direction specifies what app has priority when syncing data. Simply CRM → Billy means that the data will be synced from Simply to Billy. Simply CRM ← Billy means that the data will be synced from Billy to Simply CRM. Simply CRM ↔ Billy means that the data will sync both ways. |
| Priority module for invoice and credit note sync | Determines what module has priority when synchronizing invoices in Billy. You can choose between organizations and contacts here. Organizations – prioritizes invoices from companies. Contacts – prioritizes personal invoices. |
| Status | Specifies the status of the Billy-Simply CRM connection. Red means that the connection failed and green means that the connection has been established successfully. |
Important: If you select two-way synchronization, you’ll need to set the app has priority.
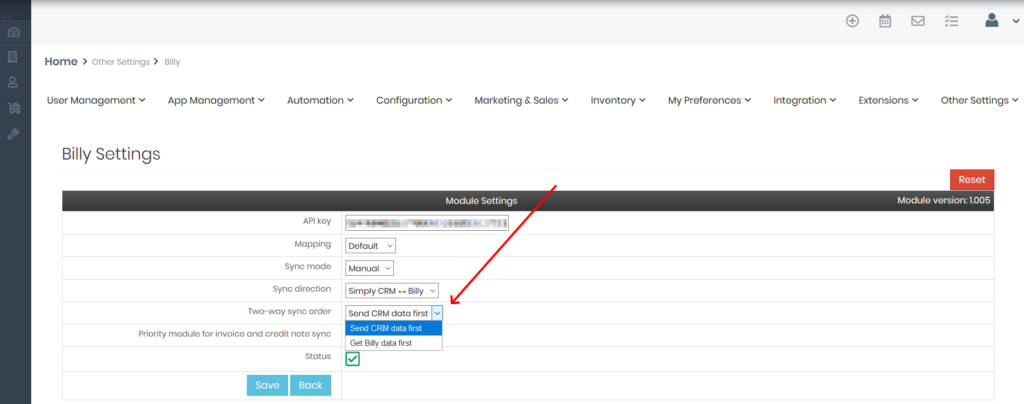
If you choose Send CRM data first, the Billy data will be updated with your Simply CRM records. Conversely, if you select Send Billy data first, your Simply CRM data will be updated with your Billy records.
How to use your Billy data in Simply CRM
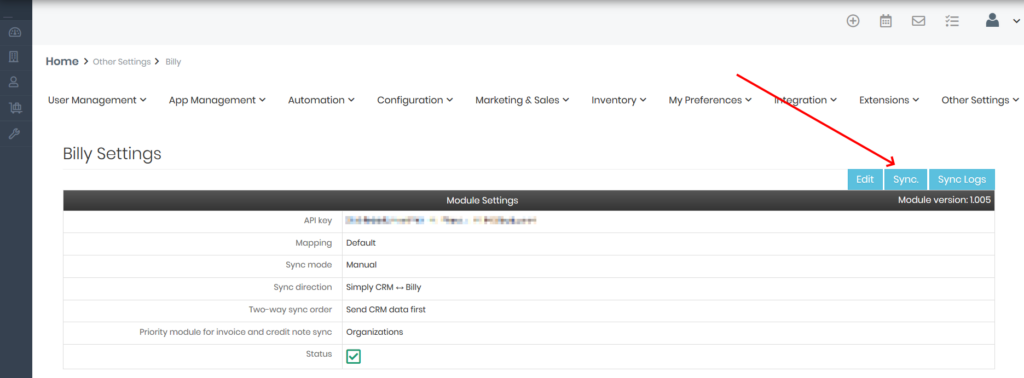
Once you integrate your Billy account in Simply CRM, you can synchronize your data for specific modules or in bulk. To synchronize your data in bulk, simply visit the Billy’s Billing module under Settings > Other Settings.
In the module, press the Sync button in the top right corner. All modules will be immediately synchronized.
Important: If you set the Sync mode to Automatic, your data will automatically sync every three hours. If you need to synchronize your data immediately, use the Sync button.
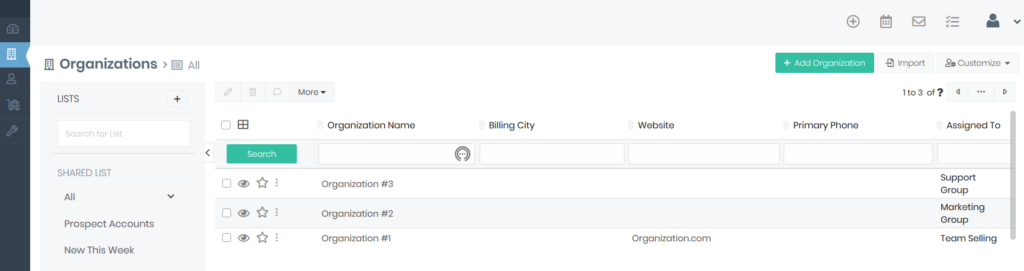
If you only want to synchronize a single record, you can perform the sync by locating the desired record in its module. You can access your modules using the menu on the left side.
Important: Billy can only be used in the following modules – Contacts, Organizations, Products and Invoices.
If you want to synchronize an Organization record, open the Organizations module from the menu. In the list view of organizations, press the record that you need to synchronize and open its detailed view.
In the detailed view, press the Sync to Billy button in the top right corner.
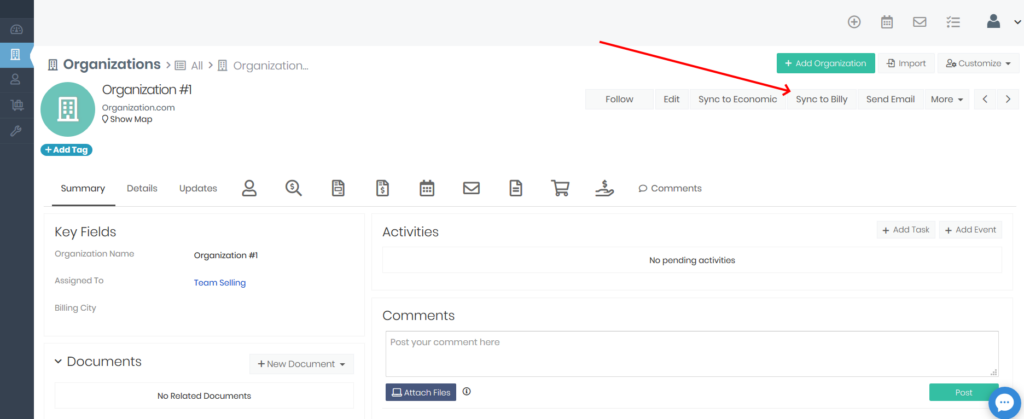
A new pop-up window with the synchronization status will appear on your screen.
If your synchronization fails, please revisit the instructions on integrating Billy in Simply CRM and make sure you’ve connected your Billy account correctly.


