Simply CRM integrates with MailChimp and allows you to connect two platforms to make sure all data is in sync and nothing is missing.
Before you start using MailChimp with Simply, you will have to establish a connection between the two.
To create the connection, you will need to:
- Access your MailChimp account
- Generate MailChimp access key for Simply
- Create a MailChimp list.
How to integrate MailChimp with Simply CRM
In order to integrate MailChimp with Simply CRM, you need to have an active MailChimp account. For instructions on how to set up a MailChimp account, please visit the help section on their official website.
Now that you have your MailChimp account, you’ll need to generate access keys in order to integrate your MailChimp data with Simply CRM.
Activate MailChimp module in SimplyCRM
In your Settings go to App management –> Apps
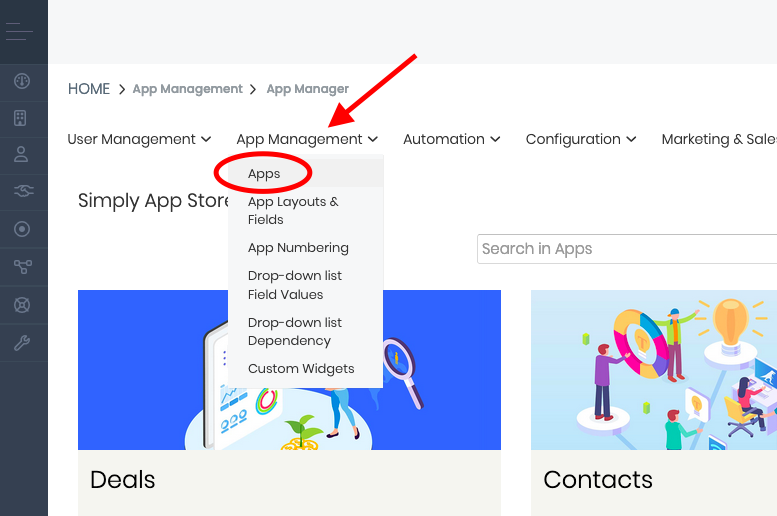
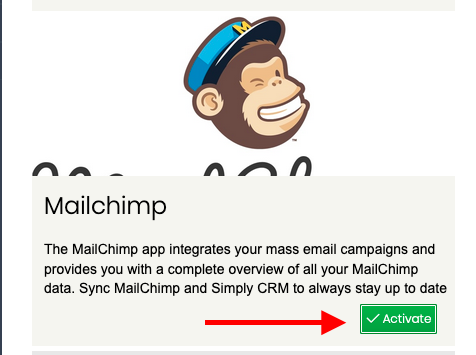
Scroll down or use the search bar to locate MailChimp App and click Activate. Refresh your page to reflect the changes.
How to generate MailChimp access data
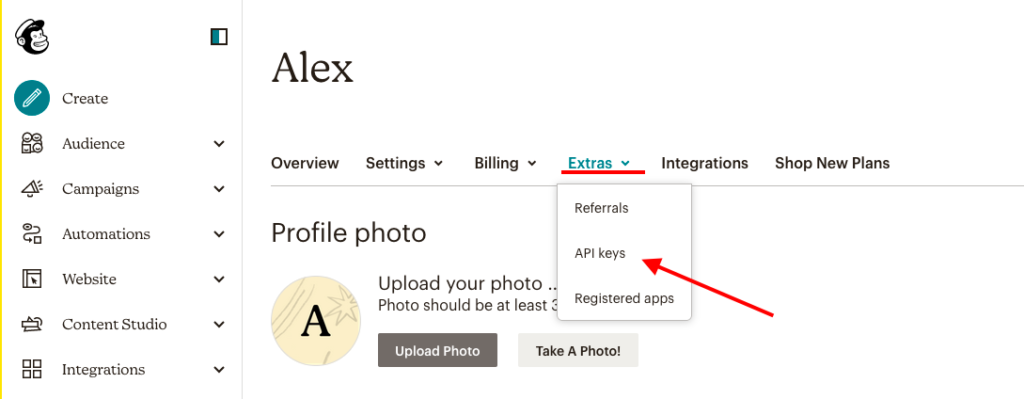
In your account click on your avatar at the bottom left corner –> select Profile –> and click on the Extras tab to select API Keys.
Scroll down and click on Create A Key to generate an access key that can be used for Simply.
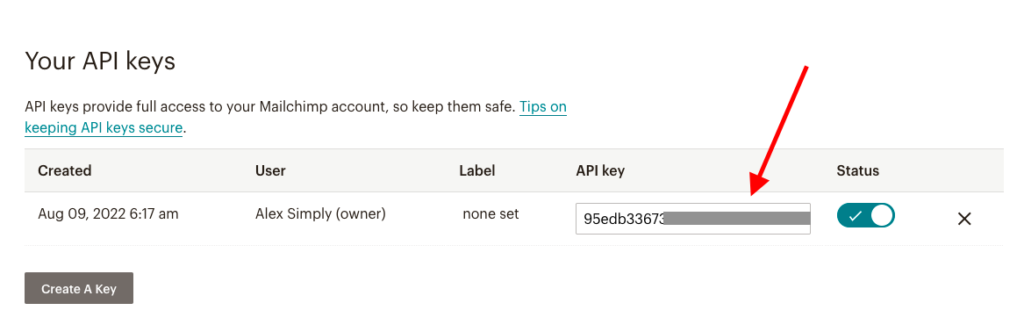
Copy the string of symbols in the API key.
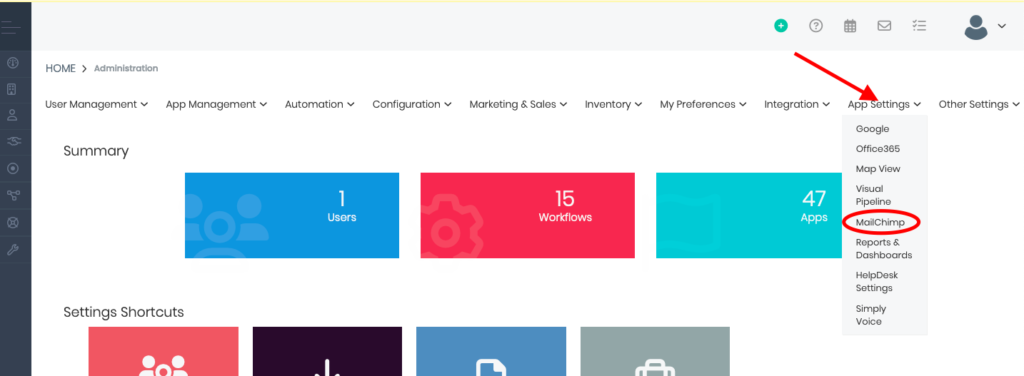
How to assign the access key
Now head back to the Settings and select App Settings –> MailChimp
On the MailChimp page, enter your API key in the relevant field, as shown below.
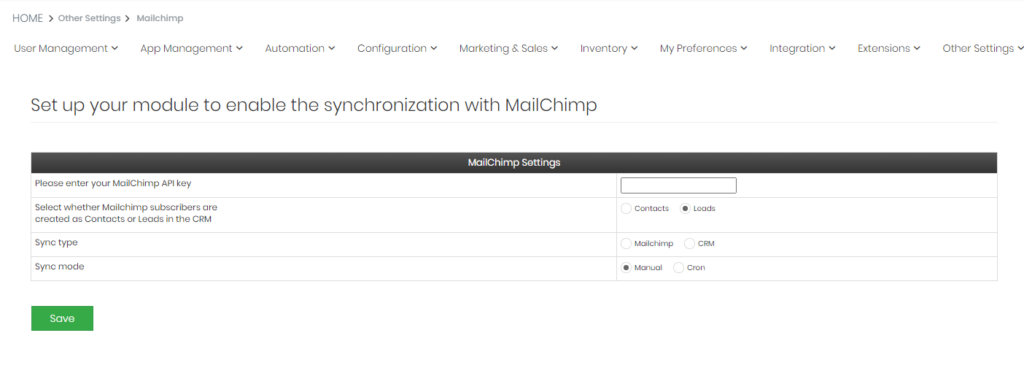
Aside from the API key, you can configure additional MailChimp settings here. You can choose whether to import MailChimp subscribers as contacts or leads.
You can also select the sync type, specifying which app will have priority when synchronizing data. If you choose MailChimp, the MailChimp data will overwrite the Simply CRM data in your instance. If you choose Simply CRM, then your MailChimp account will be updated with your Simply CRM records.
Sync Mode lets you select whether the sync will be done manually or automatically. If you choose the Cron option, the data will be periodically synchronized on its own. Selecting the Manual option here will require you to manually sync the time every time.
Once you configure your settings, press Save to confirm the changes.
How to create lists in MailChimp
MailChimp now uses the Audience feature (formerly known as Lists) to organize email contacts. A MailChimp Audience are all the recipients of your emails.
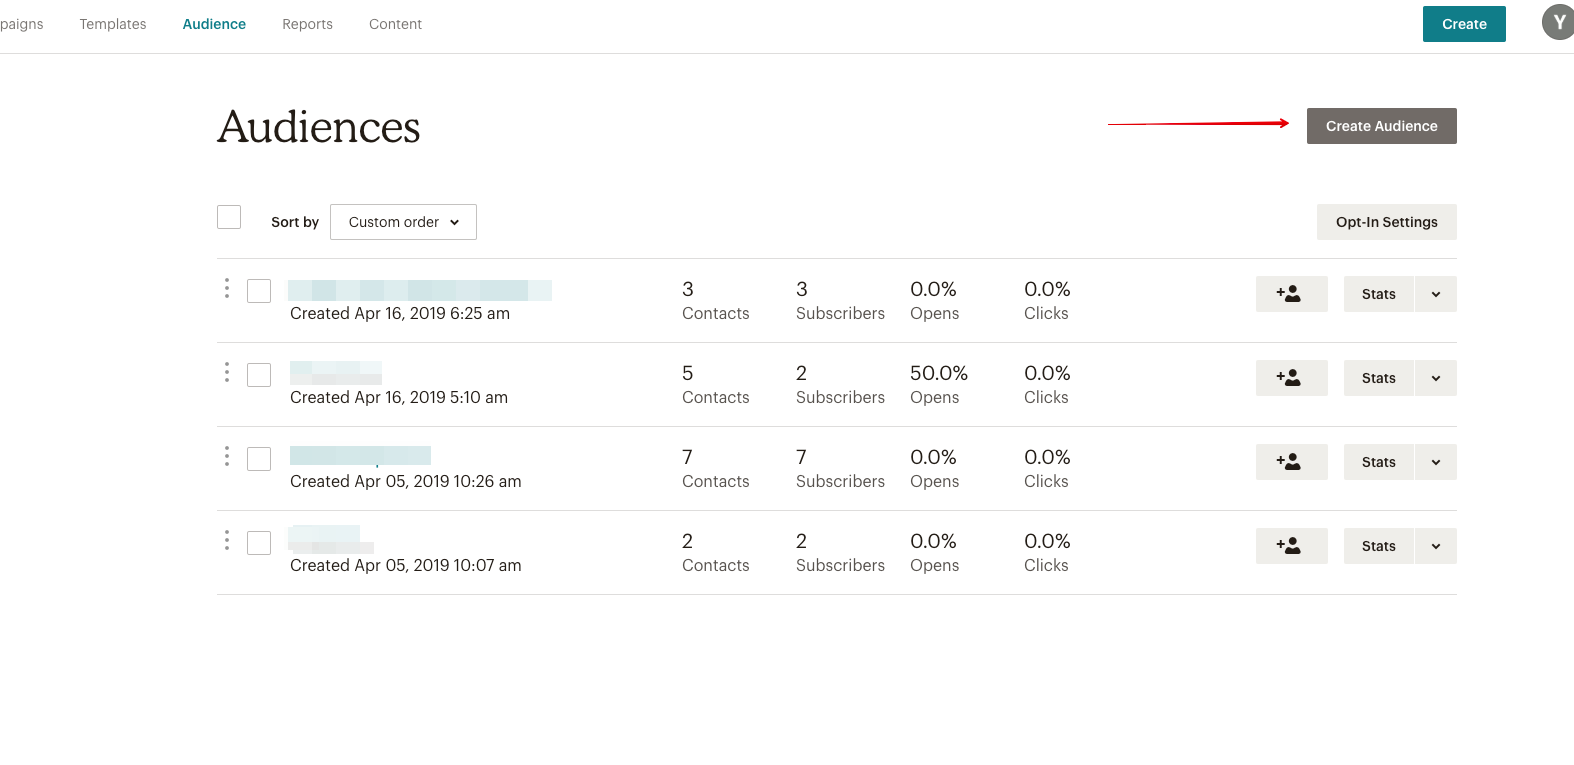
You need to have at least one Audience in MailChimp to be able to integrate with Simply CRM.
You can create an Audience by opening the Audience window from the MailChimp main menu. In the new window, press on the Create Audience button.
In case you don’t see the button, click on View Audiences and follow the instructions to create as many lists as you need. Keep in mind that all of these lists will be available in Simply.

How to sync MailChimp and Simply CRM
To sync MailChimp with Simply, open the menu on the left side and use MailChimp under the Marketing tab to create a new entry. This entry actually represents a group entry that functions in the same way as MailChimp group entries.
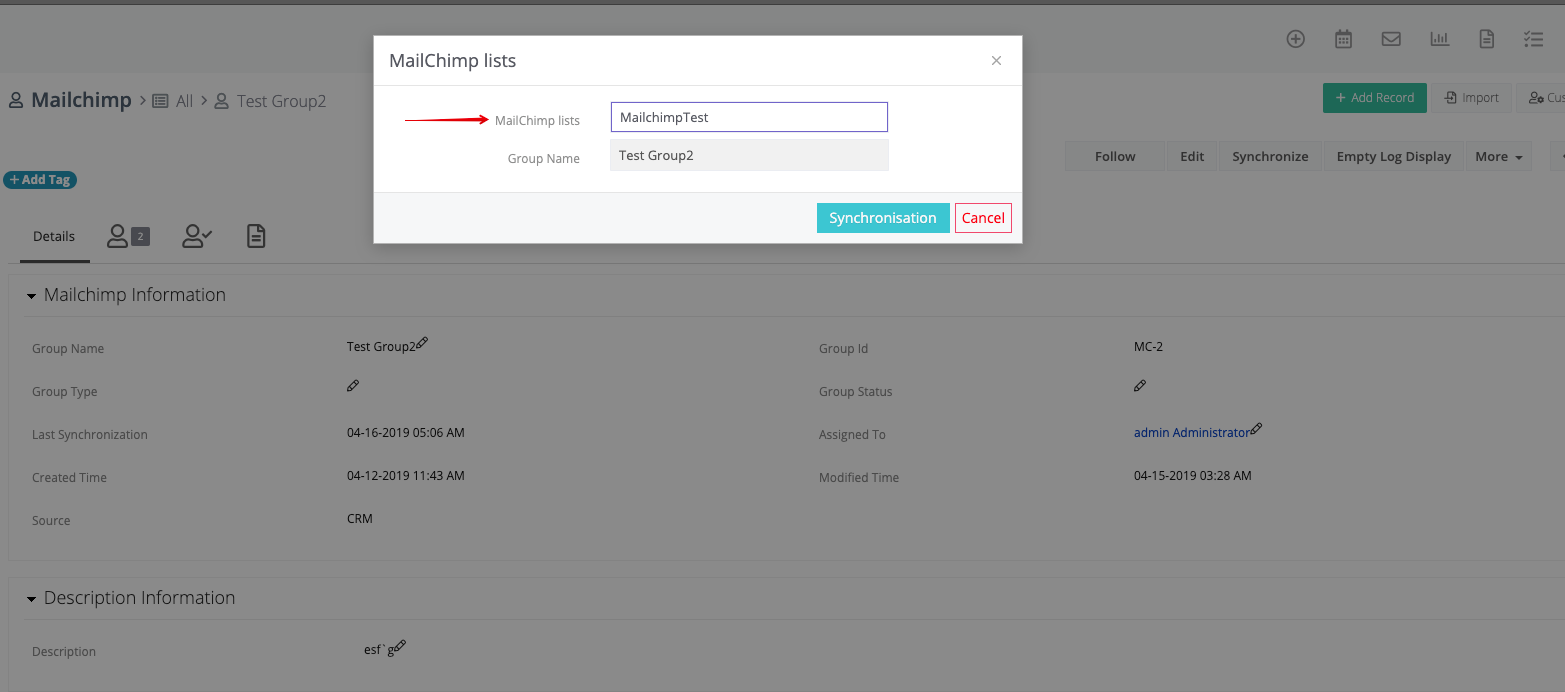
To sync the records, you will need to open the detailed view of the MailChimp group in Simply and click on the button Synchronize. Here, you will see a list of your MailChimp audiences and select the one that you want to synchronize with your Simply data.
How the MailChimp synchronization works
MailChimp utilizes two-way synchronization, which means that all contacts within the chosen MailChimp CRM group will be synced with the chosen MailChimp audience. All contacts from the MailChimp audience will be synced with the MailChimp CRM group (and the contacts module).
In case a subscriber uses the Unsubscribe option in MailChimp, they will be removed from the MailChimp CRM group, but they will stay in the MailChimp Audience after the next sync.
If you delete a contact from the MailChimp CRM group, it will be marked as Unsubscribed in the MailChimp Audience after the next sync.
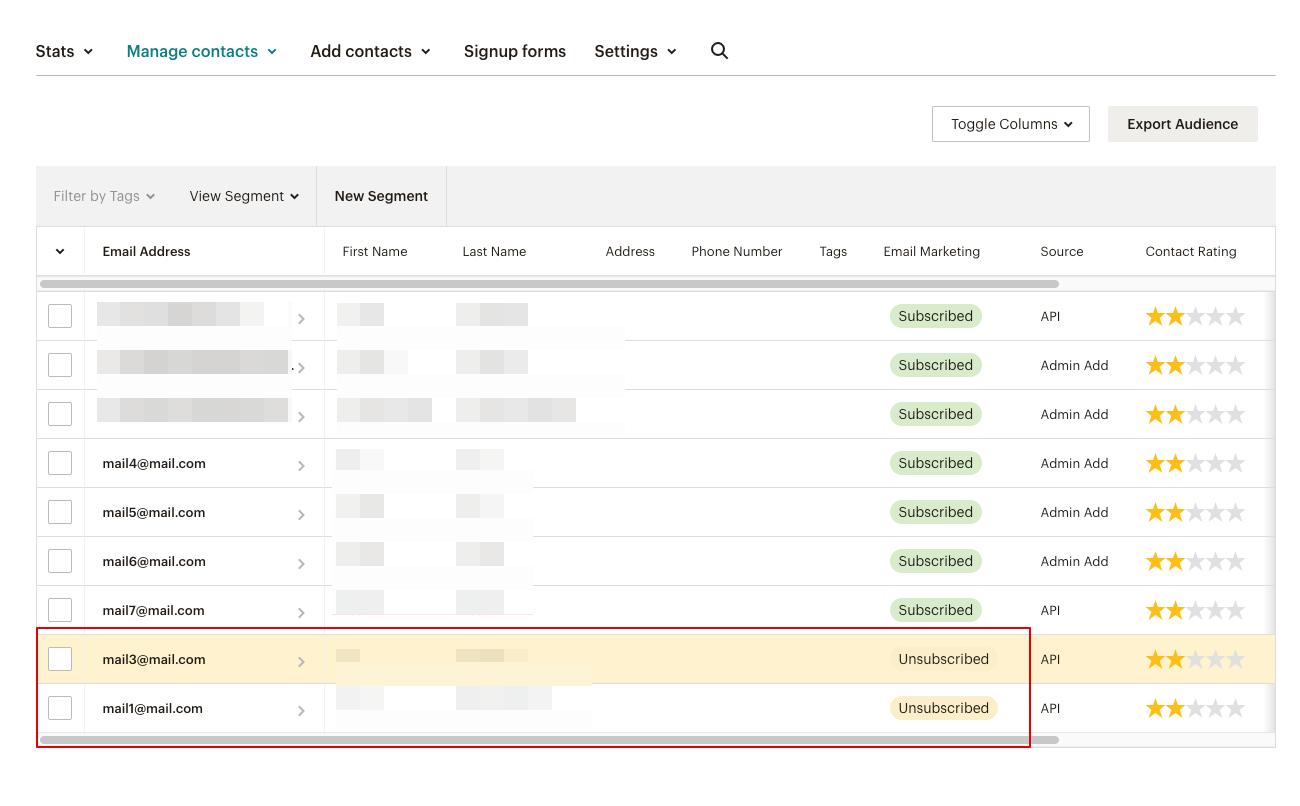
Important: MailChimp will only sync the CRM contacts with designated email addresses.
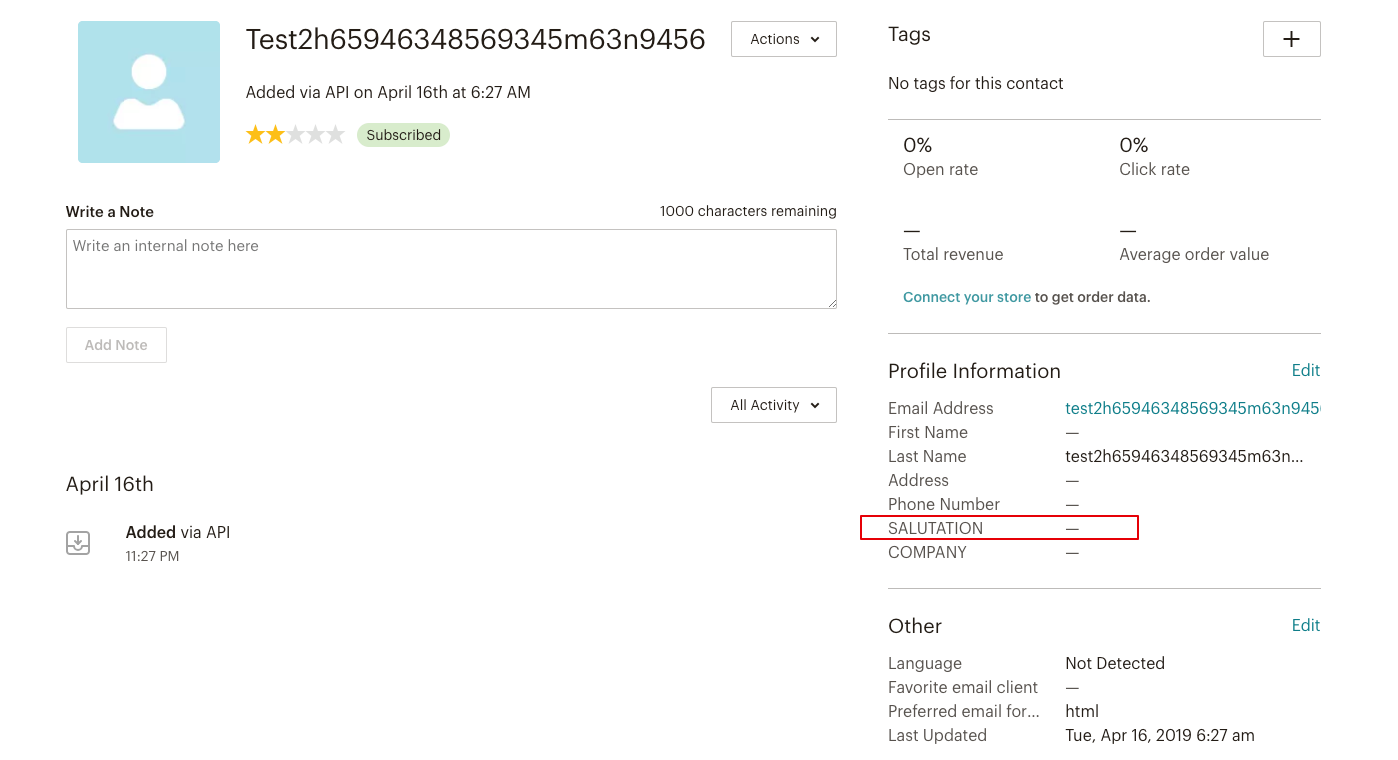
How salutation handling works in MailChimp
Leads and contacts have a field called Salutation in Simply CRM.
When you transfer CRM data to a MailChimp list for the first time, Simply will create the Salutation field, which will be filled by all subsequent data transfers.
How to use the MailChimp Connector
We will explain how the MailChimp Connector is used on a specific example.
For instance, let’s imagine we have created a MailChimp Audience called Tradeshow New York 08/18. Now, we would like to invite prospects from New York, Boston and Washington DC through a bulk emailing campaign. We would also like to use these lists of prospects for future events and emailing campaigns.
Therefore, we only want to compile the list once and reuse it whenever necessary. To achieve that, we will follow the steps outlined below:
- Create a CRM group entry with the name Boston prospects and add all prospects from the Boston area to the group.
- Sync this group with the MailChimp audience Tradeshow New York 08/18.
- Create a CRM group entry with the name New York prospects and add all prospects from the New York area to the group.
- Sync this group with the MailChimp audience Tradeshow New York 08/18.
- Create a CRM group entry with the name Washington DC prospects and add all prospects from the Washington DC area to the group.
- Sync this group with the MailChimp audience Tradeshow New York 08/18.
By executing the previous steps, we will add all prospects to the MailChimp audience called Tradeshow New York 08/18, which can be accessed by using the menu [Audience] -> Tradeshow New York 08/16 -> [View Contacts].
In addition, you may find each individual group in the menu [Audience] -> [View Audience]. The Audience of subscribers essentially combines the content in the related groups in the following way:
Tradeshow New York 08/13 = Boston prospects + New York prospects + Washington DC prospects.
How to use MailChimp with Simply CRM
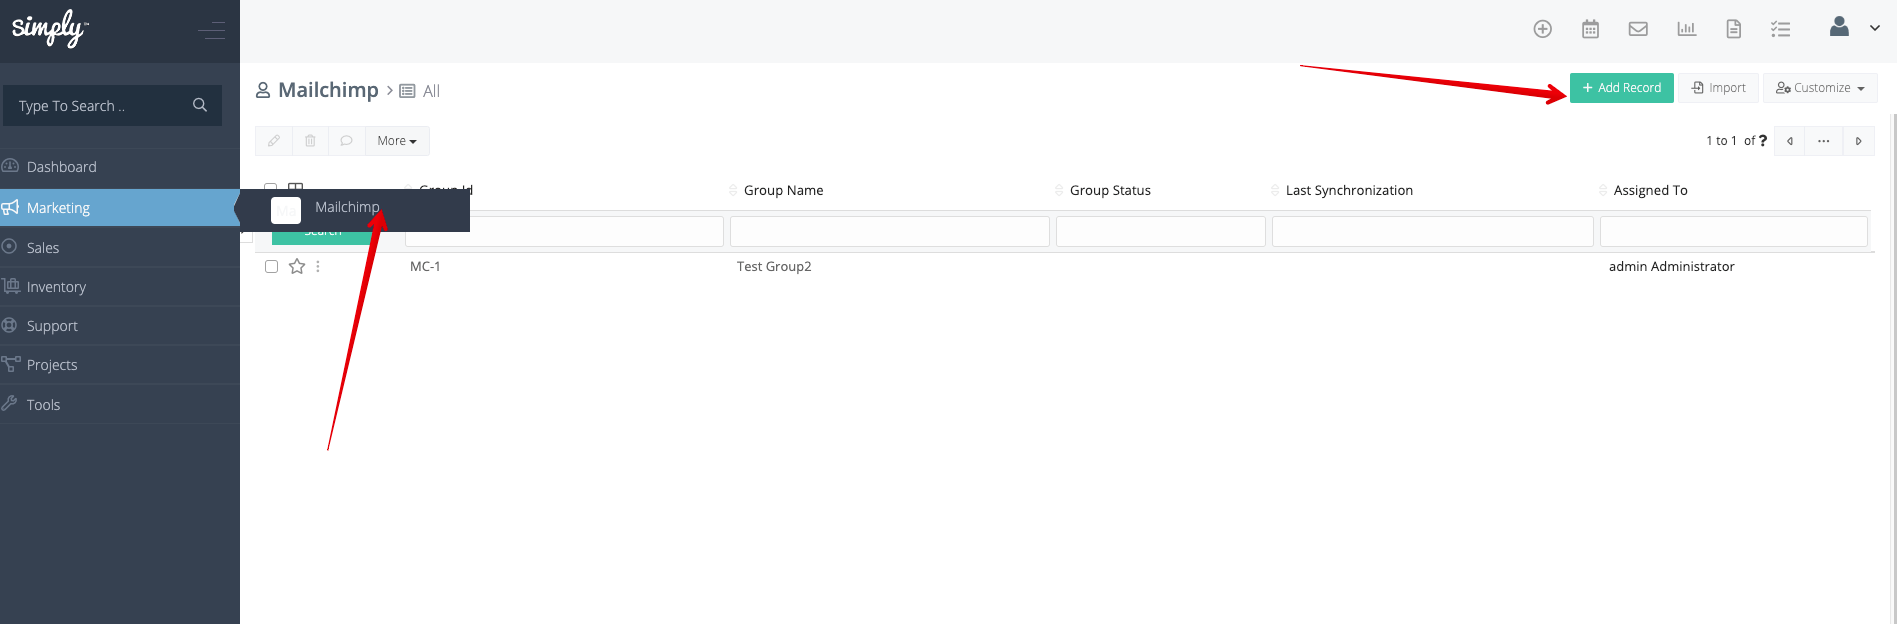
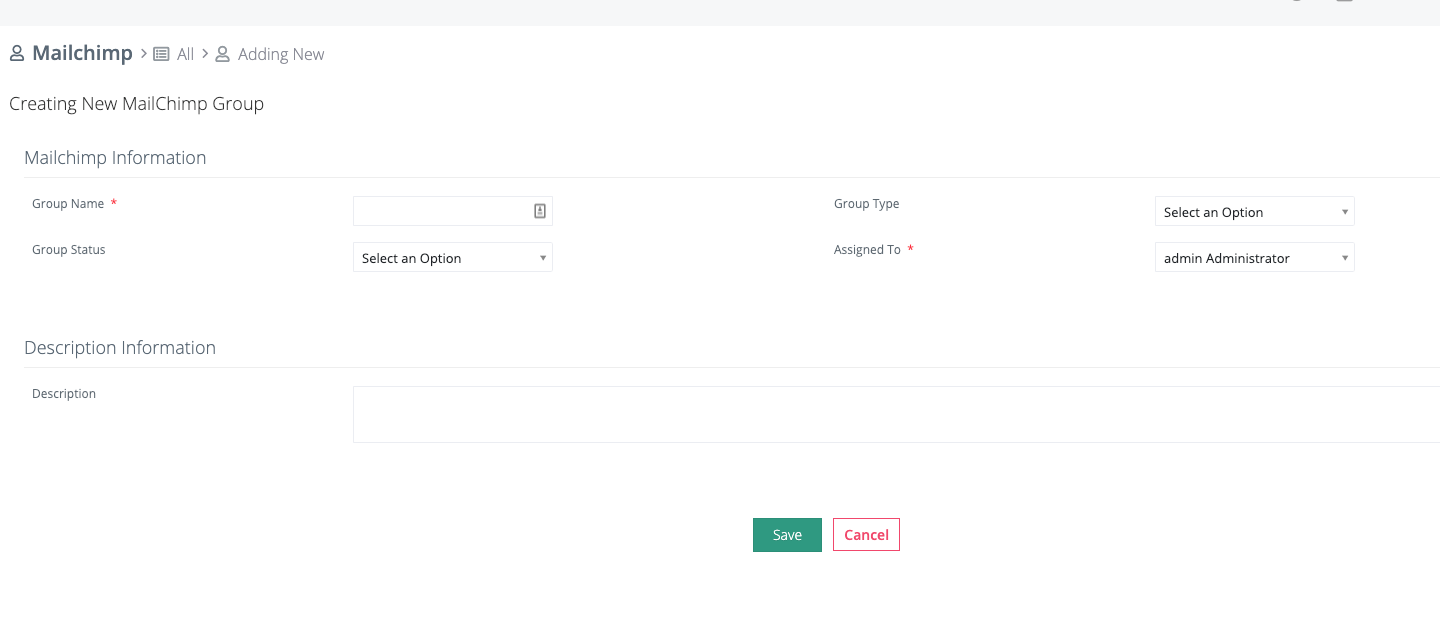
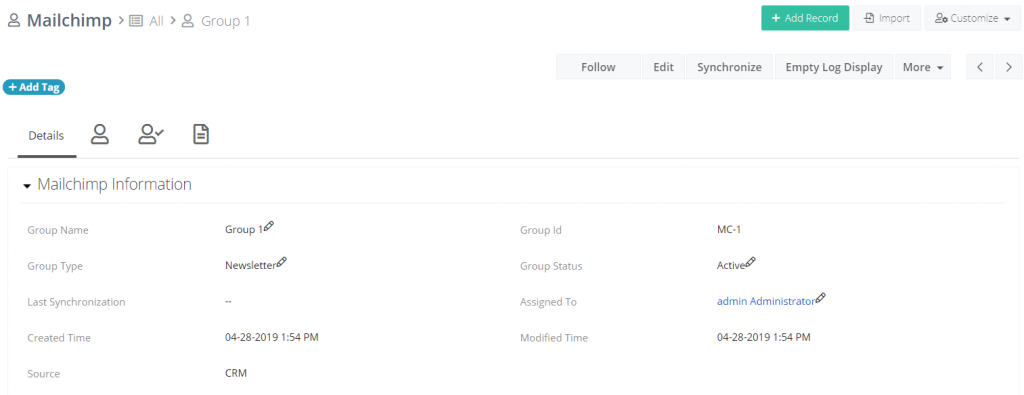
When you integrate MailChimp using the access key, you will be able to use MailChimp as an additional module in Simply. You can start by creating a MailChimp group by pressing the Add Record button in the top right corner.

In the new window, you will have to enter the Group Name and assign the group to a user. Additional options such as Group Status and Group Type are also available, but they’re not mandatory.
When you enter the necessary information, press Save to create the group.
Alternatively, you can import records for the MailChimp group, as explained in our earlier articles.
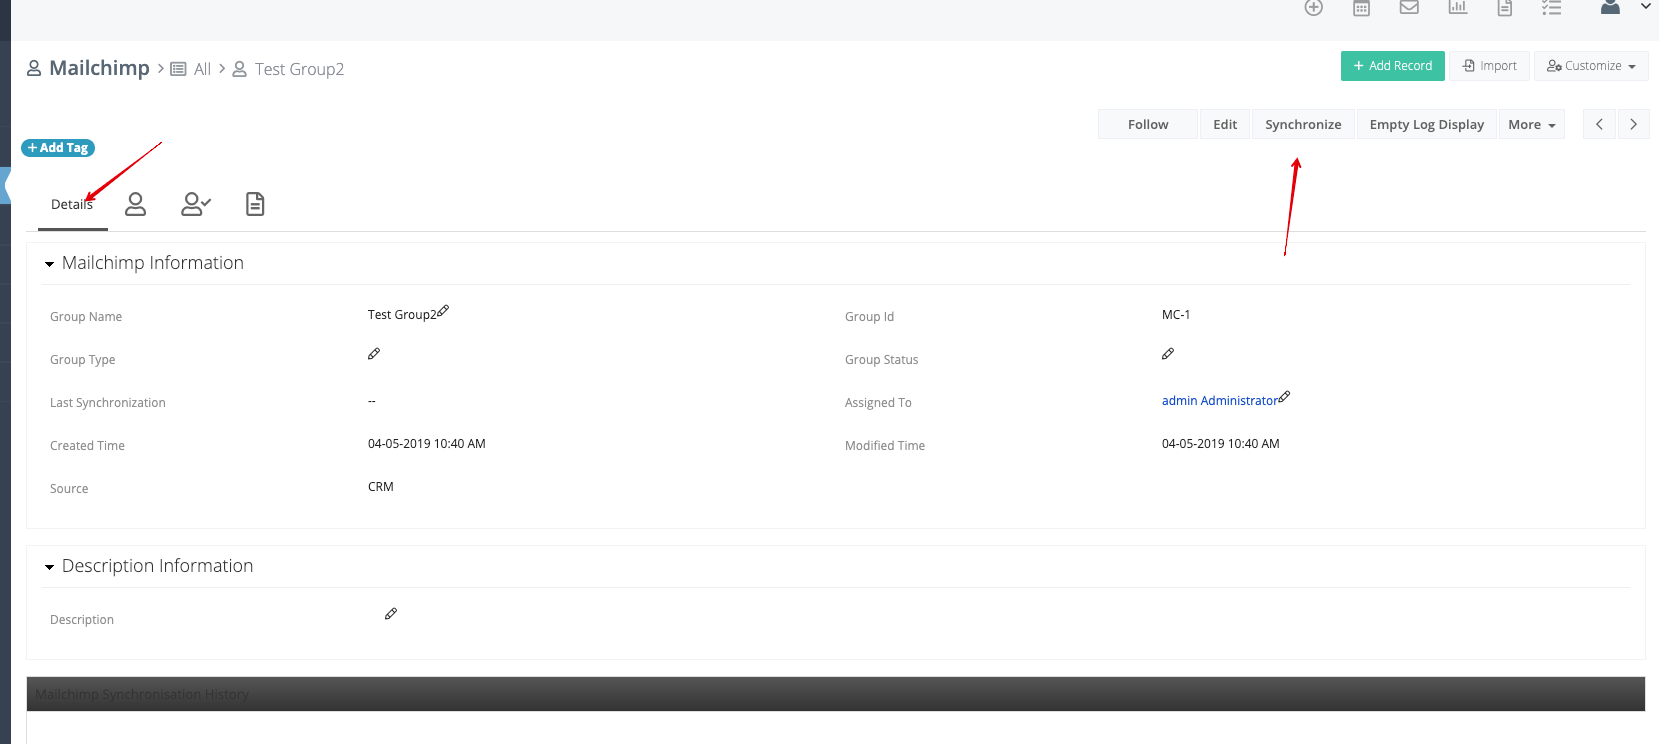
When you create or import a group, you will have a number of different options at your disposal in the list view. You can edit, delete, or export the list as well as locate duplicates in the groups.
In the detailed view, you have even more options, including follow, edit, synchronize, empty log display, duplicate and delete.
You can use the Synchronize option to sync data from the MailChimp lists to your CRM instance, and vice versa. Through Simply CRM you can even attach documents to your MailChimp groups.
When you use the Synchronize button, your CRM data will immediately become available in MailChimp, allowing you to start executing mass email campaigns from your dashboard.


