Simply CRM allows you to streamline your business by automating certain tasks and operations, such as sending emails, creating activities, etc. This will save you time and allow you to focus on more important operations.
How to create a workflow process
To create a new workflow, go to Settings and select Workflows under Automation. Press the New Workflow button in the top right corner.

Step 1: Provide basic information
Once you press the New Workflow button, a new window will appear. In it, you will need to provide the basic information about the workflow, including its name, module and conditions.
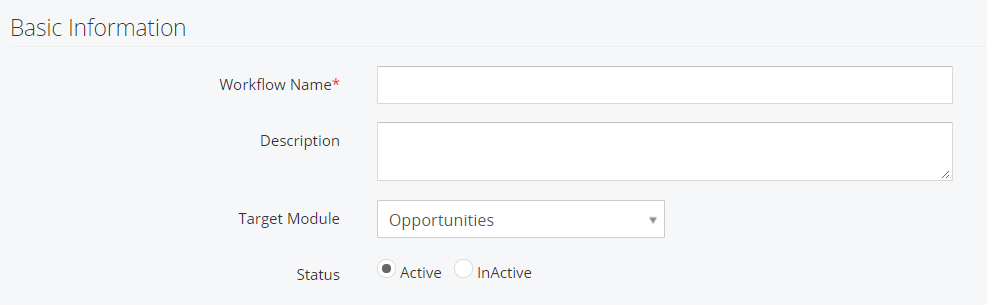
Important: All workflow conditions are predefined.
Workflow triggers
This determines when the workflow will be activated.
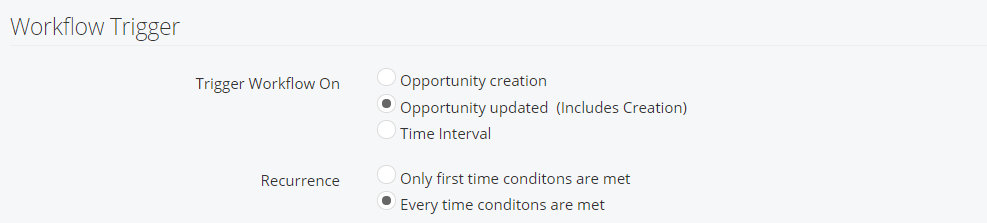
Record creation – triggers the workflow when a new record is created.
Record update – triggers the workflow when a record is updated (including the creation).
Recurrence
Only first time conditions are met – triggers the workflow if the conditions, which will be specified in step 2, are met. After the first execution, the workflow will not trigger again on the same record. However, it will still trigger actions on other records within the same module.
Every time conditions are met – triggers the workflow whenever the condition is met.
Step 2: Add conditions
When you add conditions, the workflow is only executed on the records that satisfy the conditions that you define.
For example, if you want to create a workflow for the Contacts module and send a greeting email on the Contact’s birthday. In this case, you will need to configure the condition as shown below.
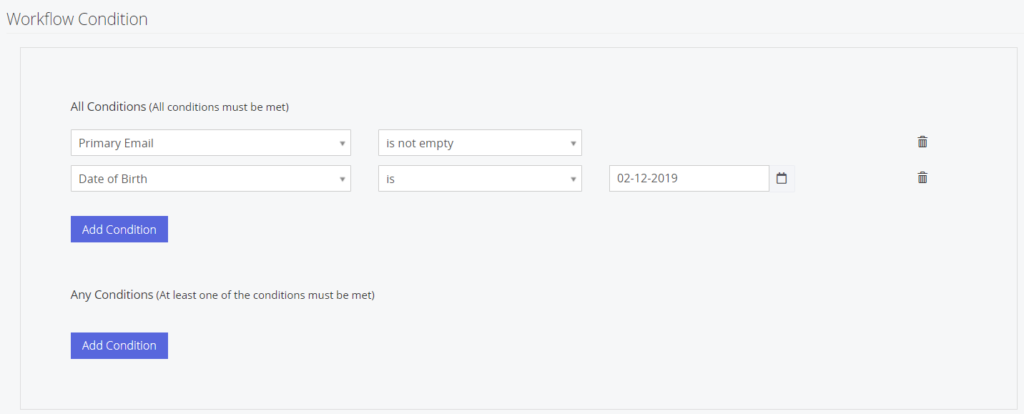
When you define conditions, you will have to options at your disposal: All Conditions and Any Conditions.
- All Conditions filters reconds according to the AND condition and triggers the workflow only when all defined conditions are satisfied.
- Any Conditions filters records according to the OR condition and triggers the workflow if at least one condition is satisfied.
Simply CRM allows you to compare different fields with the Equals To condition. For example, if you want to create a workflow that executes a certain operation on the records in the Deals module when the Amount is 1000. You can select this option from the drop-down menu options.
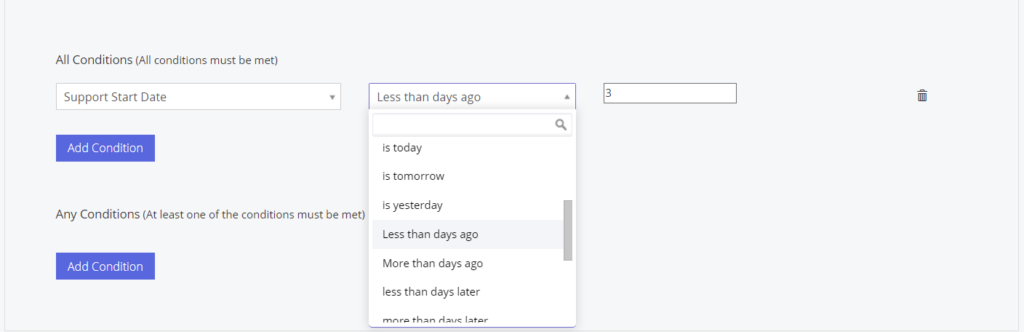
Simply CRM also allows you to add conditions for dates in regards to the current date. For example, if you want to create a workflow that sends an email 2 days before the Support End Date, your condition will be Support End Date less than days ago 3.
Important: To help you group the conditions, Simply CRM automatically enables the AND Condition for All Conditions and Any Conditions.
When you’re defining a condition, you can use the predefined criteria or create a custom criterion.
You can configure multiple conditions for your workflows. Press the Add Condition button to add new conditions to a workflow.
Count only workdays in workflows
You can configure workdays to only include workdays configured in Business Hours. For instance, you can set up a workflow that will send an email to a customer three days before the Deal Closing Date.
After you define the conditions, don’t forget to configure the workflow actions.
Set up workflows on the email opt-in field
Simply also allows you to set up workflows on the email opt-in fields.
For example, if you want to know when a customer confirms an email subscription, you can create a workflow for the Contacts module.
Then, set the Entry Criteria to Email Opt-in as Double Opt-in. Configure the Update action to configure the Email Confirmation Date as Today.
Step 3: Add actions
You can configure the previously described tasks using actions instead of workflows.
All you need to do is press the Add Action button and choose your task.
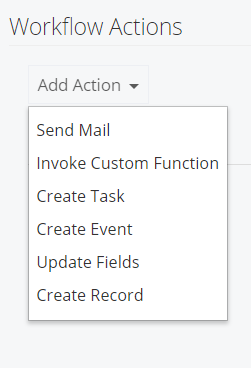
Below, you will a list of all available actions and their descriptions.
| Field | Description |
| Send Mail | Used to send an email |
| Invoke Custom Function | Used to update the target fields of records within a module when certain actions are executed over the source fields in another module |
| Create Task | Used to create a new task |
| Create Event | Used to create a new event |
| Update Fields | Used to update the fields of the selected module |
| Create Record | Used to create/update fields when the conditions on the parent record are met |
| SMS Task | Used to send SMS notifications |
| Mobile Push Notification | Used to notify a user when a task is assigned to him |
Important: Workflows are executed in the instance owner context, even if the record owner does not have the write permission. For example, if you have a workflow that creates a Deal when the Lead Status is Hot, and a Sales representative who does not have the permission to create a Deal edits the Lead record to configure the status to Hot, the Deal will still be created. The Created By/Last Modified will automatically be set to the instance owner in this case.
Similarly, scheduled workflows also run in the instance owner context. However, the create and update actions are done in admin context to ensure that the workflows will not be blocked by user profile restrictions.
How to edit a workflow
To edit or modify a workflow, go to Settings and choose Workflows in the Automation drop-down menu.
Open the workflow that you want to edit by pressing on it and edit its properties. Once you’re done modifying the workflow, press Save to confirm the changes.


